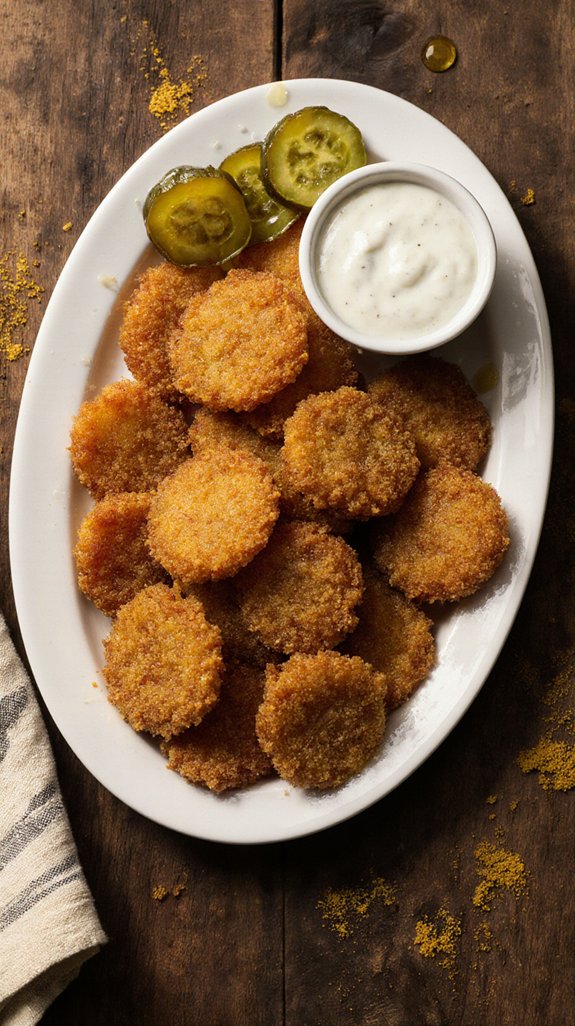
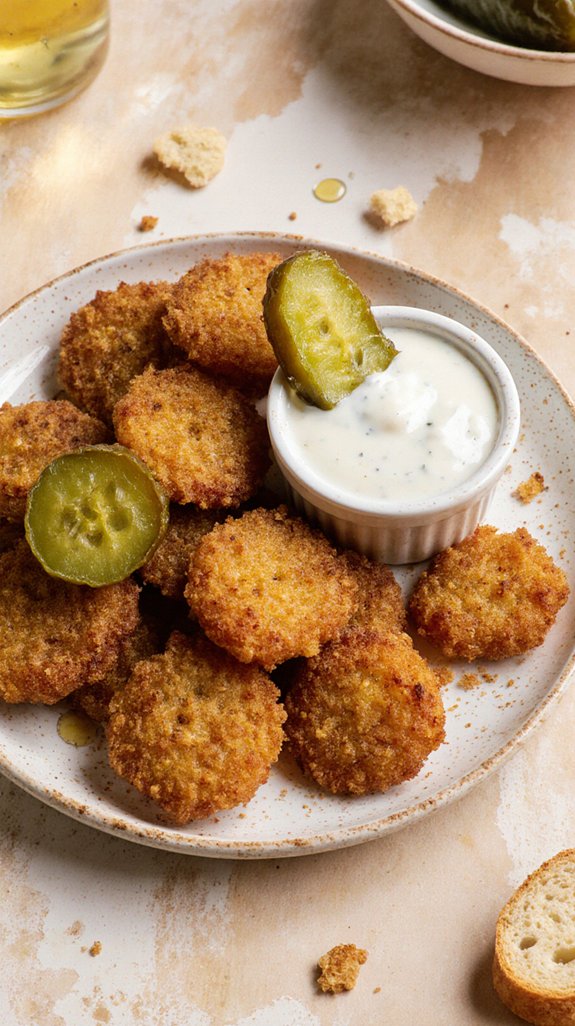
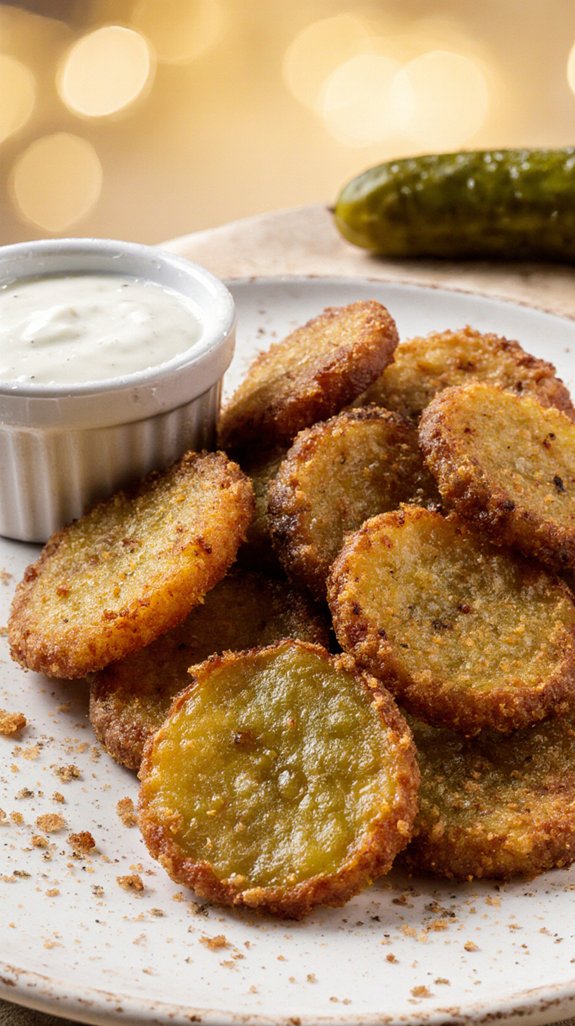
I’m about to share my go-to crispy fried pickles recipe that’ll make you wonder why you’ve been settling for soggy, disappointing versions all these years. The secret isn’t just in the breading—it’s in a few simple techniques that transform ordinary dill pickles into golden, crunchy perfection. Whether you’re hosting game day or just battling a serious craving, this recipe delivers restaurant-quality results every single time, and I’ll show you exactly how.
Why You`ll Love these Crispy Fried Pickles
When I first tried fried pickles at a local diner, I couldn’t believe how something so simple could taste so incredibly good. The crunchy texture of the golden coating paired perfectly with the tangy flavor of the dill pickles inside.
What makes this recipe special is how easy it’s to recreate that restaurant-quality taste at home. You don’t need fancy equipment or hard-to-find ingredients. The seasoned flour coating creates an irresistible crunch, while the pickle juice in the batter adds extra tang.
These make a fantastic appetizer for parties, game day snacks, or whenever you’re craving something savory and satisfying. Once you try them, you’ll understand why fried pickles have become such a beloved comfort food across the country.
What ingredients are in Crispy Fried Pickles?
The beauty of this crispy fried pickles recipe lies in its straightforward ingredient list. You’ll need common pantry staples combined with dill pickles to create this irresistible snack. The wet batter ingredients work together to help the coating stick while infusing extra flavor, and the seasoned flour creates that signature golden crunch everyone loves.
Ingredients:
- 1 egg
- 1 cup milk
- 2 tablespoons pickle juice
- 2 teaspoons Worcestershire sauce
- 1/4 teaspoon ground cayenne pepper
- 1/4 teaspoon garlic powder
- Salt and pepper
- 1 1/2 cups all-purpose flour
- Vegetable oil (for frying)
- Dill pickles (cut into slices)
When selecting your ingredients, the type of dill pickles you choose will impact the final result. Crinkle-cut pickle chips work particularly well because their ridges hold onto the batter better than smooth slices. Make sure your pickles are thoroughly drained and patted dry before coating to prevent excess moisture from making the batter soggy. For the oil, choose one with a high smoke point like vegetable, canola, or peanut oil. You’ll need enough oil to reach a depth of 2 inches in your saucepan, which typically amounts to 4-6 cups depending on the size of your pan. The seasonings can be adjusted to your taste preferences—add more cayenne for extra heat or increase the garlic powder if you prefer a more savory flavor profile.
How to make these Crispy Fried Pickles
Making these crispy fried pickles is surprisingly simple and comes together quickly once you have everything prepped. Start by creating your wet batter in a shallow bowl—beat together 1 egg and 1 cup milk along with 2 tablespoons pickle juice for that extra tangy flavor. Then stir in 2 teaspoons Worcestershire sauce, 1/4 teaspoon ground cayenne pepper, 1/4 teaspoon garlic powder, and a pinch of salt and pepper. This flavorful mixture does double duty by helping the flour coating stick while also seasoning the pickles from the inside out.
While you’re mixing the batter, go ahead and preheat your oven to 200° so it’s ready to keep your finished pickles warm and crispy while you work in batches.
Now for the fun part—the frying! Pour vegetable oil into a large saucepan to a depth of 2 inches and heat it over medium-high heat until it reaches 350° on a deep-fry thermometer. This temperature is essential because oil that’s too cool will make greasy pickles, while oil that’s too hot will burn the coating before the inside heats through. Using a premium cookware set with a heavy bottom will help maintain consistent oil temperature for better frying results.
Working with just a few pickle slices at a time, dip each one first in the egg and milk mixture, then dredge it through the 1 1/2 cups all-purpose flour until well coated. If you’re craving an extra-thick, extra-crunchy coating, feel free to double-dip by repeating the wet-then-dry process a second time.
Carefully drop the coated pickles into the hot oil, being cautious to avoid splattering. Use a slotted spoon to gently move them around in the oil, which helps them brown evenly on all sides—this usually takes about 1 minute total. You’ll know they’re ready when they turn a gorgeous golden brown color.
Remove them with your slotted spoon and transfer to paper towels to drain off any excess oil. Keep the finished pickles warm in your preheated oven while you repeat the process with the remaining pickle slices, and soon you’ll have a platter full of hot, crispy, irresistible fried pickles ready to devour.
Shop Related Products
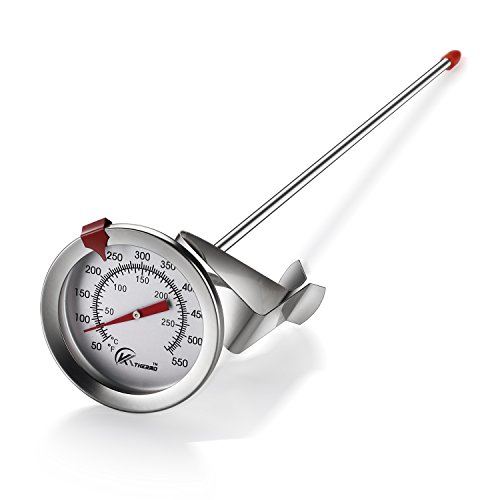
Multi-purpose: Mechanical induction, can be directly and accurately measure the oil pan, frying, barbecue temperature control.

ACCURATE FAST READINGS (No More Burned Candy) --- Our candy deep fry thermometer provides instant and accurate temperature readings within seconds. Its advanced technology ensures precise measurements, allowing you to monitor the temperature of your food with confidence.

MASTER CONFECTIONS & DEEP FRYING: Measures temperatures from 100°F to 400°F, covering all essential cooking stages including Thread, Soft Ball, Hard Crack, and deep-frying ranges, ensuring perfectly crispy fried foods and glossy, delicious candies every time.
Crispy Fried Pickles Substitutions and Variations
Once you’ve mastered the basic recipe, you’ll find that fried pickles are incredibly forgiving and open to all sorts of creative tweaks.
For pickle alternatives, I love using pickled jalapeños for a spicy kick, or try pickled green beans for a fun shape variation. Sweet bread-and-butter pickles offer a completely different flavor profile that’s surprisingly addictive.
When it comes to coating variations, you can swap half the flour for cornmeal to add extra crunch, or use panko breadcrumbs for a lighter, airier texture.
I’ve even mixed in some Old Bay seasoning or smoked paprika to the flour for regional flair.
Don’t be afraid to experiment with different pickle types and coating combinations until you discover your perfect version.
Shop Related Products

🍟[Suitable Size]: The diameter of each fryer basket is 9 inches. The thicker and longer handle keeps hands safe from heat. And the angled design is for comfortable use.
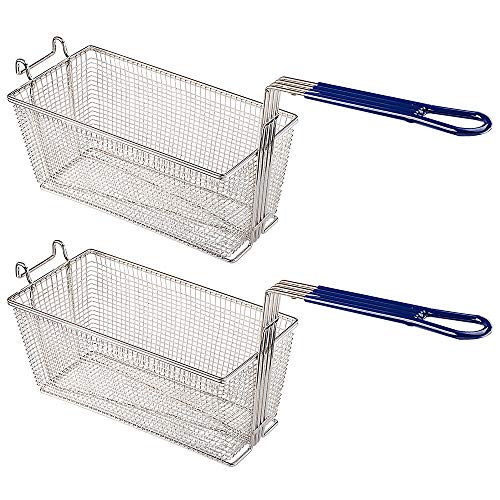
2pcs fryer baskets for deep fryer, great for commercial and home use.

【Food-Grade 304 Stainless Steel】All parts of our grease container for kitchen is made of SUS304 stainless steel, durable and safer than plastic for storing cooking oil, bacon grease, or frying leftovers.
What to serve with Crispy Fried Pickles
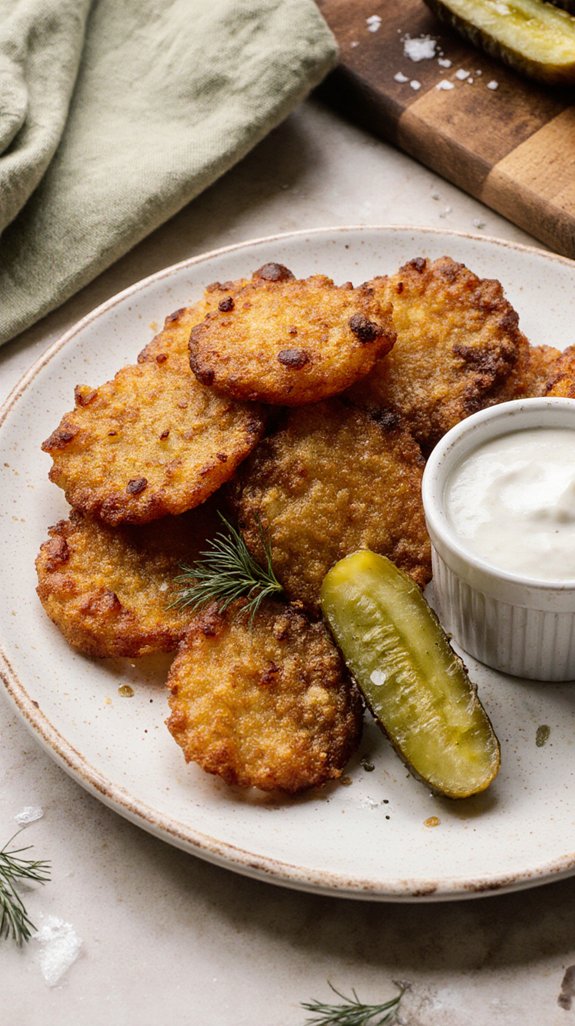
While fried pickles are incredible on their own, I’ve found they truly shine when paired with the right dipping sauces and complementary dishes. Ranch dressing is my go-to choice, offering a cool, creamy contrast to the crispy coating. Chipotle mayo adds a smoky kick, while honey mustard provides sweet tanginess. For a classic pairing, try spicy remoulade or comeback sauce.
As for side dishes, these golden beauties work wonderfully alongside burgers, pulled pork sandwiches, or barbecue platters. I often serve them as an appetizer before fried chicken dinners or fish fries.
They’re also fantastic at cookouts, paired with coleslaw and potato salad. The key is balancing their bold, tangy flavor with milder accompaniments that won’t compete for attention.
Final Thoughts
After trying this recipe a few times, I can confidently say that homemade fried pickles beat the restaurant version every single time.
The secret lies in mastering your frying techniques and keeping that oil at the right temperature. I’ve found that maintaining 350° guarantees a perfectly crispy coating without any greasiness.
Don’t skip the double-dipping step if you want extra crunch. These pickles pair wonderfully with delicious dips like ranch, chipotle mayo, or even a spicy remoulade.
The best part is how quickly they come together, making them perfect for last-minute gatherings. Once you nail this recipe, you’ll never settle for store-bought versions again.
Trust me, your taste buds will thank you.
Frequently Asked Questions
Can I Make Fried Pickles in an Air Fryer Instead?
Yes, I can confirm you’ll get great results with an air fryer! You’ll enjoy air fryer benefits like less oil and easier cleanup. Feel free to experiment with pickle variations—spears, chips, or even whole pickles work beautifully.
How Long Do Leftover Fried Pickles Stay Crispy?
I’ll be honest—fried pickles don’t stay crispy long. They’re best eaten fresh, but I’ve got leftover storage tips and reheating methods that’ll help maintain their texture if you refrigerate them within two hours.
What’s the Best Dipping Sauce for Fried Pickles?
I love serving fried pickles with tangy ranch dressing as my go-to dipping sauce. However, if you’re craving something with more kick, I’d recommend trying a spicy aioli for bold, creamy heat.
Can I Prepare the Batter Ahead of Time?
Yes, I recommend pre batter preparation up to 2 hours ahead. For proper batter storage, keep it refrigerated and covered. I’ll give it a quick stir before dipping your pickles to maintain the right consistency.
Why Are My Fried Pickles Soggy Instead of Crispy?
I’d check your oil temperature first—if it’s too low, the coating absorbs grease instead of crisping up. Also, watery pickle types make soggier results, so I always pat mine completely dry before battering.