Author

Sara

Browsing

Pumpkin Bread Maker Recipe – Simple and Delicious Homemade Bread

There’s something truly special about the scent of fresh pumpkin bread filling your home, especially as it bakes in your bread machine. Whether you’re preparing for a cozy fall day or simply craving a delicious, homemade treat, a pumpkin bread maker recipe is the perfect solution. It’s simple, convenient, and will bring a smile to your face every time.

In this guide, you’ll discover everything you need to make perfect pumpkin bread in your bread machine, from essential ingredients to step-by-step instructions. Along the way, we’ll also share some helpful tips and tricks to ensure your loaf turns out perfectly every time.

The Warm Comfort of Homemade Pumpkin Bread

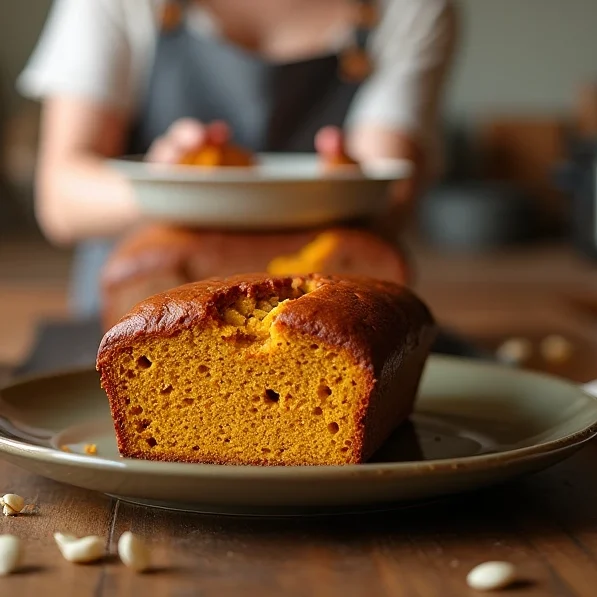
Imagine this: the cool autumn air surrounds you, and inside, your bread machine works its magic, transforming a few simple ingredients into a mouth-watering loaf of pumpkin bread. The sweet aroma of cinnamon, nutmeg, and pumpkin wafts through your kitchen, making everything feel cozier. It’s moments like these that make you appreciate the simple joy of baking from home.

Making pumpkin bread in a bread machine doesn’t just save you time—it also guarantees that your bread turns out perfectly soft and moist every time. With minimal effort, you can enjoy a homemade treat that rivals anything from the bakery. Plus, there’s something comforting about having a fresh loaf ready whenever you need a pick-me-up or a snack.

Why Choose a Bread Maker for Your Pumpkin Bread?

When it comes to making pumpkin bread, using a bread maker can make the process easier and more enjoyable. Here’s why:

  • Ease and Convenience: The bread maker handles all the hard work. No kneading, no mixing, and no complicated steps—just add your ingredients, set the machine, and let it do the rest.
  • Consistent Results: A bread machine provides consistent mixing, kneading, and baking, ensuring that each loaf is perfect.
  • Minimal Hands-On Time: You don’t have to keep an eye on your dough or worry about over-mixing or under-baking. The bread maker takes care of everything, so you can relax and enjoy the process.

Using your bread machine also frees up your time. While it’s working, you can attend to other tasks or simply relax. When you come back, you’ll have a delicious loaf of pumpkin bread waiting for you.

Ingredients You’ll Need for the Best Pumpkin Bread

Before we dive into the baking process, let’s go over the ingredients that will create the most delicious pumpkin bread. Don’t worry—these ingredients are simple and easy to find!

Simple Ingredients for a Delicious Loaf

IngredientQuantityNotes
Canned Pumpkin1 cupPure pumpkin, not spiced
All-Purpose Flour2 ½ cups
Baking Soda1 tsp
Ground Cinnamon1 tsp
Ground Nutmeg½ tsp
Salt½ tsp
Sugar (Granulated)1 cup
Eggs2 large
Vegetable Oil⅓ cupOr melted butter
Water¼ cup

You’ll notice that the ingredients for pumpkin bread are simple, but each one plays an important role in making the bread perfectly moist, flavorful, and tender.

  • Pumpkin: The star of the show. Canned pumpkin is the most convenient choice, but fresh pumpkin puree works too.
  • Flour: All-purpose flour helps create a light and airy loaf. You can experiment with whole wheat flour or other flours, but the texture may vary.
  • Baking Soda: This ingredient helps the bread rise and gives it the right texture.
  • Spices (Cinnamon and Nutmeg): These spices are what give pumpkin bread its signature warm and comforting flavor.
  • Sugar: Granulated sugar adds the sweetness needed to balance out the flavors.
  • Eggs and Oil: These provide moisture and richness to the bread.
  • Water: A small amount of water helps bring everything together.

How to Make Pumpkin Bread in Your Bread Maker

Now that you have all your ingredients ready, let’s talk about how to use your bread maker to create the perfect pumpkin bread.

Step 1: Prepare the Ingredients

Start by gathering your ingredients and ensuring that they’re measured out correctly. Add your wet ingredients (eggs, water, pumpkin, and oil) into the bread machine’s baking pan. Then, add the dry ingredients (flour, sugar, baking soda, salt, and spices) on top.

It’s important to follow this order to prevent the yeast (if you’re using any) from coming into contact with the wet ingredients until the machine starts mixing.

Step 2: Set the Bread Maker

Select the “Quick Bread” or “Cake” setting on your bread maker. These settings are designed for non-yeast-based recipes, like pumpkin bread. Adjust the loaf size to 2 lb to ensure the bread rises properly.

Step 3: Let the Machine Work

Close the bread machine, press start, and let the machine do the work. Your bread maker will mix, knead, and bake the pumpkin bread automatically. The baking time typically takes about 1 hour to 1 hour 20 minutes, depending on your machine. Keep an eye on the machine in case there are any unexpected issues, but for the most part, you can leave it alone.
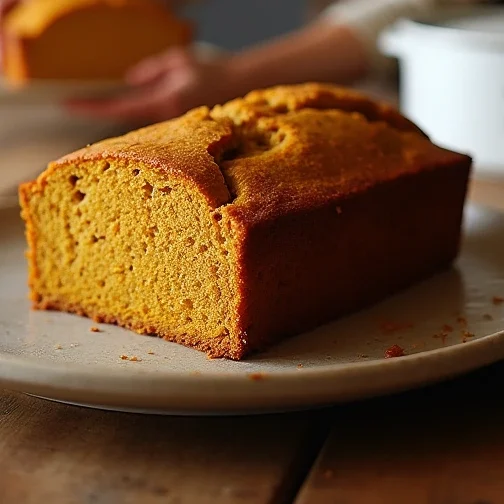
Step 4: Cooling

Once the bread is done baking, carefully remove it from the pan and let it cool on a wire rack. This step is important because it allows the bread to set and prevents it from becoming too soggy.

Once it’s fully cooled, you can slice and serve your perfect pumpkin bread.

Tips for the Best Pumpkin Bread Maker Recipe

Now that you know how to make pumpkin bread in your bread maker, here are some expert tips to take your loaf to the next level:

1. Use Room Temperature Ingredients

Using room temperature eggs and oil helps the ingredients mix more easily and ensures an even batter.

2. Avoid Over-Mixing

Your bread maker will take care of mixing the batter, so don’t worry about it being perfectly smooth. Over-mixing can lead to a dense loaf, so let the machine do the work!

3. Spices Adjustments

The cinnamon and nutmeg are the key to a warm, aromatic loaf. Adjust the amount of each based on your taste. If you love cinnamon, feel free to add a little extra.

4. Add-Ins

You can customize your pumpkin bread with add-ins like chocolate chips, walnuts, or dried cranberries. Simply fold them in during the mixing phase for a delicious twist.

Frequently Asked Questions About Pumpkin Bread in a Bread Maker

Q: Can I use fresh pumpkin instead of canned pumpkin?

A: Yes, you can absolutely use fresh pumpkin. Just make sure it’s properly cooked and pureed before using it in your recipe. Fresh pumpkin may alter the texture slightly, but it will still yield delicious results.

Q: Can I freeze pumpkin bread?

A: Yes, pumpkin bread freezes well. Once it’s completely cooled, wrap it tightly in plastic wrap and store it in a freezer bag for up to 3 months. When you’re ready to eat it, just thaw it at room temperature.

Q: Can I double the recipe?

A: You can double the recipe, but make sure your bread machine can handle a larger batch. Most bread makers are designed for a 2 lb loaf, so doubling the recipe might require extra care or adjustments to the cooking time.

Q: How can I make the bread sweeter or less sweet?

A: You can adjust the sugar according to your taste. If you prefer a sweeter loaf, add more sugar; if you like it less sweet, simply reduce the amount. You can also experiment with brown sugar for a richer flavor.

Conclusion – Enjoy Your Homemade Pumpkin Bread

There’s nothing like the satisfaction of making a fresh loaf of pumpkin bread in your bread maker. With the recipe and tips in this guide, you can easily create a soft, flavorful loaf that will impress your family and friends. Whether you’re enjoying a slice with coffee in the morning or sharing it with loved ones at a gathering, this homemade pumpkin bread is sure to bring a smile to everyone’s face.

So go ahead—grab your bread maker, gather the ingredients, and start baking. You’ll be enjoying delicious, homemade pumpkin bread in no time!

Call to Action:

Have you tried making pumpkin bread in your bread maker? Share your experience with us in the comments below! And don’t forget to subscribe for more easy and tasty bread machine recipes.

No Title

February 20, 2025

Sara

How to Make Date Nut Bread at Home: A Delicious and Nutritious Treat

When the weather cools and you start craving something warm and comforting, few things compare to the sweet, nutty aroma of freshly baked date nut bread filling your kitchen. There’s something uniquely special about homemade bread that store-bought versions simply can’t replicate—especially when it’s packed with the wholesome goodness of dates and nuts. Whether you’ve baked before or are just starting your culinary adventure, learning how to make date nut bread at home is not only simple but also incredibly satisfying.

In this guide, you’ll discover how to make a delicious, moist loaf of date nut bread from scratch. You’ll learn about the ingredients, the step-by-step process, and tips for creating the perfect loaf every time. Ready to get started? Let’s dive into the world of homemade date nut bread!

Why Make Date Nut Bread at Home?

The Benefits of Homemade Date Nut Bread

When it comes to baking, there’s an unmatched sense of pride in knowing that the bread you’re about to enjoy was made by your own hands. But beyond that, making date nut bread at home has several advantages:

  • Control over Ingredients: When you bake your bread from scratch, you know exactly what’s going into it. No hidden preservatives or artificial additives—just wholesome, real ingredients like dates, nuts, and natural sweeteners.
  • Customization: One of the best parts of making homemade bread is that you can easily adjust the recipe to suit your preferences. Add more or less sweetness, substitute your favorite nuts, or experiment with different spices.
  • Healthier Option: Homemade bread is often much healthier than store-bought alternatives. By using whole grains, reducing the sugar, and adding nutrient-rich nuts, you’re creating a more wholesome and satisfying treat.

A Versatile Bread for All Occasions

Date nut bread isn’t just a one-trick pony. It’s a versatile loaf that works for many occasions:

  • Perfect for Breakfast: Enjoy a warm slice with your morning coffee or tea. It’s an excellent way to start your day.
  • Great as a Snack: The combination of natural sweetness from dates and the satisfying crunch of nuts makes this bread a filling and energizing snack.
  • Ideal for Gifting: Wrap it up in a festive cloth and present it as a homemade gift—everyone loves receiving baked goods, especially something as delicious as date nut bread.

Key Ingredients for Date Nut Bread

Before you start baking, it’s essential to understand the ingredients that go into making this delightful bread. The beauty of date nut bread lies in the simplicity and health benefits of its ingredients.

Essential Ingredients You’ll Need

Here’s a list of the key ingredients you’ll need to bake your own date nut bread:

  • Dates: The star ingredient in date nut bread. Dates provide natural sweetness, moisture, and a chewy texture to the bread. Make sure to use soft, ripe dates for the best results.
  • Nuts: Walnuts or pecans are traditional choices, but feel free to experiment with other nuts like almonds or hazelnuts. Chopping the nuts into smaller pieces ensures an even distribution throughout the bread.
  • Flour: Most recipes call for all-purpose flour, but you can substitute with whole wheat flour if you want a healthier option.
  • Sugar: Brown sugar gives the bread its rich, molasses-like sweetness. It also helps keep the bread moist.
  • Eggs: Eggs provide structure and moisture. They also help the bread rise.
  • Baking Soda & Baking Powder: These leavening agents help the bread rise to the perfect fluffy texture.
  • Butter or Oil: For a moist, tender crumb, you’ll need fat. Unsalted butter is commonly used, but you can use vegetable oil if preferred.

Ingredients Table

IngredientQuantityNotes
Dates1 ½ cups (chopped)Pitted, chopped for easier mixing
Walnuts/Pecans1 cup (chopped)Optional, can be substituted
All-Purpose Flour2 cupsCan use whole wheat for a healthier version
Brown Sugar1 cupAdjust sweetness to taste
Eggs2Large, room temperature
Baking Soda1 tsp
Baking Powder1 tsp
Butter or Oil½ cupUse unsalted butter for best flavor

Step-by-Step Instructions to Make Date Nut Bread at Home

Now that you know what goes into the bread, let’s break down the steps involved in making this delicious treat. Don’t worry if you’re new to baking—this process is simple and easy to follow.

Preparing the Ingredients

  1. Preheat the oven to 350°F (175°C). Prepare your loaf pan by greasing it with butter or lining it with parchment paper.
  2. Chop the Dates and Nuts: Chop the dates into small pieces for even distribution throughout the bread. Do the same with your choice of nuts.

Mixing the Wet and Dry Ingredients

  1. In a medium-sized bowl, whisk together the dry ingredients: flour, baking soda, and baking powder.
  2. In another larger bowl, beat the eggs until fluffy. Add the melted butter (or oil) and brown sugar to the eggs and mix well.

Combining the Ingredients

  1. Slowly add the dry ingredients to the wet ingredients, mixing just until incorporated. Don’t over-mix—the key to light, fluffy bread is minimal mixing.
  2. Gently fold in the chopped dates and nuts. This helps to evenly distribute them throughout the batter.

Baking the Bread

  1. Pour the batter into your prepared loaf pan, spreading it out evenly.
  2. Place the pan in the oven and bake for 50-60 minutes. Check for doneness by inserting a toothpick into the center of the loaf—if it comes out clean, the bread is done.

Tips for the Perfect Date Nut Bread

To ensure that your date nut bread turns out perfectly every time, consider the following tips:

Achieving the Perfect Texture

  • Use ripe, soft dates for maximum sweetness and moisture. If your dates are too firm, soak them in hot water for 10 minutes to soften them before chopping.
  • Don’t overmix the batter. Overmixing can lead to dense bread. Stir until the ingredients are just combined.

Storing Your Date Nut Bread

  • Cool the Bread: Allow your freshly baked date nut bread to cool completely on a wire rack before storing.
  • Storage Tips: Keep your bread in an airtight container at room temperature for up to 3-4 days. You can also store it in the fridge to extend its shelf life.
  • Freezing Date Nut Bread: Date nut bread freezes wonderfully. Wrap it tightly in plastic wrap or aluminum foil, and store it in a freezer bag for up to 3 months. Simply thaw before serving.

Date Nut Bread Variations to Try

While the classic date nut bread recipe is delicious on its own, there are many ways you can make it your own by adding different flavors and textures.

Adding More Flavor and Texture

  • Spices: For an extra kick of flavor, add a pinch of cinnamon, nutmeg, or a splash of vanilla extract to the batter.
  • Other Nuts: Experiment with different nuts such as almonds, pistachios, or even macadamia nuts for a unique twist.
  • Dried Fruits: Incorporating other dried fruits like raisins, cranberries, or apricots can add a burst of color and flavor to the bread.

FAQ: Your Date Nut Bread Questions Answered

Can I make date nut bread without nuts?

Yes! If you’re allergic to nuts or simply don’t enjoy them, you can omit them entirely. The bread will still be delicious, sweet, and moist thanks to the dates.

Can I freeze date nut bread?

Absolutely! Freezing date nut bread is a great way to preserve it. Wrap it tightly in plastic or foil, and store it in the freezer for up to three months.

How do I make the bread gluten-free?

To make your date nut bread gluten-free, simply swap the all-purpose flour for a gluten-free flour blend. Be sure to check the packaging for any specific instructions on making the best gluten-free bread.

How long should I bake date nut bread?

Typically, baking takes 50-60 minutes at 350°F. However, the best way to test if it’s done is by inserting a toothpick into the center. If it comes out clean, your bread is ready!


Conclusion: Enjoy Your Homemade Date Nut Bread

Baking date nut bread at home is a rewarding experience that allows you to enjoy a delicious, wholesome loaf made with real ingredients. Whether you’re baking for yourself, your family, or as a gift for a loved one, this date nut bread recipe is sure to impress. By following these simple steps and tips, you’ll create a moist, flavorful bread that’s perfect for any occasion.

So, gather your ingredients, preheat your oven, and get ready to enjoy the irresistible aroma of freshly baked date nut bread in your kitchen! Don’t forget to share your creation with family and friends—you’ll have them asking for the recipe in no time. Happy baking!

Call to Action: If you’ve enjoyed this guide, why not share your homemade date nut bread on social media? Tag us, and let’s celebrate the joy of baking together!

No Title

February 20, 2025

Sara

How to Make Chocolate Chip Cookies Without Brown Sugar

Can You Make Delicious Chocolate Chip Cookies Without Brown Sugar? Yes, and Here’s How!

You’ve got a craving for warm, gooey chocolate chip cookies, but there’s a problem—your brown sugar jar is empty. Don’t worry! You can still whip up a batch of mouthwatering cookies with what you have in your pantry. This guide will show you step-by-step how to make chocolate chip cookies without brown sugar while keeping them soft, chewy, and delicious.

Why Bake Without Brown Sugar?

Running Low on Ingredients?

You’re not alone! Sometimes, you just don’t have brown sugar at hand, and running to the store isn’t always convenient.

Healthier Alternatives

Many people prefer to cut back on brown sugar due to its molasses content. Using white sugar or other substitutes can help manage sugar intake while still making great cookies.

Different Texture, Same Great Taste

Brown sugar adds moisture and chewiness, but cookies made with only white sugar tend to be a little crispier. Want to experiment with texture? This guide offers great alternatives to achieve the perfect balance.


Best Substitutes for Brown Sugar in Cookies

If you’re looking to replace brown sugar, here are some great alternatives:

  • White Sugar + Molasses – Mix 1 cup of white sugar with 1 tablespoon of molasses to mimic brown sugar.
  • White Sugar + Honey – Swap 1 cup of brown sugar for 1 cup of white sugar and 1 tablespoon of honey.
  • White Sugar + Maple Syrup – A touch of maple syrup can add depth to the flavor.
  • Coconut Sugar – A 1:1 swap for brown sugar, offering a caramel-like taste.
  • Applesauce – A healthier alternative that keeps cookies moist.

Ingredients Needed

Here’s what you’ll need to bake the perfect batch of chocolate chip cookies without brown sugar:

IngredientQuantity
All-purpose flour2 ½ cups
White sugar1 cup
Butter (softened)1 cup
Eggs2 large
Vanilla extract1 tsp
Baking soda1 tsp
Salt½ tsp
Chocolate chips1 ½ cups

Step-by-Step Instructions

Step 1: Preheat Your Oven

  • Set your oven to 350°F (175°C).
  • Line a baking sheet with parchment paper.

Step 2: Cream Butter and Sugar

  • In a large bowl, beat butter and white sugar until it’s light and fluffy.
  • Add eggs and vanilla extract, mixing until well combined.

Step 3: Mix the Dry Ingredients

  • In another bowl, whisk together flour, baking soda, and salt.
  • Gradually add this mixture to the wet ingredients, stirring until combined.

Step 4: Add Chocolate Chips

  • Gently fold in chocolate chips to evenly distribute them throughout the dough.

Step 5: Scoop and Bake

  • Use a spoon or cookie scoop to place dough onto the baking sheet, spacing cookies 2 inches apart.
  • Bake for 10-12 minutes or until the edges turn golden brown.
  • Let them cool for a few minutes before transferring them to a wire rack.

Tips for the Best Chocolate Chip Cookies Without Brown Sugar

  • Use high-quality butter – It adds richness to the flavor.
  • Chill the dough – Letting the dough rest for 30 minutes prevents spreading.
  • Try different sugar substitutes – Honey, molasses, or maple syrup can enhance texture.
  • Avoid overbaking – Cookies continue to cook after being removed from the oven.

FAQs

Can I Make Chocolate Chip Cookies Without Brown Sugar?

Absolutely! Using white sugar or other natural substitutes works just as well.

What Happens If I Only Use White Sugar in Cookies?

Cookies may turn out slightly crispier since brown sugar retains moisture, but they’ll still be delicious.

Can I Use Powdered Sugar Instead of White Sugar?

You can, but it will alter the texture, making the cookies more delicate and soft.

What’s the Best Substitute for Brown Sugar in Chocolate Chip Cookies?

The closest match is white sugar mixed with molasses or honey.

How Should I Store These Cookies?

Keep them in an airtight container at room temperature for up to 5 days, or freeze them for later enjoyment.

Conclusion

Now you know how to make delicious chocolate chip cookies without brown sugar! Whether you’re out of brown sugar or just want to try something new, these cookies will not disappoint. Experiment with substitutes to find your perfect match.

Try this recipe today and let us know how it turns out! Happy baking! 🍪

No Title

February 20, 2025

Sara

Simple and Delicious Ricotta Cake Recipe for Any Occasion

Ricotta cakes are the kind of dessert that feels both luxurious and comforting at the same time. Whether you’re celebrating a special occasion or simply want to treat yourself and your loved ones, a ricotta cake can be the perfect dessert. With its light texture, creamy richness, and subtle flavor, it’s sure to become a go-to in your baking repertoire.

In this article, we’ll walk you through a simple and delicious ricotta cake recipe that’s perfect for any occasion. From the basic ingredients to tips for perfecting the texture, you’ll learn everything you need to create this show-stopping treat. Let’s get started!

What is a Ricotta Cake?

A ricotta cake is a versatile dessert that features ricotta cheese as the star ingredient, giving it a rich, creamy texture that is still light and airy. Often seen in Italian desserts, this cake is made with simple ingredients but offers a unique twist compared to traditional cakes. It’s a little more decadent than a regular sponge cake, but it’s still light enough to be enjoyed after a big meal.

The beauty of ricotta cake lies in its simplicity and adaptability. It’s not overly sweet, so you can easily customize it with fruits, chocolate, or spices. Plus, it’s incredibly easy to make. The combination of ricotta cheese, eggs, sugar, and a few other ingredients creates a soft, moist cake that’s perfect for every occasion.


Why This Ricotta Cake Recipe is Perfect for Any Occasion

There are plenty of reasons why this ricotta cake recipe will be your new go-to dessert. Here’s why it’s perfect for every occasion:

1. It’s Versatile

Whether you’re hosting a birthday party, a holiday gathering, or just having a casual weekend dinner, this ricotta cake fits right in. Its subtle flavor pairs well with a variety of beverages and can be dressed up with fresh fruit or a dollop of whipped cream.

2. It’s Easy to Make

One of the best things about this ricotta cake recipe is that it’s incredibly simple to make. No complex techniques are needed, and you don’t have to be a seasoned baker to get it right. With just a few basic ingredients, you can bake a delicious, moist cake in no time.

3. It’s Light Yet Indulgent

Thanks to the ricotta cheese, the cake is lighter than most traditional cakes. It has a delicate, fluffy texture that makes it feel indulgent without being too heavy. It’s the perfect balance of sweetness and richness.

Ingredients You’ll Need for the Perfect Ricotta Cake

Before we dive into the step-by-step process, let’s gather everything you’ll need to create this delicious ricotta cake. Below is the list of basic ingredients for this recipe:

IngredientQuantity
Ricotta cheese1 ½ cups
All-purpose flour1 ½ cups
Sugar1 cup
Eggs3 large
Vanilla extract1 tsp
Lemon zest1 tbsp
Baking powder1 tsp
SaltPinch
Butter (melted)¼ cup

These simple ingredients are all you need to create a light, fluffy ricotta cake. Feel free to adjust the flavorings or add-ins depending on your personal preferences.

How to Make the Simple and Delicious Ricotta Cake

Now that you’ve gathered your ingredients, it’s time to get baking. Follow these simple steps to make your ricotta cake:

Step 1: Preheat the Oven and Prepare the Pan

First, preheat your oven to 350°F (175°C). Grease and flour an 8-inch round cake pan, or line it with parchment paper to ensure that your cake doesn’t stick.

Step 2: Mix the Dry Ingredients

In a medium bowl, sift together the all-purpose flour, baking powder, and a pinch of salt. This ensures that the dry ingredients are evenly distributed, which helps your cake rise uniformly.

Step 3: Mix the Wet Ingredients

In a separate large bowl, whisk together the sugar, eggs, and melted butter until the mixture is smooth. Add in the ricotta cheese, vanilla extract, and lemon zest. The ricotta cheese will give the batter a creamy texture and enhance the flavor of the cake.

Step 4: Combine Wet and Dry Ingredients

Gradually add the dry ingredients to the wet ingredients, stirring gently until everything is combined. Be careful not to overmix; this will help your cake remain light and airy.

Step 5: Bake the Cake

Pour the batter into your prepared cake pan and smooth the top. Bake the cake for 35–40 minutes, or until a toothpick inserted into the center of the cake comes out clean. The top should be golden brown, and the cake should spring back when gently pressed.

Step 6: Cool and Serve

Let the cake cool in the pan for about 10 minutes before transferring it to a wire rack to cool completely. Once cooled, dust the cake with powdered sugar or top with fresh berries for an extra special touch.


Tips for Making the Best Ricotta Cake Every Time

Making a perfect ricotta cake doesn’t require complicated techniques, but there are a few tips that will help you achieve the best results every time:

  • Use fresh ricotta: The quality of your ricotta cheese will directly impact the flavor and texture of the cake. Fresh ricotta will give your cake a richer, creamier texture.
  • Don’t overmix the batter: Overmixing can cause the cake to become dense. Mix just enough to combine the ingredients.
  • Let the cake cool completely: For the best texture and flavor, let the cake cool completely before slicing. It allows the flavors to meld together and prevents the cake from falling apart.
  • Top with fresh fruit: Ricotta cake pairs beautifully with fresh fruit like berries, citrus slices, or even a drizzle of honey.

Ricotta Cake Recipe Variations to Try

This ricotta cake is already a classic, but there are several variations you can try to change up the flavor or texture. Here are a few ideas:

1. Fruit-Filled Ricotta Cake

Add your favorite fruits to the batter, such as berries, diced apples, or pears. The fruit will add a natural sweetness and moisture to the cake.

2. Chocolate Ricotta Cake

For a chocolatey twist, you can incorporate cocoa powder into the dry ingredients and add chocolate chips to the batter. It’s a decadent variation that’s perfect for chocolate lovers.

3. Gluten-Free Ricotta Cake

For a gluten-free version, swap out the all-purpose flour for almond flour. This will create a denser, slightly nuttier cake that’s still rich and flavorful.

4. Lemon or Orange Ricotta Cake

To intensify the citrus flavor, add more zest to the batter or even a few tablespoons of freshly squeezed juice. This will give your cake a refreshing zing.


Frequently Asked Questions About Ricotta Cake

1. Can I use part-skim ricotta cheese in this recipe?

Yes, part-skim ricotta works well, but keep in mind that the texture might not be as creamy as full-fat ricotta. If you prefer a richer texture, go with the full-fat version.

2. Can I make this ricotta cake in advance?

Absolutely! This cake actually tastes better the next day once the flavors have had time to meld together. Store it in an airtight container at room temperature for up to 3 days.

3. Can I make a smaller or larger batch?

Yes! You can adjust the ingredient proportions depending on your desired cake size. Just be sure to use a pan that fits the batter and adjust the baking time accordingly.

4. How can I add more flavor to the ricotta cake?

You can experiment by adding flavorings like vanilla bean paste, ground cinnamon, or nutmeg. Fresh herbs like basil or thyme can also add an interesting twist.


Conclusion: Enjoying a Slice of Simplicity and Joy

A simple and delicious ricotta cake is the perfect dessert to bring people together. Whether you’re celebrating a special occasion or enjoying a quiet afternoon with friends, this cake is sure to please everyone. The soft, moist texture combined with the light flavor of ricotta makes it an ideal treat for any time of the year.

Now that you have the recipe and tips to make your own ricotta cake, it’s time to get baking. We’d love to hear how it turned out for you! Share your variations, tips, and experiences in the comments below, and let’s keep the conversation going. Happy baking!


By following this detailed guide, you can easily create a delicious ricotta cake that’s perfect for any occasion. With a little creativity, you can adapt it to suit your personal taste and impress your friends and family with your baking skills. Enjoy!

No Title

February 20, 2025

Sara

Irresistible Puff Pastry Ideas: Creative Recipes You Need to Try

Introduction

Puff pastry is a culinary wonder—light, flaky, and versatile. Whether you’re hosting a gathering or looking for a quick and delicious treat, this dough can transform your kitchen experience. You don’t have to be a pastry chef to create mouthwatering dishes. With just a few simple ingredients and some creativity, you can craft impressive appetizers, indulgent desserts, and even hearty meals. In this guide, you’ll discover some of the most innovative and delicious puff pastry ideas to try, elevating your baking skills effortlessly.

1. Savory Puff Pastry Delights

1.1. Puff Pastry Pizza Bites

Why settle for ordinary pizza when you can make crispy, bite-sized versions using puff pastry? These mini pizza pockets come together in minutes and are highly customizable.

  • Ingredients: Puff pastry, pizza sauce, shredded mozzarella, pepperoni slices, Italian seasoning
  • Instructions: Cut pastry into squares, add sauce and toppings, fold and seal, then bake at 400°F until golden brown.

1.2. Cheesy Garlic Twists

Perfect for pairing with soups or dips, these cheesy garlic twists are a crowd-pleaser.

  • Ingredients: Puff pastry, melted butter, minced garlic, mozzarella cheese, parmesan, parsley
  • Instructions: Brush the pastry with garlic butter, sprinkle cheese, cut into strips, twist, and bake until crisp.

1.3. Spinach and Feta Pinwheels

A Mediterranean-inspired snack that’s nutritious and delicious.

  • Ingredients: Puff pastry, fresh spinach, crumbled feta cheese, egg wash
  • Instructions: Spread the filling on the dough, roll it up, slice into pinwheels, and bake at 375°F.

1.4. Puff Pastry-Wrapped Brie

An elegant appetizer perfect for special occasions.

  • Ingredients: Brie cheese, puff pastry, honey, chopped nuts, egg wash
  • Instructions: Wrap the cheese in pastry, brush with egg wash, bake at 375°F, and serve with crackers.

2. Sweet Puff Pastry Creations

2.1. Classic Chocolate Croissants

Recreate the classic French pastry in your own kitchen.

  • Ingredients: Puff pastry, chocolate bars, egg wash
  • Instructions: Cut pastry into triangles, place chocolate inside, roll, and bake at 375°F until flaky.

2.2. Apple Cinnamon Turnovers

A warm, spiced dessert that’s perfect for fall.

  • Ingredients: Apples, sugar, cinnamon, puff pastry, egg wash
  • Instructions: Fill pastry squares with apple mixture, fold into triangles, seal, and bake.

2.3. Raspberry Cream Cheese Danishes

Perfect for breakfast or an afternoon treat.

  • Ingredients: Puff pastry, cream cheese, sugar, vanilla extract, raspberry jam
  • Instructions: Spread cream cheese mixture on pastry, add jam, shape into rounds, and bake.

2.4. Nutella Puff Pastry Stars

A fun, festive treat for all occasions.

  • Ingredients: Puff pastry, Nutella, powdered sugar
  • Instructions: Spread Nutella, fold and cut into star shapes, bake, and dust with sugar.

3. Puff Pastry for Breakfast

3.1. Ham and Cheese Breakfast Pockets

A quick and satisfying morning option.

  • Ingredients: Puff pastry, scrambled eggs, ham, cheddar cheese
  • Instructions: Fill pastry squares with ingredients, fold, seal, and bake.

3.2. Puff Pastry French Toast

A crispy twist on a breakfast favorite.

  • Ingredients: Puff pastry, eggs, milk, cinnamon, vanilla extract
  • Instructions: Dip pastry pieces in egg mixture, fry until golden, and serve with syrup.

3.3. Berry and Yogurt Puff Pastry Cups

A light, refreshing way to start your day.

  • Ingredients: Puff pastry, Greek yogurt, honey, mixed berries
  • Instructions: Bake pastry cups, fill with yogurt, drizzle honey, and top with berries.

4. Unique Puff Pastry Dinner Ideas

4.1. Beef Wellington

A gourmet dish that’s surprisingly easy to make.

  • Ingredients: Beef fillet, mushrooms, puff pastry, egg wash
  • Instructions: Sear beef, layer with mushroom duxelles, wrap in pastry, and bake.

4.2. Chicken Pot Pie Puff Pastry Cups

Comfort food in a flaky, golden crust.

  • Ingredients: Cooked chicken, mixed vegetables, cream sauce, puff pastry
  • Instructions: Fill pastry cups with the mixture and bake until crisp.

4.3. Puff Pastry Tarts with Goat Cheese and Tomatoes

A light, flavorful meal.

  • Ingredients: Puff pastry, goat cheese, cherry tomatoes, balsamic glaze
  • Instructions: Top pastry with cheese and tomatoes, bake, and drizzle with glaze.

5. Tips for Working with Puff Pastry

  • Keep it cold: Chilled dough rises better.
  • Use a sharp knife: Clean cuts ensure even baking.
  • Don’t overload: Too much filling can cause leaks.
  • Bake at high heat: Aim for 375°F-425°F for the best results.

6. Recipes Table: Ingredients & Steps

RecipeIngredientsInstructions
Cheesy Garlic TwistsPuff pastry, garlic butter, mozzarella, parmesanCut pastry into strips, twist, bake at 400°F
Apple Cinnamon TurnoversApples, sugar, cinnamon, puff pastry, egg washFill pastry, fold into triangles, bake at 375°F
Beef WellingtonBeef fillet, mushrooms, puff pastry, egg washWrap seared beef in pastry, bake at 400°F

7. Frequently Asked Questions (FAQs)

Q1: What are the best store-bought puff pastry brands?

Popular options include Pepperidge Farm, Dufour, and Jus-Rol.

Q2: How do I prevent my puff pastry from becoming soggy?

Pre-bake (blind bake) for a few minutes or use an egg wash barrier before adding fillings.

Q3: Can I freeze puff pastry dishes for later?

Yes! Most puff pastry recipes can be frozen before baking and cooked directly from frozen.

Q4: How long does puff pastry take to bake?

Depending on the recipe, it usually bakes for 15-25 minutes at 375°F-425°F.

Conclusion

Puff pastry is one of the most versatile ingredients in your kitchen. Whether you’re in the mood for something sweet, savory, or even a gourmet meal, these creative puff pastry ideas will keep your baking exciting. Try out these recipes, experiment with your own flavors, and let your culinary creativity shine!

Ready to bake something amazing? Share your favorite puff pastry creation in the comments!

No Title

February 20, 2025

Sara

Southern Chocolate Gravy: A Delicious Tradition & Easy Recipe

Introduction: A Taste of Southern Comfort

Imagine waking up to the warm, rich aroma of velvety chocolate gravy drizzled over fluffy homemade biscuits. This isn’t just a decadent breakfast treat; it’s a Southern tradition that has been passed down for generations. Whether you grew up with this indulgent dish or you’re just discovering it, Southern chocolate gravy is a nostalgic favorite that combines simple ingredients to create something truly special.

This article dives deep into the history of Southern chocolate gravy, explores why it became a staple in Southern homes, and provides you with a step-by-step guide to making your own batch at home. If you’re ready to experience a classic Southern delicacy, let’s get started!

The History of Southern Chocolate Gravy

A Sweet Southern Tradition

Chocolate gravy has its roots in Appalachian and Southern cuisine, with strong influences from Spanish and Mexican settlers who introduced cocoa-based sauces. While traditional gravies in the South are often savory—like sausage gravy or red-eye gravy—this sweet variation became a popular breakfast choice in the early 1900s.

  • Affordability & Availability: Cocoa powder was inexpensive and accessible, making it a go-to ingredient for home cooks.
  • A Comforting Treat: Families enjoyed chocolate gravy as a special breakfast on weekends or holidays.
  • Easy to Make: With only a handful of pantry staples, anyone could whip up a batch in minutes.

While chocolate gravy was particularly beloved in Tennessee, Arkansas, and Alabama, its popularity has spread beyond the South as more people discover its delightful simplicity.


Ingredients for Authentic Southern Chocolate Gravy

What You’ll Need

IngredientQuantity
Cocoa Powder¼ cup
Granulated Sugar¾ cup
All-Purpose Flour2 tbsp
Milk2 cups
Butter2 tbsp
Vanilla Extract1 tsp
Salt¼ tsp

Why These Ingredients Work

  • Cocoa Powder – Provides the rich chocolate flavor.
  • Sugar – Balances the bitterness of the cocoa.
  • Flour – Helps thicken the gravy to the perfect consistency.
  • Milk – Adds creaminess and smoothness.
  • Butter & Vanilla – Enhance the depth of flavor and give the gravy a silky finish.

How to Make Southern Chocolate Gravy (Step-by-Step Guide)

Step 1: Mix the Dry Ingredients

In a medium saucepan, whisk together the cocoa powder, sugar, flour, and salt until well combined.

Step 2: Add the Milk

Slowly pour in the milk, whisking continuously to prevent lumps from forming.

Step 3: Cook the Gravy

Place the saucepan over medium heat, stirring constantly. As the mixture heats, it will begin to thicken. This process takes about 5-7 minutes.

Step 4: Add the Finishing Touches

Once the gravy reaches a thick, smooth consistency, remove it from heat. Stir in the butter and vanilla extract until fully incorporated.

Step 5: Serve & Enjoy

Pour the warm chocolate gravy over freshly baked biscuits, and enjoy every bite of this Southern classic.


Variations & Serving Suggestions

Classic vs. Modern Twists

  • Add espresso powder for a deeper chocolate flavor.
  • Swap out sugar for maple syrup or honey.
  • Use dark chocolate cocoa powder for a richer taste.

Best Biscuits for Chocolate Gravy

  • Buttermilk Biscuits: The classic choice, providing a fluffy and slightly tangy base.
  • Drop Biscuits: Easier to make, with a crispier texture.
  • Store-Bought Biscuits: A quick alternative if you’re short on time.

Other Ways to Enjoy Chocolate Gravy

  • Drizzle over pancakes or waffles for a chocolatey breakfast.
  • Use as a topping for vanilla ice cream for a dessert twist.
  • Spread on toast for a quick and satisfying snack.

Tips for the Perfect Chocolate Gravy

  • Avoid lumps by whisking constantly while adding the milk.
  • Adjust the sweetness by reducing the sugar if you prefer a less sweet gravy.
  • Control the thickness by adding more or less flour.
  • Reheat gently by adding a splash of milk and stirring over low heat.

Frequently Asked Questions (FAQ)

What is Southern chocolate gravy made of?

Southern chocolate gravy is made from cocoa powder, sugar, flour, milk, butter, and vanilla extract, creating a rich and creamy topping for biscuits.

Is chocolate gravy a real Southern dish?

Yes! It’s a classic Southern breakfast tradition, especially popular in Tennessee, Arkansas, and Alabama.

Can I make chocolate gravy without flour?

Yes, but the texture will be thinner. Try using cornstarch as a substitute or reducing the milk slightly.

How do I store leftover chocolate gravy?

Store it in an airtight container in the refrigerator for up to 3 days. Reheat it gently with a splash of milk.

What can I serve with chocolate gravy besides biscuits?

You can enjoy it over pancakes, waffles, toast, or even ice cream for a decadent treat!

Conclusion – A Southern Delight Worth Trying

Southern chocolate gravy is more than just a recipe; it’s a beloved tradition that brings warmth and nostalgia to the breakfast table. Whether you’re revisiting childhood memories or trying it for the first time, this simple yet indulgent dish is sure to become a favorite in your home.

Now that you have the history, recipe, and tips, it’s time to give it a try! Share your experience in the comments and let us know how your chocolate gravy turned out!

No Title

February 20, 2025

Sara