Author

Sara

Browsing

Introduction: The Magic of Grilled Beef Ribs

There’s something deeply satisfying about a perfectly grilled beef rib. The sizzling sound as it hits the hot grill, the smoky aroma rising into the air, and the anticipation of that first juicy bite. Whether you’re hosting a family gathering or enjoying a casual barbecue with friends, grilling beef ribs is more than just cooking—it’s an experience that brings people together. In this article, we will guide you through everything you need to know to make your grilled beef ribs unforgettable: from choosing the right cut to mastering grilling techniques and adding the perfect finishing touches.

Understanding Grilled Beef Ribs

What Are Grilled Beef Ribs?

Grilled beef ribs are a beloved BBQ dish known for their rich flavor and tender texture. There are several types of beef ribs, each offering a unique grilling experience:

  • Short Ribs: These are meatier cuts that offer a lot of flavor and tenderness when cooked low and slow. They are often ideal for braising but can be beautifully grilled when done right.
  • Back Ribs: Leaner than short ribs but still full of flavor, back ribs are perfect for a classic barbecue. They tend to cook faster and are great for grilling on direct heat.
  • Flanken Ribs: These ribs are cut across the bone, creating a thin, wide strip of meat that cooks quickly and is packed with flavor. They’re great for grilling over high heat.

Understanding the differences between these cuts is crucial because each type requires slightly different preparation and cooking techniques. For instance, short ribs benefit from slow cooking methods, while back ribs and flanken ribs are ideal for a quicker, high-heat grill session.


Why Grilled Beef Ribs Are a BBQ Favorite

Grilled beef ribs are much more than just a meal—they’re an experience. The deep, smoky flavor from the grill combined with the natural richness of beef makes them irresistible. Here’s why they remain one of the most popular BBQ options:

  1. Flavorful: The fat content in beef ribs melts as they cook, basting the meat in its own juices, which creates a rich, savory flavor. This fat also helps keep the meat tender and juicy.
  2. Versatile: Whether you prefer your ribs with a tangy BBQ sauce, a dry rub, or simply seasoned with salt and pepper, they are incredibly versatile and can be customized to suit any palate.
  3. Ideal for Sharing: Grilled beef ribs are perfect for sharing at family gatherings or BBQ parties. They’re large, satisfying, and the perfect centerpiece for any meal.

Preparing for the Perfect Grilled Beef Ribs

Choosing the Right Cut of Beef Ribs

The first step in creating a mouthwatering BBQ experience is selecting the right cut of beef ribs. Here are some tips to help you choose the best cut for grilling:

  • Look for Marbling: Marbling refers to the streaks of fat running through the meat. More marbling typically means more flavor and tenderness. It’s especially important in cuts like short ribs.
  • Check Thickness: Choose ribs with consistent thickness to ensure even cooking. Thicker ribs may need more time on the grill, while thinner cuts cook faster.
  • Freshness Matters: Whenever possible, buy fresh ribs from a local butcher. Pre-packaged ribs can sometimes be of lower quality and less flavorful.

Table: Comparison of Beef Rib Cuts

Cut TypeTextureCooking MethodBest For
Short RibsRich, TenderSlow Cooking, GrillingGrilling, Braising
Back RibsLean, FlavorfulGrillingBBQ, Roasting
Flanken RibsThin, JuicyQuick GrillingGrilling

Preparing the Ribs for Grilling

Once you’ve chosen your cut, it’s time to prepare the ribs. Proper preparation ensures you get the best flavor and texture from your meat.

  1. Trimming Excess Fat: While some fat is necessary for flavor, too much fat can result in flare-ups on the grill. Trim away any thick layers of fat, but leave enough to keep the meat juicy.
  2. Removing the Silver Skin: The silver skin is a tough membrane found on the back of beef ribs. Removing it will prevent the ribs from becoming chewy and tough. To remove it, slide a knife underneath and gently pull it off.
  3. Seasoning Your Ribs: Seasoning is key to a flavorful rib. You can go simple with salt and pepper, or try a dry rub for more complexity. A basic dry rub includes brown sugar, paprika, garlic powder, and a pinch of cayenne pepper. Apply the rub generously and let the ribs sit for at least 30 minutes before grilling to allow the flavors to penetrate the meat.

Grilling Techniques for Smoky, Juicy Beef Ribs

Mastering the Grill Setup

To achieve the perfect grilled beef ribs, it’s essential to set up your grill correctly. Here’s how to do it:

  • Two-Zone Heat Setup: The key to cooking beef ribs is using both direct and indirect heat. Set up your grill with a hot side for searing and a cooler side for slow cooking. This allows you to get a crispy crust on the ribs while keeping the meat juicy and tender.
  • Wood Chips for Extra Smoke: To enhance the smoky flavor, add wood chips or chunks to your grill. Soak the chips in water for about 30 minutes before placing them on the coals. Applewood, hickory, or mesquite are great options for grilling beef ribs.

Cooking Times and Temperatures for Perfect Beef Ribs

The cooking time for grilled beef ribs depends on the cut and the heat level. Here’s a guide to help you get your ribs cooked just right:

  • Short Ribs: These can take anywhere from 2 to 3 hours to cook at a low heat (225-250°F). You can also cook them over indirect heat, allowing the meat to become tender and infused with smoke.
  • Back Ribs: These tend to cook faster, usually around 1.5 to 2 hours at 300°F. Since they’re leaner, they need less time on the grill to avoid drying out.
  • Flanken Ribs: These thin ribs cook quickly—usually around 1 hour at high heat (400-450°F). Keep a close eye on them to prevent overcooking.

Pro Tip: Use a meat thermometer to check the internal temperature. For perfectly cooked ribs, you’ll want an internal temperature of around 195°F–203°F, which ensures the meat is tender and juicy.


The Art of Saucing and Basting

While beef ribs have plenty of flavor on their own, adding a sauce or baste in the final stages of grilling can take them to the next level. Here’s how to do it right:

  1. Saucing at the Right Time: Avoid applying BBQ sauce too early. The sugar in the sauce can burn when exposed to direct heat for too long. Instead, brush the sauce on in the last 20–30 minutes of cooking.
  2. Basting Tips: If you want a more complex flavor, try basting your ribs with a homemade glaze. A mix of honey, mustard, and a dash of cayenne pepper creates a sweet and tangy finish that complements the smoky flavor of the beef.

Enhancing Your Grilled Beef Ribs Experience

Side Dishes That Complement Grilled Beef Ribs

A great side dish can turn a simple grilled rib into a full feast. Here are some ideas to complete your BBQ spread:

  • Creamy Coleslaw: The crunch and tanginess of coleslaw are a perfect balance to the richness of beef ribs.
  • Grilled Corn on the Cob: Sweet and smoky, corn on the cob is a classic side that pairs well with any grilled meat.
  • Garlic Bread: This crispy, buttery treat is great for soaking up any juices left on the plate.
  • Grilled Vegetables: Roasted or grilled vegetables, such as potatoes, bell peppers, and onions, offer a delicious contrast to the meat.

Conclusion: Master the Grill and Impress Your Guests

Grilling beef ribs is more than just a cooking technique—it’s a chance to create lasting memories with family and friends. By choosing the right cut, using the proper grilling techniques, and enhancing your ribs with the perfect sauce and sides, you’ll create a meal that’s not only delicious but also memorable. So fire up the grill, follow these tips, and enjoy your smoky, juicy beef ribs with pride.


FAQ:

Q1: How long should I cook grilled beef ribs?

  • Grilled beef ribs should cook for anywhere between 1.5 to 3 hours, depending on the cut and heat level. Always use a thermometer to ensure the internal temperature reaches 195°F–203°F for the best results.

Q2: What’s the best way to add smoky flavor to my grilled beef ribs?

  • Soak wood chips and place them on the grill to infuse your ribs with that delicious smoky aroma. Choose woods like applewood, hickory, or mesquite for the best flavor.

Q3: Can I use store-bought BBQ sauce on my beef ribs?

  • Absolutely! Apply BBQ sauce in the last 20–30 minutes of grilling to avoid burning. You can also make your own sauce for a personalized touch.

Q4: What’s a good side dish to serve with grilled beef ribs?

  • Try classic sides like creamy coleslaw, roasted vegetables, or garlic bread. These sides perfectly complement the rich flavor of beef ribs.

Now that you’re armed with expert grilling tips, it’s time to get cooking. Share your juicy, smoky beef ribs with family and friends, and watch as they rave about your BBQ skills. Happy grilling!

No Title

February 20, 2025

Sara

Healthy Ground Beef Recipes – Nutritious and Tasty Dishes You’ll Love

Ground beef doesn’t have to be reserved for greasy burgers and rich meatloafs. When prepared the right way, hamburger meat can be the star of healthy, flavorful meals that don’t sacrifice taste. Whether you’re cooking for your family or trying to add more variety to your meal planning, healthy ground beef recipes are the perfect way to enjoy a satisfying dish while reaping nutritional benefits. You might be surprised at how versatile ground beef can be – with just a few simple tweaks, you can create meals that are rich in protein, vitamins, and minerals. Ready to learn how to make healthy ground beef recipes that are both nutritious and tasty? Let’s dive into some meal ideas that will leave you full, satisfied, and guilt-free.

Why Ground Beef Can Be a Healthy Choice

Before we jump into the recipes, let’s first take a look at why ground beef can be a great choice for your meals, especially when you pick lean cuts.

Understanding the Nutritional Benefits of Hamburger Meat

Ground beef has an undeserved reputation for being unhealthy, but when you choose the right type, it can be packed with nutrients that support your body’s needs. Here are a few key benefits:

  • High in Protein: One of the most important nutrients you need for building and maintaining muscle mass is protein. Ground beef is an excellent source of protein, which makes it a great addition to your diet if you’re aiming to stay strong and active.
  • Iron-Rich: Iron is essential for transporting oxygen throughout your body, and ground beef is a good source of heme iron, which is more easily absorbed than plant-based iron.
  • Loaded with B Vitamins: Beef is particularly high in B12, which is vital for maintaining energy levels, and also provides other B vitamins like B6 and niacin that are crucial for brain function and metabolism.
  • Packed with Zinc: This essential mineral supports your immune system, skin health, and even mood regulation. Beef is a top-notch source of zinc, making it an excellent choice for overall well-being.

Choosing Lean Cuts for Healthier Dishes

While ground beef is nutritious, the fat content can vary depending on the cut. To make your meals healthier, aim for lean or extra-lean ground beef:

  • 90% lean or higher: This is the best option if you want to keep the fat content low while still getting the full flavor.
  • Grass-Fed Beef: Choosing grass-fed beef is a great option if you want even lower fat and a higher concentration of omega-3 fatty acids, which are great for heart health.

By choosing lean ground beef and using healthy cooking methods, you can easily make ground beef a nutritious part of your diet.

Healthy Ground Beef Recipe Ideas: Nutritious & Delicious Dishes

Now, let’s dive into the recipes! These dishes are not only healthy but also flavorful and easy to prepare. You’ll find yourself looking forward to these meals again and again.

Recipe #1: Healthy Ground Beef Stir-Fry with Vegetables

A colorful and nutritious stir-fry is a quick and easy way to enjoy a balanced meal. Full of fresh vegetables and lean protein, this dish will leave you feeling energized and satisfied.

Ingredients Table for Ground Beef Stir-Fry:

IngredientQuantity
Ground Beef (lean)1 lb (450g)
Bell Peppers (sliced)2
Carrots (julienned)2
Broccoli Florets1 cup
Soy Sauce (low sodium)2 tbsp
Olive Oil1 tbsp
Garlic (minced)2 cloves
Fresh Ginger (grated)1 tsp

Steps to Make:

  1. Cook the ground beef in a large skillet until browned.
  2. Add the garlic and ginger, and stir-fry for about 1 minute.
  3. Toss in the vegetables and cook until they’re just tender, about 5 minutes.
  4. Add soy sauce and stir to coat. Serve hot.

Health Benefits:

  • Fiber from vegetables helps with digestion.
  • The ginger adds anti-inflammatory properties, while the soy sauce adds flavor without extra sodium.
  • Rich in protein and vitamins, making it a well-rounded meal.

Recipe #2: Low-Carb Ground Beef Lettuce Wraps

If you’re looking to reduce carbs, these lettuce wraps are the perfect choice. Packed with flavor and light on calories, they’ll keep you feeling full without the added carbs.

Ingredients Table for Beef Lettuce Wraps:

IngredientQuantity
Ground Beef (lean)1 lb (450g)
Romaine Lettuce Leaves8-10 leaves
Avocado (sliced)1
Red Onion (diced)1/2
Lime Juice1 tbsp
Cilantro (chopped)1/4 cup
Taco Seasoning (low-sodium)1 tbsp

Steps to Make:

  1. Cook the ground beef in a skillet over medium heat, and add taco seasoning.
  2. Once the beef is cooked, spoon it onto large lettuce leaves.
  3. Top with sliced avocado, diced onion, a squeeze of lime juice, and chopped cilantro.
  4. Fold up the lettuce leaves and enjoy!

Health Benefits:

  • Low in carbs but full of healthy fats from the avocado.
  • High in protein from the ground beef, which will keep you feeling satisfied.
  • Lime juice provides a good dose of vitamin C, and cilantro is packed with antioxidants.

Recipe #3: Ground Beef and Sweet Potato Skillet

Sweet potatoes and ground beef come together in this savory skillet dish that’s both hearty and healthy. The sweet potatoes add fiber, while the beef delivers protein and iron.

Ingredients Table for Ground Beef and Sweet Potato Skillet:

IngredientQuantity
Ground Beef (lean)1 lb (450g)
Sweet Potato (cubed)2
Onion (diced)1
Spinach (fresh)2 cups
Garlic (minced)2 cloves
Olive Oil1 tbsp
Salt & PepperTo taste

Steps to Make:

  1. Brown the ground beef in a skillet and set aside.
  2. In the same skillet, sauté the onion and garlic, then add the cubed sweet potatoes.
  3. Once the sweet potatoes are tender, add spinach and beef back into the skillet.
  4. Stir everything together and cook for another minute. Serve and enjoy!

Health Benefits:

  • Sweet potatoes are high in fiber, which promotes good digestion.
  • Spinach is rich in iron and essential vitamins, supporting your overall health.
  • This dish offers a great combination of protein, fiber, and vitamins.

Recipe #4: Ground Beef Taco Salad

This taco salad is a great way to enjoy the flavors of tacos without all the added calories. It’s full of veggies, lean ground beef, and a light dressing, making it both satisfying and nutritious.

Ingredients Table for Ground Beef Taco Salad:

IngredientQuantity
Ground Beef (lean)1 lb (450g)
Romaine Lettuce (chopped)4 cups
Cherry Tomatoes (halved)1 cup
Black Beans (canned)1 can (15 oz)
Corn (frozen or canned)1/2 cup
Greek Yogurt (for dressing)1/2 cup
Lime Juice1 tbsp
Taco Seasoning (low-sodium)1 tbsp

Steps to Make:

  1. Cook the ground beef in a skillet with taco seasoning and set aside.
  2. In a large bowl, combine lettuce, tomatoes, beans, and corn.
  3. Add the seasoned beef to the salad and top with Greek yogurt dressing made by mixing yogurt and lime juice.
  4. Toss the salad and serve immediately!

Health Benefits:

  • High in fiber from beans, corn, and lettuce.
  • Greek yogurt adds probiotics, which support digestive health.
  • A healthy alternative to traditional tacos, full of protein and nutrients.

How to Make Your Ground Beef Recipes Even Healthier

If you want to elevate your recipes with hamburger meat, follow these simple tips to make your meals even healthier:

  • Choose Lean Cuts: As mentioned earlier, go for lean or extra-lean ground beef to reduce fat content.
  • Add More Vegetables: Boost the nutrient content of your meals by incorporating more vegetables like bell peppers, zucchini, or leafy greens.
  • Use Whole Grains: When possible, replace refined grains with whole grains such as brown rice, quinoa, or whole-wheat tortillas.
  • Be Mindful of Seasonings: Opt for low-sodium seasonings or make your own to keep the sodium levels in check.

Frequently Asked Questions About Healthy Ground Beef Recipes

1. Is ground beef healthy for weight loss? Yes, ground beef can be a healthy part of a weight-loss diet when you choose lean cuts. The protein content helps you feel fuller longer, which can reduce overall calorie intake.

2. Can I substitute ground turkey for beef? Absolutely! Ground turkey is a leaner alternative and can be used in any of these recipes for a lighter meal.

3. How do I make ground beef healthier? Use lean cuts, control the amount of added fat, and include plenty of vegetables to boost the nutrient content of your meals.

4. Can I freeze these ground beef dishes? Yes, many of these recipes can be frozen for up to 3 months. Just make sure to store them in airtight containers.

Conclusion

Ground beef doesn’t have to be unhealthy or heavy. By choosing lean cuts and preparing it with wholesome ingredients, you can enjoy nutritious and delicious meals that support your health and wellness. The healthy ground beef recipes shared in this article are easy to make, packed with protein, and full of essential nutrients. Why not try them out for your next meal? Your taste buds and your body will thank you!

No Title

February 20, 2025

Sara

Meatloaf Recipe with Onion Soup Mix: Easy and Delicious Comfort Food for Any Meal

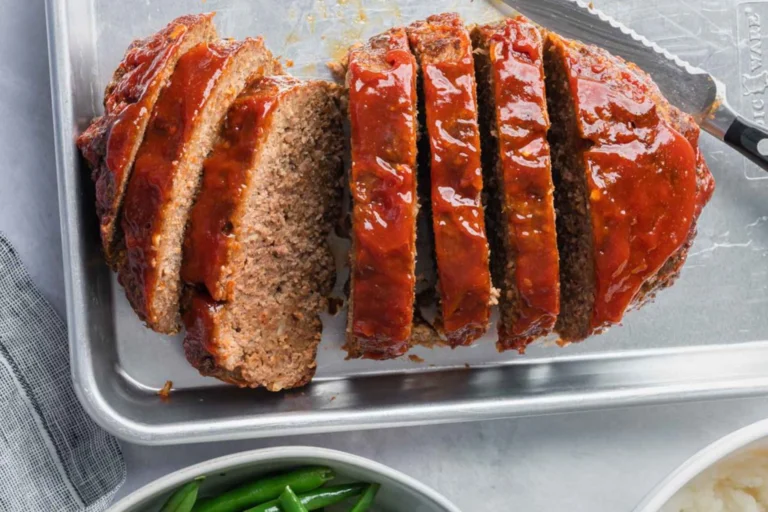
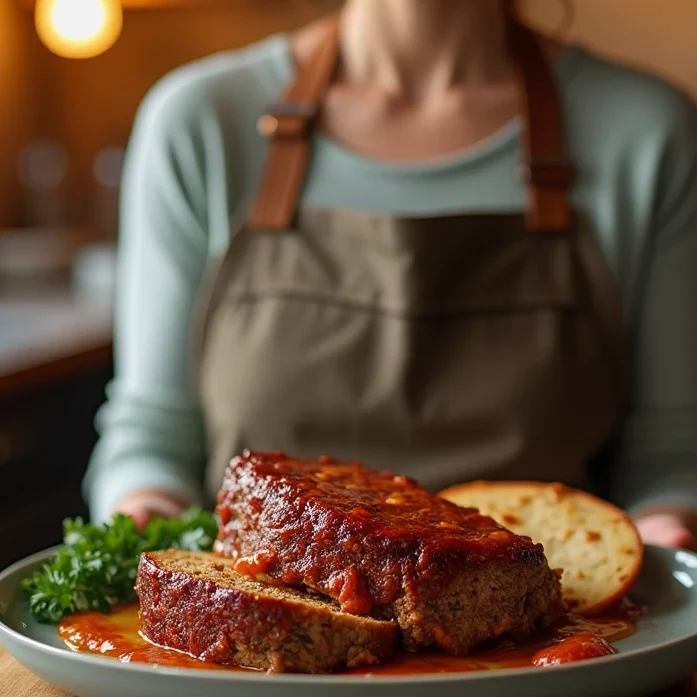
When it comes to comfort food, few dishes are as satisfying as a hearty slice of meatloaf. Whether you grew up with it on family dinner tables or have recently discovered its cozy appeal, meatloaf is a dish that brings people together. But what if you could make this classic dish even easier and more flavorful with minimal effort? That’s where the meatloaf recipe with onion soup mix comes in. By incorporating onion soup mix into your meatloaf, you can create a dish that’s packed with rich, savory flavor without spending hours in the kitchen.

This recipe is not just easy, but it’s also incredibly versatile, offering a delicious base for whatever twist you’d like to put on the traditional meatloaf. In this article, you’ll discover why using onion soup mix is a game-changer, how to make the perfect meatloaf, and even some variations to suit your tastes. So, grab your apron, and let’s get started!

Why Choose a Meatloaf Recipe with Onion Soup Mix?

There’s no shortage of ways to make meatloaf, but incorporating onion soup mix into your recipe brings a unique set of benefits that elevate the flavor and simplicity of the dish. Here’s why this particular version of meatloaf is so beloved:

Time-Saving and Convenient

One of the best reasons to try a meatloaf recipe with onion soup mix is that it significantly cuts down on the time and effort needed to make the dish. With just one packet of onion soup mix, you’re adding both seasoning and flavor to the meatloaf, eliminating the need to individually measure multiple spices. This makes it an ideal recipe for busy weeknights or when you want a quick meal with minimal prep.

Rich and Savory Flavor

The onion soup mix infuses the meatloaf with a deep, savory taste, giving it a richness that might otherwise require hours of slow cooking or a long list of ingredients. The onion, garlic, and other spices in the soup mix bring an extra depth to the flavor profile of your meatloaf.

Affordable and Accessible

Onion soup mix is inexpensive and easy to find, making it a budget-friendly option for anyone looking to make a delicious meal without breaking the bank. This recipe is not only flavorful but also accessible, using pantry staples that you likely already have at home.

Ingredients You’ll Need for Meatloaf Recipe with Onion Soup Mix

To make this recipe, you’ll need a few simple ingredients that come together quickly and create a perfectly balanced meatloaf.

Meatloaf Ingredients Table

IngredientQuantity
Ground Beef1 lb (or 450g)
Onion Soup Mix1 packet
Egg1 large
Bread Crumbs1/2 cup
Milk1/4 cup
Ketchup (for topping)1/4 cup
Salt & PepperTo taste
Garlic Powder (optional)1 tsp

Key Ingredients Breakdown:

  • Ground Beef: The base of your meatloaf. You can opt for lean ground turkey if you prefer a lighter version, but beef is traditionally used for the best texture and flavor.
  • Onion Soup Mix: This ingredient brings the full flavor punch, combining dried onion, spices, and other seasonings that give the meatloaf its savory profile.
  • Egg and Bread Crumbs: These ingredients help bind the meat together, ensuring your meatloaf stays tender and doesn’t crumble.
  • Ketchup: Ketchup is used as a topping, adding a touch of sweetness and moisture to the crust of your meatloaf.

Step-by-Step Guide to Making Meatloaf with Onion Soup Mix

Making meatloaf has never been easier. By following these simple steps, you’ll have a delicious dish ready in under an hour.

Step 1: Preheat Your Oven and Prepare Your Pan

  • Preheat your oven to 350°F (175°C).
  • Line a baking sheet with parchment paper or lightly grease a loaf pan. If you don’t have a loaf pan, a regular baking sheet will work fine, just form the meat mixture into a loaf shape on the sheet.

Step 2: Mix the Ingredients

  • In a large mixing bowl, combine the ground beef, onion soup mix, egg, bread crumbs, milk, salt, pepper, and optional garlic powder.
  • Use your hands or a spoon to mix until the ingredients are fully combined. Be careful not to overmix, as this can result in a tough meatloaf.

Step 3: Shape the Meatloaf

  • Once the meat mixture is well-combined, transfer it to your prepared pan. Shape it into a loaf, ensuring the top is level and smooth.
  • If you’re using a baking sheet, form the loaf directly on the sheet, making sure the sides are evenly packed.

Step 4: Add Toppings and Bake

  • Spread a thin layer of ketchup over the top of the meatloaf for a tangy finish and added moisture.
  • Bake the meatloaf in your preheated oven for 45–60 minutes. Use a meat thermometer to check for doneness—your meatloaf is ready when the internal temperature reaches 160°F (71°C).

Step 5: Serve and Enjoy

  • Once the meatloaf is done, remove it from the oven and let it rest for about 10 minutes before slicing. This resting period helps the juices redistribute, keeping the meatloaf moist.
  • Serve with your favorite side dishes like mashed potatoes, steamed vegetables, or a crisp salad.

Why This Meatloaf Recipe with Onion Soup Mix is So Delicious

This meatloaf recipe is a surefire way to impress your family or guests with minimal effort. Here’s what makes it so tasty:

Balanced Seasoning

The onion soup mix offers a perfect balance of salt, onion, garlic, and other spices that enhance the flavor of the ground beef. You don’t have to worry about seasoning individual ingredients; the mix does all the work for you.

Tender and Juicy Texture

The combination of bread crumbs, egg, and milk ensures that your meatloaf stays juicy and tender. The egg acts as a binder, while the bread crumbs absorb moisture, keeping the meatloaf from becoming dry.

Rich, Savory Flavor

The soup mix gives a deep, savory base to the meatloaf, while the ketchup topping adds a slight tang and sweetness. This combination of flavors is perfect for anyone who loves a well-seasoned, comforting meal.

Variations of the Classic Meatloaf Recipe

The best part about this meatloaf recipe is that it’s incredibly versatile. Here are a few variations you can try:

Vegetarian Meatloaf

  • Swap out the ground beef for plant-based options like lentils, chickpeas, or textured vegetable protein. Add a vegan onion soup mix or use onion powder and spices to replace the traditional soup mix.

Cheesy Meatloaf

  • Mix in shredded cheese like cheddar, mozzarella, or a blend of both. The cheese will melt into the meatloaf, adding a creamy, gooey texture.

Spicy Meatloaf

  • Add diced jalapeños, chili flakes, or cayenne pepper to give your meatloaf a spicy kick. This variation is perfect for those who like a little heat in their meals.

BBQ Meatloaf

  • Instead of the classic ketchup topping, use barbecue sauce. The smoky flavor will enhance the richness of the meatloaf, giving it a southern twist.

Common Mistakes to Avoid When Making Meatloaf with Onion Soup Mix

To make sure your meatloaf turns out perfectly, here are some mistakes to avoid:

Overmixing the Meat

  • Mixing the meat too much can make it dense and tough. Mix the ingredients just enough to combine them, and avoid squeezing or overworking the meat.

Not Using a Meat Thermometer

  • If you don’t use a meat thermometer, you risk overcooking or undercooking the meatloaf. Make sure the internal temperature reaches 160°F (71°C) to ensure it’s fully cooked and safe to eat.

Skipping the Resting Period

  • After baking, allow the meatloaf to rest for 10 minutes. This helps the juices settle and prevents the meat from falling apart when you slice it.

FAQs About Meatloaf Recipe with Onion Soup Mix

Can I use ground turkey instead of beef?

Yes! Ground turkey is a great alternative to beef if you prefer a leaner option. Just keep in mind that turkey can sometimes be drier, so you might need to add a little extra moisture, like extra milk or a spoonful of olive oil.

Can I prepare the meatloaf ahead of time?

Absolutely! You can mix the ingredients, shape the meatloaf, and refrigerate it for up to 24 hours before baking. This actually helps the flavors meld together, making for an even tastier meal.

Can I freeze meatloaf with onion soup mix?

Yes! After baking, let the meatloaf cool completely. Then, wrap it tightly in plastic wrap or aluminum foil and freeze for up to 3 months. To reheat, thaw in the fridge overnight and warm in the oven.

Can I skip the onion soup mix?

While the onion soup mix provides a significant flavor boost, you can substitute it with onion powder, garlic powder, salt, and pepper. However, the taste won’t be as robust as with the soup mix.

Conclusion

This meatloaf recipe with onion soup mix offers the perfect combination of convenience, flavor, and versatility. It’s a foolproof way to make a hearty, satisfying meal with minimal time and effort. Whether you’re cooking for a busy weeknight or preparing for a family gathering, this meatloaf will surely become a favorite. Don’t be afraid to experiment with different variations and find your perfect meatloaf twist. Give this recipe a try and discover just how easy and delicious comfort food can be.

Ready to cook? Gather your ingredients and start making this delicious, savory meatloaf tonight!

No Title

February 20, 2025

Sara

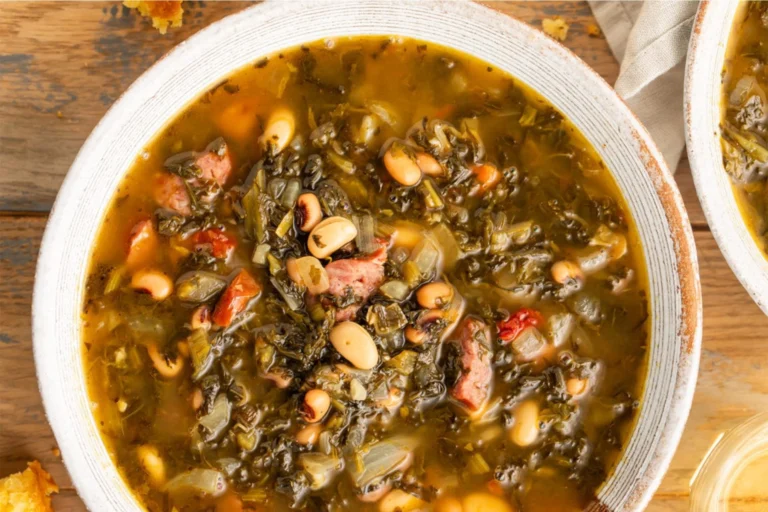
There’s a particular comfort that comes with a warm, hearty bowl of soup—especially when it’s packed with fresh, nutritious ingredients. If you’ve ever had turnip green soup, you know exactly what I mean. This humble yet flavorful dish combines earthy turnip greens, tender vegetables, and a rich broth that’s as satisfying as it is nourishing. Whether you’re looking to add more greens to your diet or simply seeking a cozy meal for a chilly day, this turnip green soup recipe is bound to hit the spot.

In this article, we’re going to dive deep into everything you need to know about making turnip green soup, from the ingredients to the step-by-step process. You’ll discover why this soup is not just delicious, but also healthy, and how you can customize it to suit your taste. Let’s explore the benefits, the flavors, and, of course, how to make this comforting dish your own!

What Makes Turnip Green Soup So Special?

Before we dive into the recipe itself, let’s first talk about what makes turnip green soup so special. This dish is more than just a meal—it’s a combination of rich flavors, vibrant nutrients, and comforting warmth that make it perfect for any season.

1. A Nutrient Powerhouse

Turnip greens are incredibly rich in nutrients that support your overall health. They are high in vitamins A, C, and K, as well as calcium and iron. These nutrients help to support your immune system, improve skin health, and promote bone strength. Including turnip greens in your diet is an excellent way to boost your daily intake of essential vitamins and minerals.

2. Low-Calorie and Filling

If you’re looking for a low-calorie option that will still keep you full, turnip green soup is perfect. The combination of vegetables and broth makes for a filling dish, without being overly heavy or high in calories. It’s ideal if you’re trying to eat more mindfully or on a health-conscious diet.

3. Comforting and Hearty

At its core, turnip green soup is a comforting food, especially when the weather turns chilly. The earthy flavor of turnip greens combined with tender potatoes and carrots makes it a satisfying meal that feels like a warm hug in a bowl. It’s no surprise that this soup has been a staple in Southern cuisine, providing comfort during tough times or simply as a hearty family meal.

Now that you know a bit more about what makes turnip green soup so special, let’s move on to the exciting part—the recipe!

Ingredients You’ll Need for Turnip Green Soup

The best part about this turnip green soup recipe is how simple it is to make. You don’t need a long list of fancy ingredients. In fact, most of the items can be found right in your kitchen or local grocery store. Here’s everything you’ll need:

IngredientQuantity
Fresh Turnip Greens4 cups
Olive Oil2 tablespoons
Onion (diced)1 medium
Garlic (minced)3 cloves
Vegetable Broth4 cups
Potato (diced)2 medium
Carrot (diced)1 medium
Salt & PepperTo taste
Crumbled Bacon (optional)1/4 cup
Red Pepper Flakes (optional)1/2 teaspoon

Key Ingredients:

  • Fresh Turnip Greens: These are the star of the soup. The greens provide a bitter flavor that balances the sweetness of the other vegetables.
  • Olive Oil, Onion, and Garlic: These form the aromatic base of the soup, creating layers of flavor.
  • Vegetable Broth: A rich, savory base that ties all the ingredients together.
  • Potato and Carrot: These vegetables add texture and natural sweetness, making the soup heartier.
  • Seasonings: Salt and pepper bring out the natural flavors of the ingredients, while optional add-ins like crumbled bacon or red pepper flakes allow you to adjust the flavor to your liking.

With everything prepped and ready, let’s jump into the step-by-step process of making your delicious turnip green soup!

Step-by-Step Guide to Making Turnip Green Soup

Making turnip green soup is straightforward, and with just a few simple steps, you’ll have a hearty, nutritious meal ready to enjoy.

Step 1: Sautéing the Aromatics

Start by heating the olive oil in a large pot over medium heat. Once the oil is warm, add the diced onion and minced garlic. Sauté them for about 3-5 minutes, or until they’re softened and fragrant. This step creates the flavorful base of your soup, infusing the broth with aromatic goodness.

Step 2: Adding Vegetables and Broth

Next, it’s time to add the diced potatoes, carrots, and vegetable broth to the pot. Stir everything together and bring the mixture to a boil. Once it’s boiling, reduce the heat to low and let the soup simmer for about 10 minutes, or until the potatoes and carrots are tender. This stage allows the vegetables to release their flavors into the broth, creating a rich, savory base.

Step 3: Incorporating the Turnip Greens

Now comes the moment you’ve been waiting for—add the fresh turnip greens to the pot. Stir them into the soup, and allow them to cook down for about 10 more minutes. As they cook, the greens will soften and infuse the soup with their signature earthy flavor. Don’t worry if the greens seem to take up a lot of space at first—once they cook down, they’ll shrink significantly.

Step 4: Final Seasoning and Optional Add-ins

Once the turnip greens have cooked down, it’s time to taste your soup and adjust the seasoning. Add salt and pepper to taste, and if you like a little heat, sprinkle in some red pepper flakes. If you’re using crumbled bacon, now’s the time to add it in for an extra layer of flavor and crunch.

Step 5: Serve and Enjoy

Your turnip green soup is ready to be served! Ladle it into bowls, and if you want, garnish it with additional crumbled bacon or a sprinkle of grated cheese. Pair it with some crusty bread, cornbread, or a simple salad for a complete meal.

Health Benefits of Turnip Green Soup

This turnip green soup isn’t just delicious—it’s also packed with health benefits. Here are a few reasons why this soup is such a great addition to your diet:

1. High in Nutrients

Turnip greens are an excellent source of vitamins A, C, and K, which are essential for maintaining good health. These vitamins support immune function, skin health, and strong bones. Additionally, the soup is loaded with fiber from the greens and vegetables, which helps with digestion and keeps you feeling full longer.

2. Rich in Antioxidants

The antioxidants found in turnip greens and other vegetables help protect your body from free radical damage and inflammation. These compounds are essential for reducing the risk of chronic diseases such as heart disease and cancer.

3. Supports Digestion

With a healthy dose of fiber, turnip green soup is great for your digestive system. The fiber helps regulate bowel movements and promotes a healthy gut microbiome, keeping your digestion running smoothly.

4. Boosts Immune System

Turnip greens are also rich in vitamin C, which is well known for boosting the immune system. Including this soup in your diet, especially during cold and flu season, can help strengthen your body’s defenses and keep you feeling healthy.

Variations of Turnip Green Soup to Try

If you’re looking to mix things up, there are several variations of this soup that you can experiment with. Here are a few ideas to customize your turnip green soup based on your preferences:

1. Vegan Version

For a completely plant-based meal, simply swap the vegetable broth for a vegan version and skip the bacon. You can also add extra beans, like white beans or chickpeas, to increase the protein content.

2. Spicy Turnip Green Soup

If you love a little heat, you can ramp up the spice level by adding more red pepper flakes or even a pinch of cayenne pepper. This will give your soup a zesty kick that’s sure to warm you up.

3. Turnip Green and Bean Soup

To make your soup even heartier, add white beans or kidney beans to the mix. This variation adds a nice creaminess and extra protein, making the soup more filling.

4. Creamy Turnip Green Soup

For a creamy version of this soup, you can blend part of the soup and add some coconut milk or heavy cream. This creates a smooth, velvety texture that pairs wonderfully with the earthy turnip greens.

Common Mistakes to Avoid When Making Turnip Green Soup

Making a perfect bowl of turnip green soup is easy, but there are a few mistakes you’ll want to avoid to ensure your soup turns out just right.

1. Overcooking the Turnip Greens

Turnip greens cook quickly, so be careful not to overcook them. If they’re cooked too long, they can become mushy and lose their vibrant color and flavor. Aim to cook them for around 10 minutes to preserve their texture and nutrients.

2. Using Too Much Salt

While seasoning is important, you don’t want to overpower the natural flavors of the vegetables. Be cautious when adding salt, especially if you’re using store-bought broth that may already be salty.

3. Skipping the Sauté Step

The sautéing of onions and garlic is essential for bringing out the full depth of flavor in your soup. Skipping this step will result in a less aromatic and flavorful base.

FAQs About Turnip Green Soup

Can I use frozen turnip greens for this soup?
Yes, frozen turnip greens are a great alternative if fresh greens aren’t available. Just thaw and drain them before adding them to the soup.

How long does turnip green soup last in the fridge?
You can store turnip green soup in the fridge for up to 4 days in an airtight container.

Can I freeze turnip green soup?
Absolutely! Let the soup cool completely, then transfer it to a freezer-safe container or bag. It will last for up to 3 months in the freezer.

What can I serve with turnip green soup?
This soup pairs wonderfully with crusty bread, cornbread, or a side salad.

Conclusion

Turnip green soup is the perfect combination of comfort, nutrition, and flavor. It’s easy to make, packed with health benefits, and can be customized to suit your taste preferences. Whether you’re looking for a cozy meal on a cold day or trying to get more greens into your diet, this soup is a delicious and satisfying choice. So go ahead, gather your ingredients, and give this recipe a try—you’ll be glad you did!

No Title

February 20, 2025

Sara

Introduction: The Essence of Greek Comfort Food

There’s something deeply satisfying about the rich, citrusy aroma of Greek chicken and potatoes roasting in the oven. It’s a dish that embodies the heart of Mediterranean cuisine—simple, fresh, and bursting with flavor. Whether you’re looking for a comforting family meal or an impressive yet effortless dinner for guests, this Greek classic delivers every time.

Greek cuisine is all about using fresh ingredients and letting natural flavors shine. With just a few essential seasonings and a touch of olive oil, you can create a meal that’s both hearty and healthy. This guide will walk you through everything you need to know, from selecting the best ingredients to roasting your chicken to perfection. By the end, you’ll be ready to serve up an authentic Greek dish straight from your kitchen!

What Makes Greek Chicken and Potatoes So Special?

A Traditional Greek Dish with Timeless Appeal

Greek roasted chicken with potatoes is more than just a recipe—it’s a tradition. Families throughout Greece prepare this meal regularly, passing down their unique variations from generation to generation. What makes it special is the balance of simple yet bold flavors: the tangy kick of lemon, the warmth of oregano, and the richness of olive oil.

The Key to Authentic Greek Flavor

The magic of this dish comes down to a few key ingredients:

  • Extra virgin olive oil – The foundation of Mediterranean cooking, adding richness and depth.
  • Fresh lemon juice – Provides a bright, tangy contrast to the savory chicken.
  • Garlic – Enhances the overall aroma and taste.
  • Dried oregano – A staple in Greek kitchens, offering an earthy, slightly peppery note.
  • Salt and pepper – Essential for seasoning and bringing out the flavors.
  • Paprika – Adds a mild smokiness and depth to the dish.

Marination is another secret to achieving the best flavor. Letting the chicken soak in a mixture of olive oil, lemon juice, and spices ensures every bite is juicy and flavorful.

Ingredients for Greek Chicken and Potatoes

Here’s what you’ll need to prepare this Mediterranean classic:

IngredientQuantityNotes
Chicken (whole or thighs)4-6 piecesSkin-on for best flavor
Potatoes4 largeCut into wedges
Olive oil⅓ cupExtra virgin
Lemon juice¼ cupFreshly squeezed
Garlic cloves4-5Minced
Dried oregano2 tspGreek oregano preferred
Thyme1 tspOptional
Paprika1 tspAdds a smoky flavor
Salt & black pepperTo tasteAdjust as needed
Chicken broth (optional)½ cupFor extra moisture

Step-by-Step Guide to Making Greek Chicken and Potatoes

Step 1 – Prepare the Marinade

  1. In a mixing bowl, combine olive oil, lemon juice, minced garlic, oregano, thyme, paprika, salt, and pepper.
  2. Coat the chicken pieces thoroughly with the marinade, ensuring even coverage.
  3. Let the chicken marinate for at least 30 minutes (overnight is ideal for deeper flavor).

Step 2 – Prepare the Potatoes

  1. Peel and cut the potatoes into wedges.
  2. Toss them with olive oil, lemon juice, oregano, and salt for seasoning.

Step 3 – Assemble and Bake

  1. Preheat your oven to 400°F (200°C).
  2. Arrange the marinated chicken in a baking dish, placing the potato wedges around it.
  3. Pour any remaining marinade over the dish and add chicken broth for extra moisture.

Step 4 – Roast to Perfection

  1. Bake uncovered for 45-55 minutes, flipping the potatoes halfway through for even crispiness.
  2. Baste the chicken with pan juices to keep it moist and flavorful.

Step 5 – Serve and Enjoy

  1. Garnish with fresh parsley.
  2. Serve alongside tzatziki, a fresh Greek salad, or warm pita bread.

Tips for the Best Greek Chicken and Potatoes

Choosing the Right Chicken Cut

  • Bone-in, skin-on chicken thighs provide the juiciest results.
  • Whole chicken offers a more traditional, rich flavor.
  • Boneless cuts work too but may require a shorter cooking time.

Getting Crispy Potatoes Every Time

  • Use Yukon Gold or Russet potatoes for the best texture.
  • Spread the potatoes evenly in the pan to ensure proper roasting.
  • Flip them halfway through baking to get that golden, crispy exterior.

Adjusting the Recipe for More Flavor

  • Sprinkle crumbled feta cheese over the dish before serving.
  • Add kalamata olives for an extra Mediterranean touch.
  • Mix in cherry tomatoes or red onions for additional sweetness and depth.

Variations of Greek Chicken and Potatoes

One-Pan Greek Chicken and Vegetables

  • Add bell peppers, zucchini, or carrots for a more balanced meal.
  • Use cherry tomatoes for a burst of natural sweetness.

Slow Cooker Version

  • Marinate the chicken overnight.
  • Cook on low for 6-8 hours or on high for 3-4 hours.
  • Broil for 5 minutes after slow cooking to achieve crispy skin.

Keto and Low-Carb Modifications

  • Swap potatoes for cauliflower or turnips.
  • Reduce lemon juice slightly to lower carbohydrate content.

Frequently Asked Questions (FAQ)

Can I use boneless chicken instead of bone-in?

Yes! However, boneless chicken cooks faster, so reduce the baking time to avoid drying it out.

What’s the best type of potato for this recipe?

Yukon Gold and Russet potatoes are ideal for achieving a crispy texture while staying fluffy inside.

How do I store and reheat leftovers?

  • Store leftovers in an airtight container in the refrigerator for up to 3 days.
  • Reheat in the oven at 350°F (175°C) for 10-15 minutes to maintain crispiness.

Can I make this recipe ahead of time?

Absolutely! Marinate the chicken overnight for maximum flavor, and prepare the potatoes in advance for a quicker cooking process.

Conclusion: Bring the Taste of Greece to Your Kitchen

Greek chicken and potatoes is a timeless dish that brings the flavors of the Mediterranean straight to your table. With its simple ingredients and bold seasonings, it’s a meal that’s both easy to prepare and incredibly satisfying. Whether you’re cooking for family or entertaining guests, this dish is sure to impress.

So why not give it a try? Gather your ingredients, fire up the oven, and treat yourself to a taste of Greece tonight. And don’t forget to share your experience—leave a comment or tag your creation online!

No Title

February 20, 2025

Sara

The Best Cornbread Dressing with Cream of Chicken Soup Recipe: A Soul-Satisfying Homemade Chicken and Dressing Experience

There’s something magical about a well-made cornbread dressing. The way it perfectly complements the main dish and brings a comforting warmth to the table, creating lasting memories. And when you take that dressing and elevate it with the rich, creamy flavor of cream of chicken soup, you’ve got a dish that’s hard to beat. This cornbread dressing recipe, with its moist, flavorful texture, is exactly what you need for your next big family meal. Whether it’s Thanksgiving, a holiday dinner, or just a weekend feast, this recipe will be the star of your table.

Why This Cornbread Dressing with Cream of Chicken Soup is the Best

What makes this cornbread dressing recipe stand out from the rest? It’s all about the balance of flavors and textures that come together effortlessly. The cornbread brings a slightly sweet, crumbly base, while the cream of chicken soup adds a savory, velvety richness. Together, they form a dish that’s comforting and filling, but never too heavy. Here’s why this recipe works so well:

A Perfect Balance of Flavors

Each bite of this cornbread dressing offers the perfect combination of savory, creamy, and slightly sweet flavors. The cornbread adds a soft, crumbly texture that absorbs all the other flavors, making it the ideal foundation for this dish. The cream of chicken soup, along with chicken broth, enhances the richness, creating a moist dressing that’s never too dry.

Why Cream of Chicken Soup Works

Cream of chicken soup isn’t just an ingredient; it’s a secret weapon in this recipe. The soup adds a smooth, creamy consistency to the dressing that keeps it from being too dry. It infuses each bite with a savory depth, making the dressing taste even more indulgent. Whether you use canned or homemade cream of chicken soup, it’s the key to ensuring that your dressing is both moist and flavorful.

Ideal for Special Occasions

This cornbread dressing recipe isn’t just for everyday meals. It’s a dish that shines on special occasions like Thanksgiving, Christmas, or any family gathering. The rich flavor and comfort it brings make it perfect for those memorable moments when you want to share something that feels like home.

Ingredients for the Best Cornbread Dressing with Cream of Chicken Soup

Before we dive into the cooking process, let’s make sure you have all the ingredients needed to create this mouthwatering cornbread dressing.

IngredientAmountNotes
Cornbread (homemade or store-bought)4 cupsCrumbled or broken into pieces
Cream of Chicken Soup1 can (10.5 oz)Can substitute with homemade version
Chicken Broth2 cupsFor added flavor
Celery1 cupChopped finely
Onion1 medium-sizedChopped finely
Butter½ cup (1 stick)Melted
Eggs2 largeBeaten
Sage1 tbspGround, or fresh
Thyme1 tspFresh or dried
Salt and PepperTo tasteFor seasoning
Chicken (optional)1 cupShredded (for added texture)
Parsley (optional)1 tbspChopped (for garnish)

With these ingredients in hand, you’re ready to start making the best cornbread dressing you’ve ever tasted.

Step-by-Step Instructions for Making Cornbread Dressing with Cream of Chicken Soup

Let’s walk through the process of making this delicious dish from start to finish. Each step is simple and easy to follow, so even if you’re a beginner in the kitchen, you’ll feel confident making this recipe.

Preparing the Cornbread

The first step in this recipe is making the cornbread. If you’ve opted for store-bought cornbread, you can skip this part and move on to crumbling it up. If you’re making homemade cornbread, bake it according to your recipe or the package instructions. Once it’s baked, let it cool down completely. This helps it dry out a bit, which is important for getting the right texture in your dressing.

Once the cornbread is cooled, break it into small pieces or crumble it with your hands. Aim for about 4 cups of crumbled cornbread to make sure your dressing has the perfect base.

Sautéing Vegetables

While the cornbread is cooling, it’s time to sauté the onions and celery. Melt the butter in a large skillet over medium heat and add the chopped onions and celery. Sauté them until they’re soft and fragrant, about 5-7 minutes. This process helps release their natural sweetness, which will add depth of flavor to your dressing.

Mixing the Dressing

Now that your cornbread is crumbled and your veggies are sautéed, it’s time to mix everything together. In a large bowl, combine the crumbled cornbread with the sautéed onions and celery. Add the eggs, sage, thyme, salt, and pepper, and stir everything together to combine.

Gradually pour in the cream of chicken soup and chicken broth, stirring as you go to make sure all the ingredients are evenly coated. You want the mixture to be moist but not soggy, so adjust the amount of broth as needed.

If you’re adding chicken for extra flavor, now’s the time to fold it in. Shredded chicken will give the dressing a hearty texture and make it even more satisfying.

Baking the Dressing

Preheat your oven to 350°F (175°C) and grease a 9×13-inch baking dish. Transfer the cornbread mixture into the dish and spread it out evenly. Bake the dressing for 30-35 minutes, or until the top is golden brown and slightly crispy.

For the best results, check the dressing after 30 minutes. If the top is browned and the dressing is cooked through, it’s ready. If you prefer a crispier texture, leave it in the oven for a few more minutes.

Variations and Customizations for Your Cornbread Dressing

While this recipe is delicious as-is, you can always make small adjustments to suit your taste preferences or dietary needs. Here are a few ideas for customizing your cornbread dressing:

Add Meat for a Heartier Dish

If you want to make the dish even more filling, consider adding meat. Cooked chicken, turkey, or sausage are all great options. Adding shredded chicken will give the dressing a savory, meaty texture. If you want to stick to a vegetarian version, you can skip the meat altogether.

Spice It Up

For those who like a little heat, adding some spice can take your dressing to the next level. Try incorporating jalapeños, cayenne pepper, or paprika into the mix. Just be sure to balance the spice with the creaminess of the soup to keep the flavor in harmony.

Gluten-Free Option

If you or your guests need a gluten-free option, it’s easy to modify this recipe. You can substitute the regular cornbread with gluten-free cornbread or use gluten-free breadcrumbs. Just be sure to double-check all of your ingredients to ensure they are gluten-free.

Tips for Perfect Cornbread Dressing with Cream of Chicken Soup

To ensure your cornbread dressing comes out perfectly every time, keep these helpful tips in mind:

How to Make It Ahead

If you’re preparing this dish for a special occasion, you might want to make it ahead of time. Fortunately, cornbread dressing can be prepared a day before and refrigerated overnight. Simply cover it tightly with plastic wrap or foil, and refrigerate until you’re ready to bake it. On the day of your meal, just pop it in the oven and bake as usual.

Common Mistakes to Avoid

To avoid any mishaps, here are a few common mistakes to watch out for:

  • Overmixing the Dressing: When you combine the ingredients, mix them gently. Overmixing can lead to a mushy texture.
  • Not Letting the Cornbread Cool: Freshly baked cornbread can be too moist. Let it cool before crumbling it to ensure the best texture in your dressing.
  • Using Too Much Broth: You want the dressing to be moist, but not soggy. Start with the recommended amount of broth and adjust as needed.

How to Serve Your Cornbread Dressing

Cornbread dressing is a versatile dish that pairs well with a variety of meats and sides. Here are some ideas for serving it:

  • Perfect Pairings: Serve it alongside roasted turkey, ham, or fried chicken for a hearty meal. It also pairs well with mashed potatoes, green beans, or roasted vegetables.
  • Garnish Ideas: A sprinkle of fresh parsley adds a pop of color and freshness to the dish. You can also drizzle a little extra chicken gravy over the top for added richness.

Frequently Asked Questions (FAQ)

Can I Use Homemade Cornbread Instead of Store-Bought?

Yes! Homemade cornbread will add an extra layer of flavor to your dressing. Just make sure it’s crumbled and dried out before adding it to the mixture.

Can I Make This Recipe Without Cream of Chicken Soup?

Absolutely! You can substitute the cream of chicken soup with a homemade cream sauce or even use cream of mushroom soup for a different flavor profile.

Can I Prepare This Recipe in Advance?

Yes, you can prepare the dressing a day ahead and bake it on the day of your meal. Just make sure to cover it and refrigerate until you’re ready to bake.

How Do I Store Leftovers?

Store leftover dressing in an airtight container in the refrigerator for up to 3 days. You can also freeze it for up to 2 months.

Conclusion: Why This Cornbread Dressing Recipe is a Family Favorite

This cornbread dressing with cream of chicken soup is a perfect blend of comfort and flavor, making it an ideal dish for any gathering. It’s simple to make, yet full of rich, delicious flavor that will have everyone coming back for seconds. Whether you’re serving it for a special occasion or just because, this recipe is sure to become a family favorite that will be enjoyed for years to come.

No Title

February 20, 2025

Sara

The Ultimate Comfort Food Made Easy

There’s something magical about coming home to the rich, comforting aroma of slow cooker chicken with cream of chicken soup. It’s a dish that wraps you in warmth and nostalgia, bringing back memories of family gatherings, cozy dinners, and effortless home cooking. Whether you’re juggling a busy schedule or simply love hassle-free meals, this slow cooker recipe is about to become your new favorite.

Why You’ll Love This Recipe

  • Set It & Forget It – Let the slow cooker handle everything while you focus on your day.
  • Rich, Creamy, and Satisfying – The soup blends into a velvety sauce that pairs perfectly with tender chicken.
  • Minimal Ingredients, Maximum Flavor – You likely already have most of these ingredients in your kitchen.
  • Perfect for Meal Prep – Stores beautifully in the fridge or freezer for easy future meals.
  • Picky Eater Approved – Even kids love this creamy, flavorful dish!

Ingredients & Substitutions

IngredientQuantitySubstitute (if needed)
Chicken breasts or thighs2 lbsBoneless, skinless thighs for extra juiciness
Cream of chicken soup1 can (10.5 oz)Cream of mushroom or homemade white sauce
Chicken broth1 cupWater with a bouillon cube
Garlic powder1 tspFresh minced garlic (1 clove)
Onion powder1 tspChopped onions (¼ cup)
Black pepper½ tspTo taste
Italian seasoning1 tspThyme or rosemary
Butter2 tbspOlive oil

Step-by-Step Instructions

Preparing the Ingredients

  1. Trim the Chicken – Remove any excess fat to ensure a smooth texture in the final dish.
  2. Mix the Sauce – In a mixing bowl, whisk together cream of chicken soup, chicken broth, and seasonings until smooth.
  3. Enhance the Flavor – Want an extra layer of richness? Add a tablespoon of sour cream or a splash of heavy cream.
  4. Optional Add-ins – Boost nutrition and taste by tossing in sliced mushrooms, diced carrots, or celery.

Cooking in the Slow Cooker

  1. Layer the Chicken – Arrange the chicken at the bottom of the slow cooker.
  2. Pour the Mixture Over the Chicken – Ensure the sauce evenly coats the chicken to lock in moisture.
  3. Set It & Relax – Cook on low for 6-7 hours or high for 3-4 hours.
  4. Shred & Serve – Once fully cooked, use two forks to shred the chicken. Stir it into the sauce for maximum flavor.

Best Side Dishes to Serve

  • Mashed Potatoes – A perfect base to soak up all the creamy goodness.
  • Steamed Rice – Keeps the meal simple while enhancing its heartiness.
  • Egg Noodles – Classic comfort food pairing.
  • Roasted Vegetables – Adds balance and a hint of sweetness.

Storage & Reheating Tips

  • Refrigeration: Keep leftovers in an airtight container for up to 3 days.
  • Freezing: Freeze in portion-sized containers for up to 3 months.
  • Reheating: Warm in a saucepan over low heat or microwave with a splash of broth to maintain creaminess.

FAQ – Slow Cooker Chicken with Cream of Chicken Soup

Can I Use Frozen Chicken in a Slow Cooker?

Yes, but it’s safer to thaw it first to ensure even cooking and food safety.

Can I Make This Without Cream of Chicken Soup?

Absolutely! Try a homemade substitute using butter, flour, and milk for a healthier version.

What’s the Best Cut of Chicken for This Recipe?

Boneless, skinless chicken breasts work well, but thighs provide extra tenderness and flavor.

Can I Add Cheese to This Dish?

Yes! A sprinkle of shredded cheddar or parmesan can take the dish to the next level.

How Can I Make This Dish Healthier?

Use low-sodium cream of chicken soup, swap butter for olive oil, and increase veggie content.

Conclusion

Slow Cooker Chicken with Cream of Chicken Soup is the ultimate hands-off comfort meal that delivers on taste, texture, and convenience. Whether you’re enjoying it fresh or prepping for later, this dish is guaranteed to bring warmth and satisfaction to your table. Try it today, and experience the ease of slow cooker magic!

No Title

February 20, 2025

Sara

The Best Ninja Creami Ice Cream Recipe: Creamy Vanilla Delight

Introduction

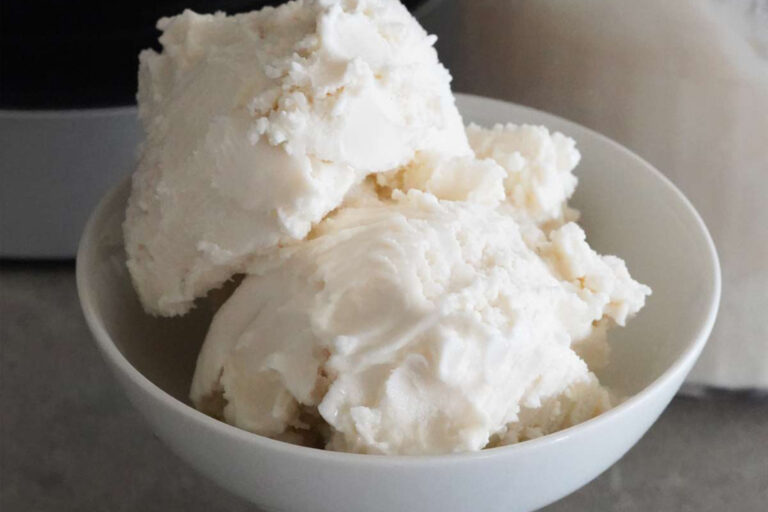
Imagine the joy of scooping into a smooth, creamy bowl of homemade vanilla ice cream, crafted exactly to your taste. Whether you crave a sweet indulgence or a healthier, customizable treat, the Ninja Creami makes the process effortless. Unlike traditional ice cream makers that require constant churning and patience, the Ninja Creami transforms simple ingredients into a luxurious dessert with minimal effort.

In this guide, you’ll discover how to make perfect vanilla ice cream in the Ninja Creami—from selecting ingredients to troubleshooting common issues. Whether you’re a beginner or an ice cream enthusiast, this recipe will help you create a rich, velvety treat every time.

Why Choose the Ninja Creami for Homemade Ice Cream?

Key Benefits of Using the Ninja Creami

  • Ultra-Smooth Texture: Achieve a soft-serve consistency with just the press of a button.
  • Full Customization: Adjust ingredients to suit dietary needs, whether dairy-free, keto, or low-sugar.
  • No-Churn Convenience: Skip the hassle of traditional ice cream makers and enjoy a hands-free experience.
  • Easy Cleanup: Minimal mess with a simple, compact design.

What Makes Ninja Creami Vanilla Ice Cream Special?

  • Faster and More Convenient: Unlike classic churned ice cream, this method requires less effort and time.
  • Perfect for Meal Prepping: Freeze pints ahead of time and spin them whenever you crave a fresh scoop.
  • Endless Flavor Possibilities: Start with a vanilla base and get creative with mix-ins.

Ingredients for Ninja Creami Vanilla Ice Cream

IngredientQuantitySubstitutions
Heavy cream1 cupHalf-and-half for a lighter version
Whole milk3/4 cupAlmond or oat milk for dairy-free
Sugar1/4 cupHoney, maple syrup, or sweetener
Vanilla extract1 tbspVanilla bean paste for deeper flavor
Pinch of saltBalances and enhances sweetness

Optional Add-Ins

  • Chocolate chips, nuts, or fruit for a personalized twist.
  • Protein powder or collagen for a nutritious boost.

Step-by-Step Guide to Making Vanilla Ice Cream in the Ninja Creami

Step 1: Preparing the Ice Cream Base

  • In a mixing bowl, combine the heavy cream, milk, sugar, vanilla extract, and salt.
  • Whisk thoroughly until the sugar dissolves completely.
  • Pour the mixture into a Ninja Creami pint container.

Step 2: Freezing the Mixture

  • Secure the lid tightly and place the container in your freezer.
  • Freeze for at least 24 hours to ensure a firm, scoopable texture.

Step 3: Spinning the Ice Cream

  • Remove the frozen pint and place it into the Ninja Creami machine.
  • Select the “Ice Cream” setting and let the machine process.
  • If the texture appears crumbly, use the “Re-spin” option for a smoother finish.

Step 4: Adding Mix-Ins (Optional)

  • Stir in chocolate chips, crushed cookies, or nuts for extra flavor.
  • Use the “Mix-In” function to distribute evenly without over-processing.

Pro Tips for Perfect Ninja Creami Vanilla Ice Cream

  • Use high-quality vanilla extract for a more intense flavor.
  • Let the frozen pint sit for 5 minutes before spinning if it feels too hard.
  • Re-spin as needed to achieve the desired creaminess.
  • Try different milk alternatives for unique textures and flavors.

Common Mistakes & How to Fix Them

ProblemSolution
Ice cream is icyIncrease the fat content by adding more cream.
Too soft/runnyFreeze for a full 24 hours before processing.
Lacks flavorUse real vanilla beans for a richer taste.
Texture is crumblyRun a re-spin cycle for extra smoothness.

Frequently Asked Questions (FAQ)

Can I make this recipe dairy-free?

Yes! Substitute coconut cream and almond milk for a creamy, dairy-free alternative.

How long does homemade Ninja Creami ice cream last?

It stays fresh for up to two weeks in the freezer, but re-spin before serving for the best texture.

Can I reduce the sugar in this recipe?

Absolutely! Use monk fruit sweetener, stevia, or honey instead of regular sugar.

What other flavors can I make with this base?

Try adding cocoa powder, caramel, or crushed cookies to create unique variations!


Conclusion

Making homemade vanilla ice cream in the Ninja Creami is incredibly simple and rewarding. With just a handful of ingredients, you can whip up a rich, creamy dessert that’s tailored to your taste. Whether you’re experimenting with mix-ins or keeping it classic, this foolproof recipe ensures delicious results every time.

Now it’s your turn! Try this recipe today and share your creations in the comments. Looking for more Ninja Creami ice cream recipes? Explore our site for endless flavor ideas and expert tips!

No Title

February 20, 2025

Sara

Vanishing Oatmeal Cookies Recipe – Step-by-Step Guide to the Ultimate Cookie Delight


Introduction

Imagine this: It’s a chilly afternoon, and you’re in the kitchen, ready to bake something warm and comforting. The sweet aroma of cinnamon and oats fills the air as your batch of Vanishing Oatmeal Cookies bakes to golden perfection. These cookies are called “vanishing” for a reason — once they’re out of the oven, they seem to disappear in the blink of an eye. Whether you’re baking them for a family treat, a get-together, or simply because you need something delicious to nibble on, Vanishing Oatmeal Cookies are the ultimate go-to.

In this guide, you’ll learn how to make these irresistible cookies from scratch, with a detailed step-by-step process that ensures each batch turns out perfectly chewy and delicious. So, grab your apron, and let’s dive into the world of oatmeal cookies that are destined to become your new favorite treat!

1. Why Vanishing Oatmeal Cookies Are So Irresistible

The History of Vanishing Oatmeal Cookies

Vanishing Oatmeal Cookies have a charming history that dates back decades. This beloved recipe, often linked to Quaker Oats, is known for its unique blend of simple ingredients that come together to create a cookie that’s more than just a treat — it’s an experience. The recipe first gained popularity in the 1960s and has been a household favorite ever since. The “vanishing” part of the name comes from how quickly these cookies seem to disappear once they’re baked, thanks to their irresistibly chewy texture and delicious flavor.

The Perfect Texture and Flavor

What makes Vanishing Oatmeal Cookies so special is their texture. They are perfectly soft on the inside, with just a hint of crispness around the edges. The combination of oats, butter, cinnamon, and a touch of sweetness gives each bite a comforting and satisfying flavor that keeps you coming back for more. Whether you’re a fan of raisins, chocolate chips, or even both, the versatility of this recipe makes it a favorite for many.


2. Ingredients Needed for Perfect Vanishing Oatmeal Cookies

When it comes to baking the best Vanishing Oatmeal Cookies, the ingredients you choose matter. Here’s a breakdown of everything you’ll need for a batch of these irresistible cookies. Make sure to use the freshest ingredients for the best results.

Ingredients Table

IngredientAmount
Old-fashioned rolled oats2 cups
All-purpose flour1 cup
Baking soda1 tsp
Ground cinnamon1 tsp
Salt1/2 tsp
Butter (softened)1 cup
Granulated sugar3/4 cup
Brown sugar (packed)3/4 cup
Eggs2 large
Vanilla extract1 tsp
Raisins or chocolate chips1 cup (optional)

Why These Ingredients?

  • Old-fashioned rolled oats: These oats are essential for that chewy texture. Instant oats or quick oats may not give the same results, so it’s best to stick with old-fashioned oats for this recipe.
  • Butter: Softened butter ensures that your cookies are rich and have that melt-in-your-mouth feel. Make sure your butter is at room temperature for the best consistency.
  • Brown sugar: The brown sugar adds a bit of moisture and depth to the flavor, making your cookies even more irresistible.
  • Raisins or chocolate chips: This is where you can get creative! While raisins are traditional, adding chocolate chips (or a combination of both) can take your cookies to the next level.

3. Step-by-Step Guide: How to Make Vanishing Oatmeal Cookies

Now that you have your ingredients, let’s begin making the dough for your Vanishing Oatmeal Cookies. Follow these steps carefully to ensure your cookies turn out perfect every time.

  1. Cream the butter and sugars together – Start by placing your softened butter, granulated sugar, and brown sugar in a large mixing bowl. Using an electric mixer or a whisk, beat them together until the mixture is light and fluffy. This step is crucial for a soft, airy cookie texture.
  2. Add eggs and vanilla – Beat in the eggs one at a time. After adding each egg, ensure it’s fully incorporated before moving on to the next. Then, mix in the vanilla extract. The vanilla adds a subtle sweetness that complements the oats beautifully.
  3. Mix dry ingredients – In a separate bowl, whisk together the flour, baking soda, salt, and ground cinnamon. The cinnamon is what gives these cookies their signature warm, spicy aroma. You can even add a pinch of nutmeg for an extra layer of flavor.
  4. Combine wet and dry ingredients – Gradually add the dry ingredients to the wet mixture, mixing until everything is well combined. Be careful not to overmix, as this can make the cookies tough.
  5. Fold in oats and raisins (or chocolate chips) – Finally, gently fold in the oats and raisins (or chocolate chips) using a spatula. Be sure the oats are evenly distributed throughout the dough.

3.2 Baking the Cookies

With the dough ready, it’s time to bake these delicious cookies. Here’s how to do it:

  1. Preheat the oven to 350°F (175°C). This temperature is perfect for creating the golden-brown edges while keeping the centers soft and chewy.
  2. Scoop the dough onto a baking sheet – Use a cookie scoop or two spoons to drop rounded balls of dough onto a baking sheet lined with parchment paper. Be sure to leave enough space between each cookie, as they will spread slightly during baking.
  3. Bake for 10-12 minutes – Place the baking sheet in the preheated oven and bake for about 10-12 minutes, or until the edges of the cookies are golden brown. Keep an eye on them during the last few minutes to ensure they don’t overbake.
  4. Cool on the baking sheet – Once baked, remove the cookies from the oven and allow them to cool on the sheet for a few minutes. This step helps them firm up a bit before transferring them to a wire rack to cool completely.

3.3 Tips for Perfect Texture and Flavor

While the recipe is simple, a few helpful tips can ensure your cookies come out perfectly every time:

  • Use old-fashioned oats: Instant oats might seem like a shortcut, but old-fashioned oats provide the best texture for these cookies. They’re heartier and give your cookies that satisfying chew.
  • Chill the dough: If you have time, refrigerate the dough for 30 minutes before baking. This helps the dough firm up, preventing the cookies from spreading too much during baking.
  • Avoid overbaking: The cookies will continue to cook on the baking sheet after you remove them from the oven. For a soft, chewy texture, remove them while the centers are still slightly soft.
  • Experiment with mix-ins: Feel free to experiment with different add-ins like coconut flakes, chopped nuts, or even a drizzle of caramel for a unique twist on this classic recipe.

4. Frequently Asked Questions about Vanishing Oatmeal Cookies

What makes Vanishing Oatmeal Cookies so chewy?

The key to chewy oatmeal cookies lies in the right balance of ingredients. The combination of butter, brown sugar, and eggs helps keep the cookies moist and tender, while the oats provide that hearty texture. Additionally, the cinnamon and vanilla bring warmth and sweetness to every bite.

Can I make Vanishing Oatmeal Cookies ahead of time?

Yes! You can definitely make the dough ahead of time. Simply store it in an airtight container in the refrigerator for up to three days. You can also freeze the dough for up to three months. When you’re ready to bake, scoop out the dough and bake as usual. It’s a great way to have fresh cookies on demand!

Why do Vanishing Oatmeal Cookies disappear so quickly?

Simply put, they’re delicious! The combination of chewy oats, sweet raisins, and a touch of spice makes them irresistible. Plus, they’re small enough to eat just one…or two…or three!

Can I use instant oats for this recipe?

While you can technically use instant oats, it’s best to stick with old-fashioned rolled oats for this recipe. Instant oats don’t provide the same texture and will result in a slightly different cookie. For the ultimate chewy texture, always go with old-fashioned oats.


5. Conclusion: Enjoy Your Homemade Vanishing Oatmeal Cookies

There you have it — the perfect recipe for Vanishing Oatmeal Cookies! These cookies are everything you’ve been craving: soft, chewy, and utterly delicious. Whether you’re baking for a special occasion or just because you’re in the mood for something sweet, this recipe will not disappoint.

So, grab your ingredients, preheat the oven, and get baking! Don’t forget to share this recipe with friends and family, and maybe even come up with your own variations. Once you take that first bite, you’ll understand exactly why they’re called “vanishing” oatmeal cookies — because they’ll disappear in no time!

Call-to-Action:
Try out this Vanishing Oatmeal Cookies recipe today, and let us know how it turns out! Share your photos and experiences with us in the comments below or tag us on social media. Happy baking!

No Title

February 20, 2025

Sara

Easy Chocolate Cobbler Recipe – A Step-by-Step Guide to a Gooey Delight

Introduction: The Ultimate Comfort Dessert

There’s nothing quite like the warm embrace of a homemade chocolate dessert. Whether you’re craving something indulgent after a long day or looking for the perfect treat to impress your guests, chocolate cobbler checks all the right boxes. This classic Southern dessert is rich, fudgy, and incredibly easy to make.

Imagine a dessert that combines the crispy texture of a brownie with the gooeyness of molten lava cake—that’s exactly what you get with this chocolate cobbler. Best of all, you don’t need any fancy baking skills or equipment. Just a few pantry staples and a little bit of time will yield a warm, luscious treat that will satisfy any chocolate lover.

In this guide, you’ll learn how to make the perfect chocolate cobbler with step-by-step instructions, expert tips, and customization options. Let’s dive in!

Why You’ll Love This Chocolate Cobbler Recipe

  • Quick and easy – No complex techniques required.
  • Minimal ingredients – Uses basic pantry staples.
  • Perfect texture – Crispy on top, gooey underneath.
  • Crowd-pleaser – Great for family gatherings and potlucks.
  • No special equipment needed – Just a baking dish and an oven.

Ingredients for the Perfect Chocolate Cobbler

Basic Pantry Ingredients

IngredientQuantity
Unsalted butter1/2 cup (1 stick)
All-purpose flour1 cup
Granulated sugar3/4 cup
Unsweetened cocoa powder3 tbsp
Baking powder2 tsp
Salt1/4 tsp
Milk1/2 cup
Vanilla extract1 tsp
Brown sugar1 cup
Boiling water1 1/2 cups

Optional Additions

  • Chopped nuts (pecans or walnuts) for crunch.
  • Espresso powder to enhance the chocolate flavor.
  • Vanilla ice cream for the perfect pairing.

Step-by-Step Instructions to Make Chocolate Cobbler

Step 1 – Preparing the Baking Dish

  1. Preheat your oven to 350°F (175°C).
  2. Place the butter in a 9×13-inch baking dish and melt it in the oven.

Step 2 – Mixing the Batter

  1. In a medium bowl, whisk together:
    • Flour
    • Granulated sugar
    • Cocoa powder
    • Baking powder
    • Salt
  2. Stir in milk and vanilla extract until smooth.
  3. Pour the batter over the melted butter (do not stir!).

Step 3 – Adding the Topping

  1. Evenly sprinkle brown sugar and additional cocoa powder over the batter.
  2. Slowly pour boiling water over the mixture. Do not stir (this helps create the gooey chocolate sauce layer beneath the cobbler).

Step 4 – Baking to Perfection

  1. Bake for 35-40 minutes, or until the top is firm but a thick chocolate sauce forms underneath.
  2. Let it cool for 5-10 minutes before serving.

Serving & Storage Tips

How to Serve Chocolate Cobbler

  • Serve warm with a scoop of vanilla ice cream or a dollop of whipped cream.
  • Drizzle with chocolate syrup for extra richness.
  • Sprinkle with chocolate chips or nuts for added texture.

Storing & Reheating

  • Refrigeration: Store leftovers in an airtight container for up to 3 days.
  • Reheating: Microwave individual portions for 30-40 seconds.

Variations & Customizations

  • Gluten-Free Option – Swap all-purpose flour with a gluten-free blend.
  • Dairy-Free Version – Use almond or oat milk and dairy-free butter.
  • Spicy Chocolate Cobbler – Add a pinch of cinnamon and cayenne for a Mexican chocolate twist.

FAQs About Chocolate Cobbler

What makes chocolate cobbler different from traditional cobblers?

Unlike fruit cobblers, chocolate cobbler has a unique self-saucing effect, creating a rich, molten chocolate layer beneath a crisp top.

Can I make chocolate cobbler ahead of time?

Yes! Bake it ahead and reheat before serving. However, it’s best enjoyed fresh for maximum gooeyness.

Why does my cobbler turn out dry?

This can happen if there isn’t enough boiling water or if it’s overbaked. Make sure to follow the water measurement and baking time closely.

Can I use a different sweetener instead of sugar?

Yes, you can use coconut sugar or a sugar substitute, but it may slightly alter the taste and texture.


Conclusion – Your New Favorite Chocolate Dessert

Chocolate cobbler is the ultimate comfort dessert—simple, delicious, and impossible to resist. With just a few pantry ingredients, you can whip up a rich, gooey masterpiece that will become a household favorite.

Give this easy recipe a try and let us know how it turned out! If you love it, share it with your friends and family. Enjoy!

No Title

February 20, 2025

Sara