Easy Chicken Pot Pie Recipe – A 30-Minute Comfort Classic
Introduction: The Ultimate Comfort Food in No Time
Few meals evoke warmth and nostalgia quite like a chicken pot pie. The flaky crust, the creamy filling, the savory goodness—it’s comfort food at its best. But traditional recipes often require hours of prep and cooking, making them less ideal for busy weeknights.
That’s where this easy chicken pot pie recipe comes in! With simple ingredients and only 30 minutes from start to finish, you can enjoy a homemade meal without spending all evening in the kitchen. Whether you’re a seasoned cook or a kitchen newbie, this recipe is foolproof, delicious, and sure to become a family favorite.
1 cup frozen mixed vegetables (peas, carrots, corn)
1/2 cup diced onion
1/4 cup butter
1/3 cup all-purpose flour
1 3/4 cups chicken broth
2/3 cup milk
1/2 tsp salt
1/4 tsp black pepper
1 refrigerated pie crust (or homemade)
👉 Want a homemade crust? Check out our easy pie crust recipe!
🔪 How to Make This Chicken Pot Pie Recipe (Easy & Quick!)
Step 1: Preheat & Prep
Preheat the oven to 425°F (220°C).
Grease a 9-inch pie dish and set aside.
Step 2: Make the Creamy Filling
In a large skillet, melt butter over medium heat.
Add onions; cook 2–3 minutes until soft.
Stir in flour; cook 1 minute, stirring constantly.
Gradually whisk in chicken broth and milk until smooth.
Bring to a boil; cook 2 minutes until thickened.
Stir in chicken, vegetables, salt, and pepper.
Step 3: Assemble the Pot Pie
Pour filling into the prepared pie dish.
Place the pie crust over the filling, sealing the edges.
Cut small slits on top to allow steam to escape.
Step 4: Bake & Serve
Bake for 20 minutes or until golden brown.
Let cool for 5 minutes, then serve hot!
💡 Pro Tip: Brush the crust with egg wash for extra crispiness!
🥄 Recipe Variations & Substitutions
Want to Customize? Try These Options!
✔ No pie crust? Use biscuit dough or puff pastry. ✔ Dairy-free? Swap milk for almond or coconut milk. ✔ Gluten-free? Use GF flour and GF pie crust. ✔ Make it vegetarian! Swap chicken for mushrooms or tofu.
📝 Pro Tips for the Best Chicken Pot Pie
✅ Shred rotisserie chicken to save time. ✅ Use a cast-iron skillet for a one-pan meal. ✅ Freeze before baking for an easy make-ahead dinner.
❄️ Storage & Reheating Tips
Refrigerator: Store leftovers in an airtight container for up to 3 days.
Freezer: Freeze unbaked for up to 3 months; bake from frozen at 400°F.
Reheat: Microwave individual portions for 1–2 minutes, or bake at 350°F until heated through.
❓ FAQs – Chicken Pot Pie Recipe Easy
1. Can I use store-bought rotisserie chicken?
Yes! Rotisserie chicken saves time and adds flavor. Simply shred and add it to the filling.
2. What’s the best crust for chicken pot pie?
A flaky, buttery pie crust is ideal, but puff pastry or biscuit dough work great too!
3. How do I thicken my pot pie filling?
If the filling is too thin, simmer longer or add 1 tbsp cornstarch mixed with water.
4. Can I make this ahead of time?
Absolutely! Assemble the pie, cover, and refrigerate for up to 24 hours before baking.
5. What sides go well with chicken pot pie?
Serve with a fresh salad, roasted veggies, or garlic bread for a complete meal.
🥧 Final Thoughts: A Cozy, Easy Meal in Just 30 Minutes!
This easy chicken pot pie recipe is a quick, hearty, and delicious comfort meal that your whole family will love. Try it tonight and enjoy the perfect balance of creamy filling and flaky crust!
🔹 Loved this recipe? Share it with friends & leave a comment below!
No-Bake Eggnog Pie Recipe – A Creamy & Easy Holiday Treat
🍂 Introduction: A Holiday Dessert You’ll Love
Nothing captures the spirit of the holidays quite like the warm, spiced flavor of eggnog. If you love the creamy richness of this festive drink, you’re in for a treat! This no-bake eggnog pie takes all the best flavors of classic eggnog and transforms them into a luscious, dreamy dessert — with no oven required! Whether you’re hosting a holiday party, preparing a family dinner, or simply craving a seasonal treat, this recipe is a quick and effortless way to impress.
Let’s dive into this easy, make-ahead dessert that will bring a touch of holiday magic to your table!
To make this creamy holiday delight, you’ll need just a handful of simple ingredients:
Ingredient
Quantity
Graham cracker crust
1 (9-inch)
Eggnog
1 cup
Instant vanilla pudding mix
1 package (3.4 oz)
Whipped topping
1 cup
Ground nutmeg
½ tsp
Ground cinnamon
¼ tsp
Optional: Rum extract
½ tsp
Pro Tip: Use high-quality eggnog for the richest flavor.
👩🍳 How to Make No-Bake Eggnog Pie
Step 1: Prepare the Filling
In a large mixing bowl, whisk together eggnog, pudding mix, nutmeg, and cinnamon until smooth.
Step 2: Fold in the Whipped Topping
Gently fold in whipped topping to keep the texture light and airy.
Step 3: Fill and Chill
Pour the mixture into the graham cracker crust, smoothing the top evenly.
Cover and refrigerate for at least 4 hours to set properly.
Step 4: Garnish and Serve
Sprinkle with extra nutmeg & cinnamon for a festive touch.
Add whipped cream & holiday sprinkles for extra holiday flair.
🎁 Why You’ll Love This Recipe
🔹 No-Bake Convenience — No oven required! 🔹 Perfect Holiday Flavor — Tastes just like classic eggnog. 🔹 Quick & Easy — Only 10 minutes of prep before chilling. 🔹 Make-Ahead Friendly — Ideal for busy holiday gatherings.
🎂 Variations & Substitutions
Dairy-Free Version: Use almond or oat-based eggnog and coconut whipped topping.
Boozy Eggnog Pie: Add 1-2 tbsp rum or bourbon for a grown-up twist.
Crust Options: Try gingersnap or vanilla wafer crust for a delicious variation.
🔮 Expert Tips for the Best Eggnog Pie
Use cold eggnog & pudding mix to ensure a firm set.
Let the pie chill for at least 4 hours (overnight is even better!).
For a firmer texture, add ½ cup cream cheese to the filling.
🤔 FAQ: No-Bake Eggnog Pie Recipe
How long does eggnog pie last in the fridge?
Eggnog pie stays fresh for 3–4 days when covered and refrigerated.
Can I freeze no-bake eggnog pie?
Yes! Wrap tightly and freeze for up to 1 month. Thaw in the fridge before serving.
What can I use instead of a graham cracker crust?
Try Oreo, shortbread, or gingersnap crust for a tasty twist!
👏 Conclusion: A Must-Try Holiday Dessert!
Now that you have everything you need to create this creamy, festive, and effortless no-bake eggnog pie, it’s time to get into the kitchen and give it a try! With its rich eggnog flavor and velvety texture, this dessert is bound to become a family favorite year after year.
Did you try this recipe? Let us know in the comments below! And for more holiday treats, check out our collection of festive dessert ideas.
Easy Coconut Custard Pie Recipe – Ready in 3 Steps!
The Best Recipe for Coconut Custard Pie
A Slice of Comfort in Every Bite
There’s something truly magical about a homemade coconut custard pie. The rich, creamy filling paired with a buttery crust creates a perfect harmony of textures and flavors. Whether you’re making it for a family gathering, a holiday treat, or just because you crave something sweet, this recipe is a must-try. Even if you’re a beginner in the kitchen, you’ll find this process simple and rewarding. Get ready to impress your loved ones with a pie that tastes as if it came straight from a bakery!
👩🍳 How to Make Coconut Custard Pie in 3 Easy Steps
Step 1: Prepare the Pie Crust
Roll out your pie crust and place it into a 9-inch pie pan.
If you prefer a crispier crust, pre-bake it for 10 minutes at 350°F (175°C).
Let it cool slightly before adding the custard filling.
Step 2: Make the Custard Filling
In a large mixing bowl, whisk together eggs, sugar, salt, and vanilla extract.
Gradually add the milk and heavy cream while whisking to create a smooth mixture.
Stir in the shredded coconut.
Step 3: Bake to Perfection
Pour the custard mixture into the prepared pie crust.
Bake at 350°F (175°C) for 45 minutes or until the center is set.
Allow the pie to cool for at least 30 minutes before slicing.
🍽️ Serving & Storage Tips
Best Ways to Serve
Serve warm or chilled for different textures.
Top with whipped cream or a sprinkle of toasted coconut for extra flavor.
Pair with a cup of coffee or tea for a cozy treat.
Storage Instructions
Store leftovers in the refrigerator for up to 3 days.
For longer storage, wrap tightly and freeze for up to 3 months.
💡 Expert Tips for the Best Coconut Custard Pie
Use full-fat dairy for a richer and creamier texture.
Bake with a water bath to prevent cracks in the custard.
Toast the coconut before adding it to the mixture for enhanced flavor.
Let the pie cool completely before slicing for the best consistency.
🤔 FAQ – Coconut Custard Pie Questions Answered!
Can I use coconut milk instead of regular milk?
Yes! Substituting whole milk with full-fat coconut milk will make the pie even more coconutty and dairy-free if needed.
How do I know when my coconut custard pie is done?
The center should be slightly jiggly but mostly set. A knife inserted near the center should come out clean.
Can I make this pie ahead of time?
Absolutely! Make it a day in advance and store it in the refrigerator overnight for the best texture and flavor.
🎉 Conclusion: Try This Easy Coconut Custard Pie Today!
Now that you have this foolproof recipe, it’s time to put on your apron and start baking. Whether for a special occasion or a simple dessert to enjoy at home, this coconut custard pie is guaranteed to please. Don’t forget to share your results and let us know how your pie turned out in the comments below! Happy baking! 🍰✨
Cajun Alfredo Sauce Recipe – A Bold & Flavorful Twist
Introduction: The Perfect Blend of Creamy & Spicy
Imagine a sauce that combines the rich, velvety smoothness of classic Alfredo with the bold, smoky heat of Cajun spices. That’s exactly what this Cajun Alfredo sauce delivers—a perfect balance of creamy and spicy that transforms any dish into a flavor-packed experience. Whether you’re craving comfort food or looking to spice up your dinner routine, this recipe is sure to become a favorite.
Let’s dive into how you can whip up this mouthwatering sauce in your own kitchen!
Cajun Alfredo sauce is a fusion of two classic flavors: traditional Alfredo sauce, known for its creamy, buttery texture, and Cajun seasoning, a robust spice blend that originated in Louisiana. The result? A sauce that’s creamy, spicy, and utterly irresistible.
Why You’ll Love This Recipe
Quick & Easy: Ready in just 25 minutes.
Versatile: Pairs well with pasta, proteins, and even vegetables.
Customizable: Adjust the spice level to your preference.
Ingredients for Cajun Alfredo Sauce
Main Ingredients
2 tbsp butter – Adds richness.
2 cloves garlic (minced) – Enhances flavor.
1 cup heavy cream – Creates a smooth, creamy texture.
1/2 cup Parmesan cheese (grated) – Provides a nutty, cheesy depth.
1 tbsp Cajun seasoning – The key spice blend.
1/2 tsp paprika – Adds smoky undertones.
1/4 tsp cayenne pepper (optional) – For extra heat.
Salt & black pepper (to taste) – Enhances all flavors.
Optional Additions for Extra Flavor
Smoked sausage – A hearty protein option.
Grilled shrimp – Complements the sauce beautifully.
Bell peppers – Adds a pop of color and sweetness.
Ingredient Measurements
Ingredient
Quantity
Butter
2 tbsp
Heavy cream
1 cup
Parmesan cheese
1/2 cup
Garlic (minced)
2 cloves
Cajun seasoning
1 tbsp
Paprika
1/2 tsp
Cayenne pepper
1/4 tsp (optional)
Step-by-Step Guide to Making Cajun Alfredo Sauce
Step 1 – Prepare Your Ingredients
Mince the garlic, grate the Parmesan cheese, and measure out all spices.
Step 2 – Sauté the Garlic
Melt the butter in a saucepan over medium heat.
Add the minced garlic and cook for about 1 minute until fragrant.
Step 3 – Add the Cream & Spices
Pour in the heavy cream, stirring constantly.
Mix in Cajun seasoning, paprika, and cayenne pepper.
Let the mixture simmer for 3-5 minutes to infuse the flavors.
Step 4 – Thicken the Sauce
Slowly add the Parmesan cheese while stirring.
Continue stirring until the cheese melts and the sauce thickens.
Step 5 – Taste & Adjust
Season with salt and black pepper to taste.
Adjust spice levels if needed.
Tips for the Best Cajun Alfredo Sauce
Use fresh garlic for the most flavorful results.
Don’t overheat the cream to prevent curdling.
Simmer, don’t boil, to maintain a smooth texture.
For a lighter version, use half-and-half instead of heavy cream.
How to Serve Cajun Alfredo Sauce
Best Pasta Pairings
Fettuccine – Classic choice for Alfredo sauce.
Penne – Holds the sauce well in its ridges.
Linguine – A great alternative to fettuccine.
Protein Pairings
Blackened chicken – Adds a smoky, spicy contrast.
Grilled shrimp – Perfect for seafood lovers.
Andouille sausage – A flavorful Cajun touch.
Side Dish Ideas
Garlic bread – Ideal for soaking up extra sauce.
Roasted vegetables – Balances the richness.
Simple salad – A fresh, crunchy contrast.
Storage & Reheating Tips
Store in an airtight container in the fridge for up to 3 days.
Reheat on low heat, adding a splash of milk if needed.
Avoid microwaving to prevent separation.
Frequently Asked Questions (FAQs)
Can I make Cajun Alfredo sauce without heavy cream?
Yes! You can substitute half-and-half or whole milk with a bit of flour for thickness.
What’s the best Cajun seasoning for this recipe?
Popular choices include Tony Chachere’s, Slap Ya Mama, or homemade blends.
How can I make the sauce spicier?
Increase the cayenne pepper or add a dash of hot sauce.
Can I make this sauce dairy-free?
Yes! Use coconut cream and nutritional yeast as substitutes.
What pasta works best with Cajun Alfredo sauce?
Fettuccine, penne, and rigatoni are all excellent choices.
Conclusion: Try This Bold & Creamy Cajun Alfredo Sauce Today!
Now that you know how to make this irresistible Cajun Alfredo sauce, it’s time to bring this creamy, spicy masterpiece to your kitchen. Whether you’re drizzling it over pasta, pairing it with proteins, or dipping garlic bread into it, this sauce is sure to impress.
Give it a try and let us know what you think! Share your thoughts in the comments and don’t forget to save this recipe for later!
Introduction: Why Chipotles in Adobo are a Game-Changer
Have you ever taken a bite of something so rich and smoky that it instantly elevated the entire dish? That’s the magic of chipotles in adobo! These bold, flavorful peppers combined with a tangy sauce can completely transform your cooking. Whether you’re looking to spice up your tacos, add depth to soups, or create a smoky marinade, chipotles in adobo are the secret ingredient you need. In this guide, you’ll learn everything from what they are to how you can make adobo sauce from scratch and store it properly for long-term use.
Have you ever taken a bite of something so delicious that you instantly wanted to recreate it at home? Bang Bang Sauce is one of those irresistible condiments that elevate any dish. Whether you’ve had it drizzled over crispy shrimp or as a dip for crunchy chicken tenders, its perfect balance of sweet, spicy, and creamy flavors keeps you coming back for more.
The good news? You don’t need a restaurant to enjoy this incredible sauce. In just a few minutes, you can whip up the best homemade Bang Bang Sauce with simple pantry ingredients. Say goodbye to store-bought versions and hello to a sauce that’s fresher, tastier, and 100% customizable!
Bang Bang Sauce is a creamy, slightly spicy, and mildly sweet condiment made famous by Bonefish Grill’s Bang Bang Shrimp. While its origins can be traced to Asian-inspired flavors, it has become a popular addition to various dishes. The sauce is loved for its versatility, making it a staple for seafood, poultry, and even vegetables.
Why is it Called “Bang Bang” Sauce?
The name itself suggests boldness and excitement. While there’s no definitive explanation, it likely refers to the explosive combination of flavors that give your taste buds a kick with every bite.
🥄 Ingredients for the Best Homemade Bang Bang Sauce
📝 Ingredient List
Ingredient
Amount
Mayonnaise
1/2 cup
Sweet Chili Sauce
1/4 cup
Sriracha
1 tbsp
Honey
1 tbsp
Lime Juice
1 tsp
Garlic Powder
1/2 tsp
Salt (optional)
To taste
Why These Ingredients Work
Mayonnaise – Creates a rich and creamy base.
Sweet Chili Sauce – Adds a mild heat and subtle sweetness.
Sriracha – Brings the perfect level of spice and depth.
Honey – Balances out the heat with natural sweetness.
Lime Juice – Adds a fresh, citrusy tang.
Garlic Powder – Enhances the overall flavor profile.
🥣 How to Make Bang Bang Sauce
Step-by-Step Instructions
Combine all ingredients in a medium-sized bowl.
Whisk together until smooth and well blended.
Taste and adjust flavors to your liking (add more spice, sweetness, or tang if needed).
Refrigerate for at least 15 minutes to let the flavors meld together.
Prep & Cooking Time
Prep Time
Cook Time
Total Time
5 mins
0 mins
5 mins
🍽️ Best Ways to Use Bang Bang Sauce
Perfect Pairings
Bang Bang Shrimp – The most popular way to enjoy this sauce!
Crispy Chicken Tenders – A delicious dip to complement crunchy chicken.
Drizzle Over Tacos – Enhances flavors with a spicy kick.
Dip for Fries & Veggies – Makes for a tasty alternative to ketchup or ranch.
Burger & Sandwich Spread – Adds creaminess and boldness to your favorite sandwiches.
Pro Tips for Serving
For a thicker sauce: Reduce the amount of lime juice.
For a spicier kick: Add more Sriracha.
For a healthier version: Use Greek yogurt instead of mayonnaise.
For a restaurant-style experience: Serve chilled for the best taste.
❓ FAQs About Bang Bang Sauce
How long does homemade Bang Bang Sauce last?
When stored in an airtight container in the refrigerator, your sauce will stay fresh for up to one week.
Can I make Bang Bang Sauce without mayo?
Yes! You can substitute Greek yogurt or sour cream for a lighter alternative.
Is Bang Bang Sauce spicy?
It has a mild heat level. If you want it spicier, simply add more Sriracha or a pinch of red pepper flakes.
Can I use Bang Bang Sauce for meal prep?
Absolutely! Prepare a batch ahead of time and store it for easy use throughout the week.
🎯 Conclusion: Why You’ll Love This Bang Bang Sauce Recipe
There’s something about mac and cheese that feels like home. Whether it’s the creamy cheese sauce, the perfectly cooked pasta, or the comfort it brings after a long day, it’s a dish that always hits the spot. But when it comes to making the perfect mac and cheese, there’s one recipe that stands out from the crowd—Tiny’s Mac and Cheese. This viral sensation has taken the internet by storm, and today, you’re about to learn why it’s a must-try for your next meal.
If you’re tired of the usual mac and cheese and are looking for something that elevates this classic comfort food, Tiny’s mac and cheese recipe is the answer. You’ll soon discover what makes this dish so special and why you need to give it a try today!
So, what makes Tiny’s Mac and Cheese so special? It’s not just the perfectly balanced blend of creamy cheeses; it’s the unique twist that elevates this dish from a simple side to the star of your meal. From the viral buzz on social media to the rave reviews from food lovers everywhere, Tiny’s Mac and Cheese has won the hearts of many.
Emotional Appeal: Imagine serving this at your next family gathering, watching everyone’s faces light up as they take their first bite. It’s more than just a recipe; it’s an experience. The richness of the cheese, the texture of the pasta, and the crispy top layer (if you choose to bake it) come together to create a dish that’s both comforting and indulgent.
Viral Appeal: People can’t stop talking about Tiny’s Mac and Cheese. The recipe has gone viral for a reason. It’s simple to make, yet so delicious. Whether you’re a beginner in the kitchen or a seasoned chef, this recipe is perfect for anyone looking to make a memorable dish.
Ingredients You’ll Need for Tiny’s Mac and Cheese
To make this delicious mac and cheese, you don’t need a ton of fancy ingredients—just the basics! Here’s what you’ll need to get started:
Basic Ingredients:
2 cups elbow macaroni
3 cups shredded cheddar cheese
1 cup shredded mozzarella cheese
1 cup heavy cream
1/2 cup milk
1/4 cup butter
Salt and pepper to taste
Optional Add-ins:
1/2 cup grated Parmesan cheese (for extra cheesiness!)
A pinch of cayenne pepper (if you like a bit of spice)
1 cup breadcrumbs (for a crunchy topping)
Table: Ingredients for Tiny’s Mac and Cheese Recipe
Ingredient
Quantity
Elbow macaroni
2 cups
Shredded cheddar cheese
3 cups
Shredded mozzarella cheese
1 cup
Heavy cream
1 cup
Milk
1/2 cup
Butter
1/4 cup
Salt and pepper
To taste
Grated Parmesan (optional)
1/2 cup
Cayenne pepper (optional)
A pinch
Breadcrumbs (optional)
1 cup
Step-by-Step Instructions for Making Tiny’s Mac and Cheese
Now that you have all the ingredients, let’s get cooking! Follow these simple steps to make Tiny’s Mac and Cheese.
1. Preparing the Pasta
Start by boiling your pasta. Bring a large pot of salted water to a boil. Once boiling, add the elbow macaroni and cook it according to the package instructions. Be sure not to overcook the pasta; you want it to be slightly undercooked, as it will absorb more of the creamy sauce later. Once the pasta is ready, drain it and set it aside.
2. Making the Cheese Sauce
While your pasta is cooking, it’s time to make the creamy cheese sauce. In a separate saucepan, melt the butter over medium heat. Once the butter is melted, add the milk and heavy cream. Stir gently to combine, and cook for 2-3 minutes until the mixture is warmed through.
Once the milk and cream are heated, add the shredded cheddar and mozzarella cheese. Stir constantly until the cheese is completely melted, and the sauce becomes smooth and creamy. If you want to add a bit of extra cheese, feel free to sprinkle in some grated Parmesan for that added richness.
3. Combining the Pasta and Cheese Sauce
Now, it’s time to bring everything together. Add the cooked macaroni to the cheese sauce and stir until the pasta is well-coated with the creamy mixture. Season with salt and pepper to taste. If you like a little kick, sprinkle in a pinch of cayenne pepper or add your favorite spices.
4. Final Touches: Bake (Optional)
For a crispy top and extra flavor, transfer your mac and cheese to a baking dish. Sprinkle breadcrumbs on top, and add a little more grated Parmesan for an irresistible golden finish. Bake in a preheated oven at 350°F (175°C) for 15 minutes or until the top is golden brown and bubbly.
Why This Recipe Works So Well
Perfect Cheese Sauce
The key to Tiny’s Mac and Cheese is the cheese sauce. By combining both cheddar and mozzarella, you create a sauce that’s velvety and rich, yet not too heavy. The mozzarella adds a lovely meltiness, while the cheddar brings in that sharp, tangy flavor we all love.
Balanced Flavor
The real magic of Tiny’s Mac and Cheese lies in the balance of flavors. The subtle heat from the cayenne pepper complements the creaminess of the sauce without overpowering it. It’s a perfect blend that makes every bite feel like a little indulgence.
Versatility
While this recipe is delicious as-is, you can easily add your own twist. Want to make it spicier? Add more cayenne pepper or throw in some jalapeños. If you prefer a smoky flavor, try adding some cooked bacon. The options are endless, allowing you to personalize Tiny’s Mac and Cheese to your liking.
Tips for Perfecting Tiny’s Mac and Cheese Recipe
Use Fresh Cheese: For the best melt and texture, always use fresh cheese instead of pre-shredded options. Freshly shredded cheese will melt more evenly, creating that smooth, creamy sauce.
Don’t Overcook the Pasta: Be careful not to overcook the macaroni. Keep it slightly al dente so it absorbs the cheese sauce without becoming too soft and mushy.
Make It Ahead: This mac and cheese is great for prepping in advance. You can make it a day ahead, store it in the fridge, and then bake it when you’re ready to serve.
Freeze It: Want to make a big batch? Freeze it before baking! This mac and cheese freezes really well. Just thaw it overnight and bake when you’re ready to serve.
Frequently Asked Questions (FAQ)
Can I make Tiny’s mac and cheese ahead of time?
Yes, you can! This recipe is perfect for prepping in advance. Simply make the mac and cheese as directed, then store it in the fridge for up to 24 hours. When you’re ready to serve, pop it in the oven to reheat and enjoy!
Can I freeze Tiny’s mac and cheese?
Absolutely! Tiny’s Mac and Cheese freezes wonderfully. Before baking, transfer the mac and cheese to an airtight container and freeze it for up to three months. When you’re ready to eat, thaw it in the fridge overnight, then bake as usual.
What makes Tiny’s mac and cheese viral?
Tiny’s Mac and Cheese became viral due to its creamy texture, rich flavor, and the perfect combination of cheeses. It’s an easy-to-make recipe that delivers restaurant-quality comfort food right at home. People love sharing their version of the dish on social media, contributing to its viral popularity.
Conclusion: Your New Go-To Mac and Cheese Recipe
Tiny’s Mac and Cheese isn’t just a dish—it’s a sensation. With its rich, creamy texture, flavorful cheeses, and endless customization possibilities, this recipe has quickly become a fan favorite. Whether you’re making it for a casual weeknight dinner or for a special occasion, Tiny’s Mac and Cheese is guaranteed to impress.
Ready to give it a try? Gather your ingredients, follow the easy steps, and enjoy a bowl of comfort that’s sure to become your new favorite. Don’t forget to share your mac and cheese creation on social media, and let your friends in on the viral magic!
Call to Action: Ready to make Tiny’s mac and cheese today? Get your ingredients, follow the steps, and enjoy! Share your delicious results with us on social media using #TinysMacAndCheese!
Elevate Your Desserts with a Simple Cream Cheese Filling
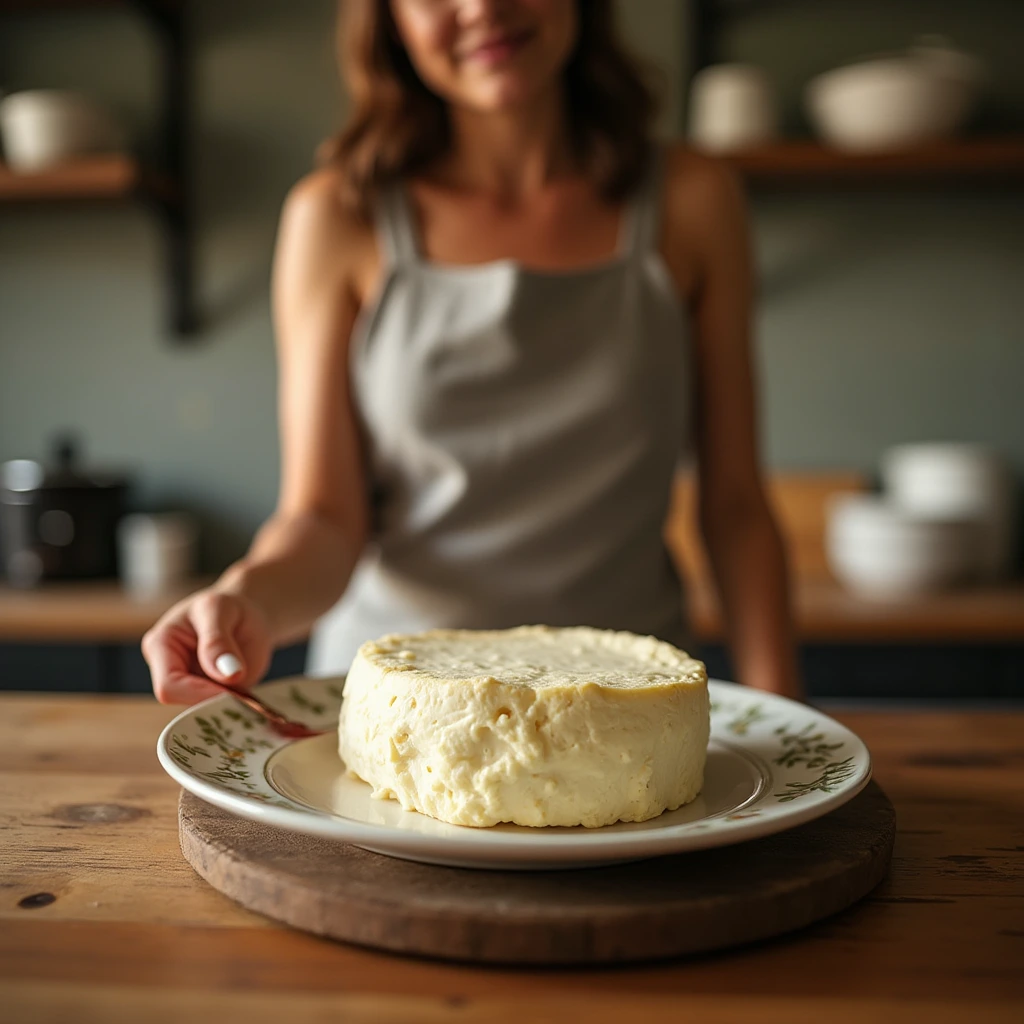
Imagine sinking your fork into a luscious slice of cake, cupcake, or a delicate fruit tart, only to discover a rich, smooth, and slightly tangy filling that perfectly complements the sweetness. This is the magic of a simple cream cheese filling. Whether you’re an experienced baker or just beginning to explore the art of desserts, this easy-to-make filling will add depth and flavor to your treats, making them unforgettable.
In this article, we’ll walk you through everything you need to know about creating a simple cream cheese filling that will take your favorite dessert recipes to the next level. From the ingredients and preparation steps to tips and variations, you’ll be ready to incorporate this versatile filling into your next baking project with ease. Let’s get started!
When it comes to dessert, nothing quite compares to the perfect balance of creamy richness and subtle tang. A simple cream cheese filling provides exactly that, and here’s why it’s so beloved by bakers and dessert enthusiasts alike:
The Balance of Flavors: Cream cheese brings a slight tanginess that balances out the sweetness of your dessert. It’s the ideal contrast that prevents your treats from becoming overly sugary.
Easy and Quick to Prepare: This filling doesn’t require hours of preparation or hard-to-find ingredients. In fact, you probably already have most of the ingredients in your kitchen!
Versatility: Whether you’re baking a cake, preparing cupcakes, or creating a fruit tart, a cream cheese filling can be adapted to fit any dessert. The options are endless!
Great for All Skill Levels: Whether you’re new to baking or an expert, this filling is easy to make. It’s perfect for anyone who wants to add a little extra something to their dessert without a complicated recipe.
Ingredients for Your Simple Cream Cheese Filling
To create a smooth, creamy filling that will transform any dessert, you’ll need just a handful of ingredients. The beauty of this simple cream cheese filling is in its minimalism. Here’s what you’ll need:
Cream Cheese: The star of the show! Opt for full-fat cream cheese for the best texture and richness. Low-fat options can be used, but the result might be slightly less creamy.
Powdered Sugar: This ingredient sweetens the filling without introducing any graininess. It’s the perfect companion for cream cheese.
Vanilla Extract: Adds a subtle, warm flavor that enhances the overall taste of the filling.
Heavy Cream: This is what makes your cream cheese filling smooth and easy to spread. Adjust the amount depending on how thick or thin you want the filling to be.
Salt: A pinch of salt is key to balancing the sweetness and enhancing the flavor of the cream cheese.
Here’s a breakdown of the ingredients:
Ingredient
Quantity
Cream Cheese
8 oz (227g)
Powdered Sugar
1 cup (120g)
Heavy Cream
1/4 cup (60ml)
Vanilla Extract
1 tsp
Salt
A pinch
How to Make Simple Cream Cheese Filling
Creating your cream cheese filling is incredibly straightforward. Follow these simple steps to whip up this delicious filling in no time:
Step 1: Prepare the Cream Cheese
Before you begin, make sure the cream cheese is softened to room temperature. Cold cream cheese can cause lumps in your filling, making it difficult to mix. Let it sit out for about 30 minutes to ensure it’s easy to blend.
Step 2: Mix the Ingredients
In a large mixing bowl, combine the room temperature cream cheese, powdered sugar, and a pinch of salt. Use an electric mixer or a hand whisk to blend the ingredients together until the mixture is smooth and creamy. This process should take about 2-3 minutes.
Step 3: Add Vanilla and Cream
Now, it’s time to add the vanilla extract and heavy cream. Start by slowly adding the cream while mixing. You’ll want to adjust the amount of heavy cream to get the desired consistency. For a thicker filling, use less cream; for a softer, more spreadable filling, add more cream. Continue mixing until the filling is light and fluffy.
Step 4: Check the Consistency
Once everything is well-combined, check the consistency. It should be smooth, creamy, and thick enough to hold its shape. If it’s too runny, add a little more powdered sugar. If it’s too thick, add a bit more cream.
Step 5: Chill Before Using
For the best texture, refrigerate your cream cheese filling for at least 30 minutes before using it in your dessert. Chilling allows the filling to set, making it easier to pipe or spread onto cakes and pastries.
Tips for Perfecting Your Cream Cheese Filling
While making a simple cream cheese filling is easy, there are a few tips you can follow to make sure you get the best possible result every time:
Room Temperature Ingredients: As mentioned earlier, make sure your cream cheese and heavy cream are at room temperature. Cold ingredients can lead to lumps and a less smooth filling.
Adjust the Sweetness: If you prefer a sweeter filling, feel free to add more powdered sugar. Start with small amounts and taste as you go to avoid making it too sweet.
Flavor Variations: Want to add a twist? Try mixing in different extracts like almond or lemon for a unique flavor. You could also add zest from citrus fruits or a small amount of cocoa powder for a chocolatey variation.
Best Desserts to Use Cream Cheese Filling For
Now that you’ve mastered making your cream cheese filling, it’s time to put it to good use! This filling pairs perfectly with a variety of desserts, and here are some ideas to get you started:
1. Cheesecake
Cream cheese filling is a classic pairing for cheesecake, offering a smooth and creamy texture that complements the richness of the cake. Whether you’re making a traditional New York-style cheesecake or a no-bake version, a simple cream cheese filling will elevate your dessert to new heights.
2. Cupcakes
Swirl the cream cheese filling into the center of your cupcake batter for a surprise creamy bite in every cupcake. You can also pipe it on top as a frosting for an extra layer of decadence.
3. Fruit Tarts
Fruit tarts are a perfect dessert for showcasing fresh seasonal fruit, but a cream cheese filling makes them even more special. The tangy filling pairs beautifully with the sweetness of the fruit.
4. Pastries
Fill puff pastry or Danish dough with cream cheese filling for a rich, buttery treat. Whether you’re making turnovers, danishes, or cinnamon rolls, this filling will add a delightful flavor and texture.
Storing and Using Leftover Cream Cheese Filling
If you happen to have any leftover cream cheese filling, don’t worry! It’s easy to store for future use.
Refrigeration
Store the leftover filling in an airtight container in the fridge for up to 3-4 days. Before using it again, give it a quick stir to restore its smooth texture.
Freezing
You can also freeze the filling for longer storage. Place it in an airtight container and freeze for up to one month. When you’re ready to use it, simply thaw it in the refrigerator overnight and stir before using.
Common Mistakes to Avoid
While this cream cheese filling is simple to make, there are a few common mistakes you’ll want to avoid:
Overmixing: Mixing the filling for too long can cause it to become too thin. Stop mixing as soon as it’s smooth and fluffy.
Cold Ingredients: Using cold cream cheese or heavy cream can make the filling lumpy and hard to incorporate. Always allow these ingredients to reach room temperature.
Not Adjusting Consistency: If your filling is too thick or too thin, don’t hesitate to adjust the texture by adding more powdered sugar or heavy cream. The goal is a smooth, spreadable filling.
Nutritional Information for Simple Cream Cheese Filling
While delicious, it’s good to be aware of the nutritional information for your simple cream cheese filling. Here’s a quick breakdown of the nutritional content per tablespoon of filling:
Nutrient
Amount
Calories
80 kcal
Total Fat
6g
Saturated Fat
4g
Carbohydrates
8g
Sugar
7g
Protein
1g
FAQs About Simple Cream Cheese Filling
Q1: Can I use low-fat cream cheese for this filling?
Yes, low-fat cream cheese can be used as a substitute, but the texture and flavor may differ slightly. Full-fat cream cheese yields the richest and creamiest filling.
Q2: How can I make the cream cheese filling thicker?
If your filling is too runny, simply add more powdered sugar to thicken it up. Alternatively, reduce the amount of heavy cream for a firmer filling.
Q3: Can I add flavorings to the cream cheese filling?
Absolutely! You can add a variety of flavorings to customize your cream cheese filling. Try lemon zest for a citrusy twist or a small amount of cocoa powder for a chocolate flavor.
Conclusion
Now that you know how to create a simple cream cheese filling, you’re ready to transform your favorite desserts into something truly special. Whether you’re making cheesecakes, cupcakes, or pastries, this rich and tangy filling will enhance the flavor and texture of any treat. Don’t forget to experiment with different variations and flavors to make it your own.
So, next time you’re baking, why not add this easy cream cheese filling to your recipe? Your friends and family will thank you for it, and your desserts will never be the same!
Call to Action: Ready to start baking with this delicious cream cheese filling? Gather your ingredients and give it a try today! And don’t forget to share your creations with us—let us know how you used the filling in your favorite dessert!
Starbucks Cake Pops Recipe – How to Make Starbucks Cake Pops at Home: Easy Step-by-Step Guide
Introduction: Why Making Starbucks Cake Pops at Home Is a Game-Changer
There’s something undeniably magical about the bite-sized goodness of Starbucks cake pops. Whether you’re indulging in one with your coffee or treating yourself after a long day, these sweet little pops of joy have become a staple for many. But have you ever wondered if you could make them at home? Well, you can!
Making Starbucks cake pops at home not only saves you money but also allows you to tailor them to your taste. Imagine enjoying a freshly baked, homemade cake pop, dipped in rich chocolate, or adorned with your favorite sprinkles – all in the comfort of your kitchen. Whether you’re craving a chocolate indulgence, looking to impress at your next birthday party, or simply enjoy the satisfaction of baking your own treats, making these cake pops from scratch is easier than you think.
In this step-by-step guide, you’ll learn how to recreate Starbucks’ delicious cake pops, right from your home. Let’s get started on this fun and satisfying baking adventure!
Starbucks Cake Pops Recipe – How to Make Starbucks Cake Pops at Home
Making Starbucks-style cake pops at home is simpler than you might think. With the right ingredients, some creativity, and a little bit of patience, you can whip up these delectable treats in no time. Here’s everything you need to know to make your own Starbucks cake pops.
What Are Starbucks Cake Pops and Why Are They So Popular?
Starbucks cake pops are small, cake-based treats served on a stick. These pop-sized desserts are covered in a rich coating of chocolate or candy melts and often decorated with sprinkles or drizzled with more chocolate. The combination of moist cake and a sweet, crunchy coating makes them a perfect snack or dessert.
The popularity of these little treats is undeniable. They’re quick to grab on the go, come in a variety of flavors, and are a fun, portion-controlled way to indulge your sweet tooth. Whether it’s a birthday treat, a pick-me-up during your coffee break, or a special gift, cake pops have become a favorite for many Starbucks fans.
Ingredients for Starbucks Cake Pops – What You’ll Need
Before you get started, it’s essential to gather your ingredients. Here’s a simple list of what you’ll need for the basic Starbucks cake pop recipe. The ingredients listed below will make about 12 cake pops, but feel free to adjust based on your needs.
Table of Ingredients:
Ingredient
Quantity
Notes
Cake mix (or homemade cake)
1 box (or 2 cups)
Choose your favorite flavor
Eggs
2
Butter
1/2 cup (softened)
Milk
1/4 cup
Frosting (store-bought)
1 cup
Vanilla or chocolate
Candy melts (chocolate)
1-2 cups
For coating
Lollipop sticks
10-12
For the pops
Sprinkles (optional)
As desired
For decoration
How to Make Starbucks Cake Pops at Home – Easy Step-by-Step Guide
Let’s dive into the step-by-step process of making your very own Starbucks cake pops at home. With just a few ingredients and simple steps, you’ll have your delicious cake pops ready in no time.
Step 1: Bake the Cake
The first step is to bake your cake. You can use store-bought cake mix or make your own homemade cake if you prefer. For the sake of simplicity, we’ll stick to using a box mix.
Preheat your oven to 350°F (175°C).
Prepare the cake mix as per the instructions on the box.
Bake in a greased or lined pan for the time specified on the box or until a toothpick inserted comes out clean.
Pro Tip: For a fluffier texture, try using cake flour instead of regular all-purpose flour. You can also experiment with adding flavoring extracts such as vanilla or almond to give your cake a unique twist.
Step 2: Crumble the Cake
Once your cake is done baking, let it cool completely. This step is crucial as hot cake can lead to a mushy mixture when combined with frosting.
After the cake has cooled, break it into pieces using your hands or a fork. Crumble the cake until it forms fine crumbs.
Tip: Don’t worry if the crumbs are a little uneven. The mixture will come together once you add the frosting.
Step 3: Mix with Frosting
Now comes the fun part – mixing the cake crumbs with frosting to create a dough-like texture.
Add about 1 cup of frosting to the crumbled cake. Stir it in gradually, making sure the mixture is moist but not soggy. You want it to hold together when you roll it into balls.
If the mixture is too dry, add more frosting a tablespoon at a time.
The key here is to add enough frosting to bind the crumbs together without making the mixture too gooey.
Step 4: Shape the Cake Pops
Once your mixture is well combined, it’s time to shape the cake pops.
Take a spoonful of the cake-frosting mixture and roll it into a ball about 1 to 1.5 inches in diameter.
Repeat until all the mixture has been used up.
Tip: If you want uniform-sized cake pops, consider using a melon baller to scoop out evenly sized portions.
Step 5: Insert the Lollipop Sticks
To ensure the sticks stay in place, you’ll need to dip each stick into melted chocolate or candy melts before inserting them into the cake balls.
Melt a small amount of candy melts in a microwave-safe bowl or over a double boiler.
Dip the end of each lollipop stick into the melted chocolate and then gently insert it into the center of each cake ball.
This step helps to anchor the stick and prevents the pops from falling apart later on.
Step 6: Coat with Chocolate
Now it’s time to dip your cake pops into the coating. You can use candy melts, chocolate, or any coating of your choice.
Melt your candy melts or chocolate according to the package instructions.
Dip each cake pop into the melted chocolate, covering it completely.
Gently tap the stick to remove any excess coating.
Pro Tip: For a smooth finish, avoid swirling the cake pops too much after dipping them. A quick tap will do.
Step 7: Let Them Set
Place the coated cake pops upright in a styrofoam block, a cake pop stand, or a tall glass. Allow them to sit at room temperature for 30-60 minutes, or until the chocolate has hardened completely.
Tip: If you’re in a hurry, you can refrigerate the cake pops for 10-15 minutes to speed up the setting process.
Step 8: Add Sprinkles or Decorations (Optional)
To make your cake pops even more fun and festive, you can add sprinkles, edible glitter, or drizzle extra chocolate on top.
Gently roll the cake pops in sprinkles or use a spoon to drizzle chocolate over the top for a beautiful finish.
Tips for Perfect Starbucks Cake Pops Every Time
Here are a few helpful tips to ensure your Starbucks cake pops come out perfectly every time:
Ensure the cake is completely cooled before mixing with frosting. This prevents the cake pop mixture from becoming too soft.
Don’t add too much frosting. The mixture should hold together but not be overly wet. Too much frosting can make the cake pops difficult to work with.
Use high-quality chocolate or candy melts for a smooth and glossy finish.
Be patient. Let your cake pops set properly before serving them. This will ensure they hold their shape and don’t fall apart.
Variations – Creative Twists on Starbucks Cake Pops
While the classic Starbucks cake pop is delicious, there’s plenty of room to get creative with different flavors and decorations. Here are some ideas to switch things up:
Chocolate Cake Pops
For a richer flavor, use chocolate cake mix and chocolate frosting. You can also coat them in dark or white chocolate for an added layer of indulgence.
Fun Birthday Cake Pops
Make your birthday parties even more special with colorful cake pops. Use rainbow-colored candy melts or add multi-colored sprinkles to make these cake pops the life of the party.
Vegan Cake Pops
You can easily make vegan Starbucks-style cake pops by swapping out dairy ingredients. Use plant-based butter, almond milk, and vegan frosting for a dairy-free alternative.
Common Mistakes to Avoid When Making Starbucks Cake Pops
Making cake pops can be tricky if you’re not careful. Here are a few common mistakes to avoid:
Mistake 1: Using Too Much Frosting
Too much frosting can make the cake pop mixture too soft, leading to cake pops that fall apart. Be sure to add just enough frosting to bind the crumbs together.
Mistake 2: Not Letting the Cake Pops Fully Set
Impatience can lead to messy, unraveled cake pops. Make sure to give them enough time to set completely before serving.
Mistake 3: Forgetting to Dip the Stick in Chocolate First
If you don’t dip the stick in chocolate before inserting it into the cake, it can cause the stick to slide out of the cake ball. This simple step ensures your cake pops stay intact.
Conclusion: Enjoy Your Homemade Starbucks Cake Pops
Making Starbucks cake pops at home is a fun and rewarding experience that lets you enjoy a sweet treat without the Starbucks price tag. With just a few simple ingredients and easy steps, you can recreate these delicious bites of joy in your own kitchen. So, grab your ingredients, roll up your sleeves, and get ready to indulge in the delightful world of homemade Starbucks cake pops.
Don’t forget to share your cake pops with friends and family – they’ll love you for it! Have fun decorating and experimenting with flavors. And most importantly, enjoy the process and the delicious results!
FAQ – Frequently Asked Questions About Starbucks Cake Pops Recipe
Q1: How long do Starbucks cake pops last?
Homemade cake pops will last up to one week when stored in an airtight container in the refrigerator.
Q2: Can I freeze cake pops?
Yes! Cake pops can be frozen. Simply place them on a baking sheet in a single layer, freeze until solid, and then transfer them to an airtight container for up to one month.
Q3: What’s the best way to melt candy melts for cake pops?
The best way to melt candy melts is by microwaving them in 30-second intervals, stirring in between, or by using a double boiler. Stir the chocolate until smooth before dipping your cake pops.
Q4: Can I use a different flavor of cake for my cake pops?
Yes! Feel free to use any flavor of cake that you love. You can experiment with flavors like lemon, red velvet, or even funfetti to add your own twist to the cake pops.
Q5: How do I make my cake pops extra festive for a party?
Use brightly colored candy melts, sprinkles, or edible glitter to make your cake pops stand out. You can even add a personalized touch with custom decorations.
How to Make Pumpkin Dump Cake with Just a Few Ingredients
🍂 A Cozy Fall Treat You’ll Love
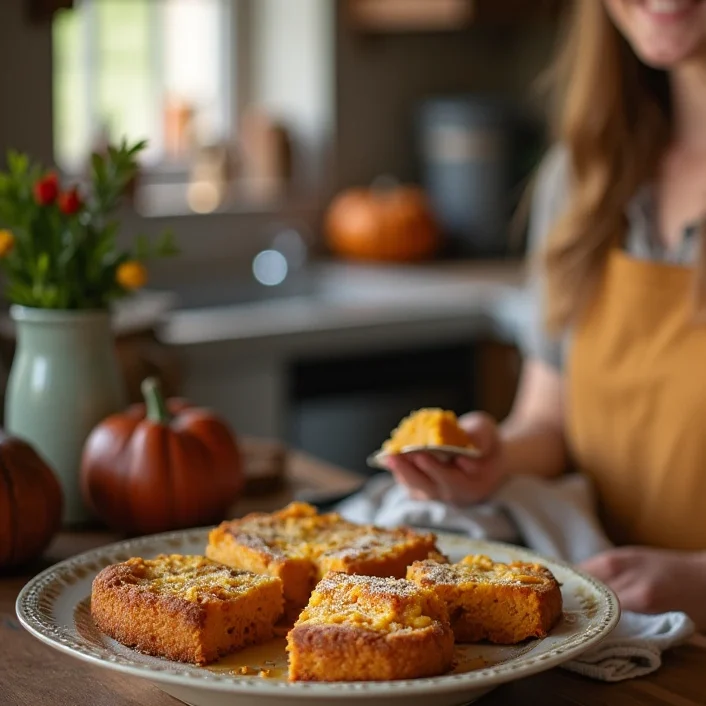
There’s something undeniably comforting about the aroma of warm spices filling your kitchen. As the leaves turn golden and the air gets crisp, you crave desserts that bring warmth and nostalgia. If you’re searching for an effortless yet decadent treat, Pumpkin Dump Cake is exactly what you need. This recipe is a game-changer—minimal effort, maximum flavor, and no special baking skills required!
Imagine a dessert that combines the rich, spiced flavors of pumpkin pie with the light, crumbly texture of a cake. That’s exactly what Pumpkin Dump Cake delivers. The beauty of this recipe is its simplicity—just layer the ingredients, pop it in the oven, and let the magic happen. No need for tedious mixing, folding, or frosting. In under an hour, you’ll have a dessert that looks impressive and tastes divine.
🛒 Ingredients Needed
You won’t need a long shopping list for this dessert. Everything required is either in your pantry or easy to find at any grocery store. Check out the ingredient breakdown in the table below:
Ingredient
Quantity
Pumpkin puree
1 can (15 oz)
Evaporated milk
1 can (12 oz)
Eggs
3 large
Granulated sugar
3/4 cup
Pumpkin pie spice
2 tsp
Yellow or spice cake mix
1 box
Melted butter
1/2 cup
Chopped pecans (optional)
1/2 cup
This combination ensures a moist, flavorful pumpkin base topped with a buttery, crumbly cake layer.
🏡 Step-by-Step Instructions
1️⃣ Preheat and Prepare
Set your oven to 350°F (175°C).
Lightly grease a 9×13-inch baking dish to prevent sticking.
2️⃣ Mix the Pumpkin Base
In a large bowl, whisk together pumpkin puree, evaporated milk, eggs, sugar, and pumpkin pie spice until smooth.
Pour the mixture evenly into the baking dish.
3️⃣ Add the Cake Mix
Evenly sprinkle the cake mix over the pumpkin mixture. No need to stir—just let it sit on top.
Gently press the dry mix down for uniform coverage.
4️⃣ Drizzle the Butter
Melt the butter and slowly drizzle it across the surface of the cake mix.
For extra crunch, scatter chopped pecans on top.
5️⃣ Bake to Perfection
Place in the oven and bake for 45-50 minutes until golden brown.
The edges should be slightly crisp, while the center remains soft and gooey.
Let it cool for at least 15 minutes before serving.
🍽️ Serving & Storage Tips
How to Serve Pumpkin Dump Cake
Serve it warm for the best texture and flavor.
Enhance the experience with a scoop of vanilla ice cream or whipped cream.
Drizzle with caramel sauce for a sweet finishing touch.
Storage Tips
Refrigerate leftovers in an airtight container for up to 4 days.
To reheat, microwave for 20-30 seconds or warm in an oven at 300°F (150°C).
❓ FAQ: Everything You Need to Know
1. Can I use fresh pumpkin instead of canned pumpkin puree?
Yes! Simply cook and blend fresh pumpkin until smooth. Make sure to drain excess moisture.
2. Can I make Pumpkin Dump Cake ahead of time?
Definitely! Bake it a day in advance, store in the fridge, and warm before serving.
3. What’s the best cake mix to use for this recipe?
A yellow cake mix gives a mild sweetness, while spice cake mix enhances the fall flavors.
4. Can I add extra toppings?
Absolutely! Try chopped walnuts, shredded coconut, or even white chocolate chips for a unique twist.
5. Do I need to refrigerate Pumpkin Dump Cake?
Yes, because of the dairy content, always store leftovers in the fridge.
🎉 Final Thoughts
This Pumpkin Dump Cake is proof that great desserts don’t have to be complicated. With just a few ingredients, you can create a dessert that’s bursting with flavor and perfect for any occasion. Whether you’re making it for a family dinner, a holiday gathering, or just to satisfy a pumpkin craving, this cake is bound to impress.
So, what are you waiting for? Gather your ingredients, preheat your oven, and bake up a batch of this irresistible treat today! 🍁