Author

Sara

Browsing

Quick & Tasty Hamburger and Rice Recipes for Dinner

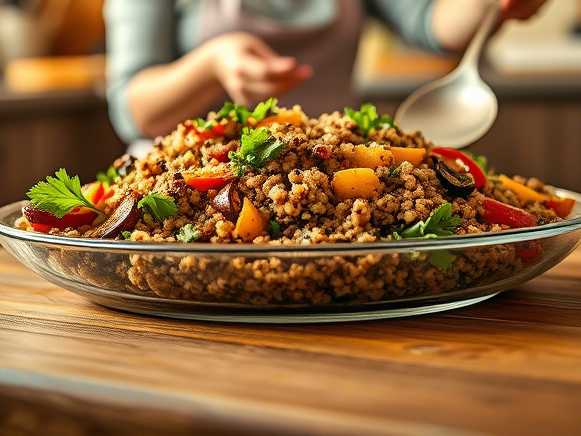
After a long day, getting dinner on the table quickly doesn’t have to mean sacrificing flavor. Whether you’re cooking for yourself or your family, hamburger and rice recipes are a go-to solution for quick, satisfying meals that are both hearty and delicious. With just a few ingredients, you can whip up a variety of dishes that don’t skimp on flavor. From one-pot skillets to casseroles and stir-fries, these quick and tasty hamburger and rice recipes are perfect for busy nights when you need something simple and tasty. Let’s dive into some of the easiest and most delicious hamburger and rice meals that are sure to become family favorites!


Why Hamburger and Rice Make the Perfect Dinner Combo

Have you ever found yourself standing in front of the fridge, wondering what to make for dinner that’s quick, easy, and still packed with flavor? The answer is simple: hamburger and rice. This classic combo is not only quick to prepare but also incredibly versatile. You can pair it with almost anything in your pantry and create a dish that’s both filling and satisfying.

Think about it: ground beef cooks quickly, and rice can be prepared in a variety of ways, from fluffy white rice to nutrient-rich brown rice. Together, they form the perfect base for a wide range of recipes. Plus, both ingredients are easy to find, budget-friendly, and flexible enough to fit any flavor profile—from savory and spicy to cheesy and comforting. In short, hamburger and rice recipes are a no-brainer for busy nights when you want a home-cooked meal that doesn’t take hours to prepare.

Simple Ingredients for Quick Hamburger and Rice Recipes

Before you can start cooking, you’ll need to make sure you have the right ingredients on hand. Here’s a rundown of the basics you’ll want to stock up on for quick hamburger and rice recipes:

Ground Beef

Ground beef is the star of these recipes, and it’s available in various fat percentages, so you can pick the one that suits your dietary needs. For a leaner option, go with ground sirloin or lean ground beef. If you’re looking for something with more flavor, you can opt for a fattier cut. Don’t worry if you don’t have ground beef on hand—this recipe works just as well with ground turkey, chicken, or even vegetarian alternatives like lentils or plant-based ground “meat.”

Rice

Rice is the perfect accompaniment to hamburger in these recipes, and it’s incredibly easy to cook. You can go with white rice, which cooks quickly, or brown rice for a heartier, more nutritious option. Instant rice or microwaveable rice pouches are also great time-savers for busy weeknights.

Vegetables

Adding vegetables to your hamburger and rice dishes is a great way to balance out the flavors and boost the nutrition. Consider using:

  • Onions for sweetness and depth
  • Bell peppers for a crunchy texture and colorful addition
  • Tomatoes for juiciness and acidity
  • Frozen vegetables like peas, carrots, and corn for convenience and flavor

Seasonings

To elevate the flavor of your hamburger and rice recipes, don’t forget about the seasonings. A few staples you can rely on include:

  • Salt and pepper to taste
  • Garlic powder for savory depth
  • Paprika, oregano, or Italian seasoning for an extra layer of flavor

With these simple ingredients, you’ll be able to create countless variations of hamburger and rice dishes that are perfect for busy evenings.


Quick Hamburger and Rice Recipes for Busy Nights

Now that you have your ingredients ready, let’s jump into some of the best hamburger and rice recipes for dinner. These dishes are easy to make, packed with flavor, and perfect for those times when you need a meal on the table fast.

Recipe 1: One-Pot Hamburger Rice Skillet

This one-pot hamburger rice skillet is a lifesaver when you’re in a rush. With minimal prep and cook time, this dish is both simple and satisfying.

Prep Time: 10 minutes
Cook Time: 15 minutes
Total Time: 25 minutes

Ingredients:

  • 1 lb ground beef
  • 1 cup rice (white or brown)
  • 1 can diced tomatoes
  • 1 cup beef broth
  • 1 teaspoon garlic powder
  • Salt and pepper to taste

Instructions:

  1. In a large skillet, brown the ground beef over medium heat.
  2. Once the beef is cooked, add the rice, diced tomatoes, and beef broth.
  3. Stir everything together, then cover and simmer for 15 minutes, or until the rice is tender and the liquid has been absorbed.
  4. Season with salt and pepper to taste.

This recipe is great because it’s all cooked in one pot, saving you time and reducing the amount of cleanup!

Recipe 2: Ground Beef and Rice Casserole

If you’re looking for a comforting meal that’s easy to throw together, this ground beef and rice casserole is perfect. With its creamy texture and cheesy topping, it’s sure to become a family favorite.

Prep Time: 15 minutes
Cook Time: 30 minutes
Total Time: 45 minutes

Ingredients:

  • 1 lb ground beef
  • 1 cup rice (white or brown)
  • 1 can cream of mushroom soup
  • 1/2 cup shredded cheddar cheese
  • Salt and pepper to taste

Instructions:

  1. Preheat your oven to 350°F (175°C).
  2. Brown the ground beef in a skillet over medium heat. Drain any excess fat.
  3. In a bowl, combine the beef, rice, and cream of mushroom soup. Stir in some salt and pepper to taste.
  4. Transfer the mixture to a casserole dish and top with shredded cheddar cheese.
  5. Bake for 25-30 minutes or until the casserole is bubbling and the cheese is melted.

This casserole is an easy, comforting dish that can be prepared ahead of time for even faster cooking.

Recipe 3: Quick Hamburger Stir Fry with Rice

This quick hamburger stir fry with rice is a great way to mix up your usual routine. It’s fast, flavorful, and packed with veggies!

Prep Time: 10 minutes
Cook Time: 15 minutes
Total Time: 25 minutes

Ingredients:

  • 1 lb ground beef
  • 1 cup rice (cooked)
  • 1 cup frozen mixed vegetables
  • 2 tablespoons soy sauce
  • 1 teaspoon ginger (optional)

Instructions:

  1. In a large skillet or wok, brown the ground beef over medium-high heat.
  2. Add the frozen mixed vegetables to the pan and cook until heated through.
  3. Stir in the cooked rice, soy sauce, and ginger (if using).
  4. Cook for another 3-5 minutes, stirring occasionally, until everything is well combined and heated through.

This stir fry is perfect for using up leftover rice and is a great way to incorporate more vegetables into your diet.


Tips to Make Your Hamburger and Rice Meals Even Better

While the basic hamburger and rice recipes are delicious on their own, there are a few easy tricks you can use to make them even better. Here are some ideas:

Add Cheese

A sprinkle of cheese can take your hamburger and rice dishes to the next level. Try adding shredded cheddar, mozzarella, or even a dollop of sour cream for extra creaminess.

Boost with Veggies

For an extra nutritional boost, consider adding more vegetables to your meal. Spinach, zucchini, and mushrooms all pair wonderfully with ground beef and rice.

Experiment with Sauces

Give your dish a little more flair by drizzling it with a sauce. Soy sauce, hot sauce, or even a creamy ranch dressing can add a new depth of flavor to your meal.


How to Meal Prep Hamburger and Rice Recipes for the Week

If you’re always in a rush, meal prepping can save you a lot of time. Here’s how to prep your hamburger and rice meals for the entire week:

  1. Cook in Bulk: Make a large batch of rice and brown a big batch of ground beef.
  2. Store Separately: Keep the rice and beef in separate airtight containers in the fridge. They’ll last for up to 4 days.
  3. Reheat and Serve: When you’re ready to eat, just reheat the beef and rice, and top it with your favorite vegetables or seasonings.

Meal prepping hamburger and rice dishes is an easy way to ensure you always have a delicious, home-cooked meal on hand.


Conclusion: Ready to Cook? Try These Hamburger and Rice Recipes Tonight!

There you have it! These quick and tasty hamburger and rice recipes are the perfect solution for busy nights when you need a meal that’s easy to make, full of flavor, and satisfying. Whether you’re cooking for yourself or your whole family, you can’t go wrong with this dynamic duo. So next time you’re wondering what to make for dinner, reach for that ground beef and rice and start cooking one of these delicious dishes. You won’t be disappointed!


FAQ Section

Can I use ground turkey instead of ground beef?

Yes! Ground turkey is a great, leaner substitute for ground beef in these hamburger and rice recipes.

How can I make these recipes spicier?

Add chili flakes, jalapeños, or hot sauce to spice things up and bring extra heat to your dishes.

Can I freeze hamburger and rice meals?

Absolutely! These dishes freeze well. Just store them in airtight containers for up to 3 months. Reheat thoroughly before serving.


No Title

February 20, 2025

Sara

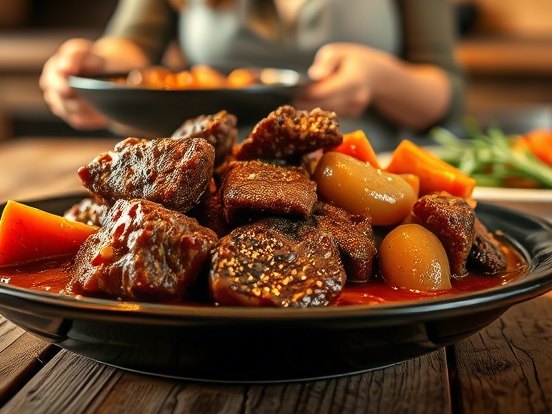
Slow Cooker Venison Stew Meat – Easy & Flavorful!

Introduction: A Hearty & Comforting Meal for Any Occasion

There’s something about a rich, slow-cooked stew that brings warmth and comfort on chilly days. Imagine walking into your home, greeted by the savory aroma of venison simmering in a blend of hearty vegetables and aromatic spices. If you’re looking for a delicious, hands-off meal that melts in your mouth, then this slow cooker venison stew recipe is for you.

Venison is a lean, flavorful meat that’s perfect for slow cooking. It absorbs the deep, rich flavors of herbs and broth, creating a dish that is both wholesome and satisfying. Plus, it’s packed with protein and essential nutrients, making it a healthy alternative to traditional beef stews. Ready to craft a mouthwatering meal with minimal effort? Let’s dive in!


🕒 Recipe Overview

Prep TimeCook TimeTotal TimeServings
15 minutes6-8 hours6-8 hours 15 min6 servings

🍔 Ingredients for the Best Slow Cooker Venison Stew

Main Ingredients:

  • 1.5 lbs venison stew meat (cubed)
  • 3 carrots (sliced)
  • 3 medium potatoes (diced)
  • 1 onion (chopped)
  • 3 cloves garlic (minced)
  • 4 cups beef or venison broth
  • 1 cup red wine (optional, adds richness)
  • 2 tbsp Worcestershire sauce
  • 2 tbsp tomato paste
  • 1 tsp thyme
  • 1 tsp rosemary
  • 1 bay leaf
  • Salt & black pepper to taste

Optional Additions:

  • 1 cup mushrooms (adds depth of flavor)
  • 2 celery stalks (for extra texture)
  • 1/4 cup flour or cornstarch (for thickening)

📝 Step-by-Step Instructions

1⃣ Prepping the Venison for Maximum Flavor

  • Trim the venison meat to remove any silver skin or excess fat.
  • Pat dry and season with salt and black pepper for enhanced taste.
  • Sear the meat in a skillet with olive oil over medium heat. Browning locks in the juices and adds a depth of flavor.

2⃣ Assembling the Slow Cooker Ingredients

  • Place chopped vegetables at the bottom of the slow cooker.
  • Add browned venison on top of the vegetables.
  • Pour in broth, wine (if using), Worcestershire sauce, and tomato paste.
  • Sprinkle in thyme, rosemary, and bay leaf for aromatic richness.

3⃣ Slow Cooking for Tender Perfection

  • Set the slow cooker on LOW for 6-8 hours or HIGH for 4-5 hours.
  • Avoid removing the lid frequently, as it can affect cooking time.
  • Stir occasionally to distribute flavors evenly.

4⃣ Thickening & Final Touches

  • For a thicker stew, mix 1/4 cup cornstarch with 1/4 cup cold water and stir into the stew 30 minutes before serving.
  • Remove the bay leaf before serving.
  • Adjust seasoning as needed.

🍽️ Serving Suggestions & Storage Tips

Best Side Dishes to Pair With Venison Stew

  • Crusty artisan bread
  • Buttery mashed potatoes
  • Fluffy rice or egg noodles
  • Roasted Brussels sprouts or asparagus

How to Store & Reheat Leftovers

  • Refrigeration: Store in an airtight container for up to 4 days.
  • Freezing: Place in a freezer-safe bag or container for up to 3 months.
  • Reheating: Warm on the stovetop over medium heat or microwave in 30-second intervals.

🤔 Frequently Asked Questions (FAQs)

How do you make venison stew meat tender?

Venison is naturally lean, so slow cooking at a low temperature breaks down the connective tissues, making it tender and juicy. Searing beforehand also enhances flavor.

Can I use frozen venison in this recipe?

Yes! However, for best results, thaw it overnight in the refrigerator before using.

What can I substitute for venison?

If venison isn’t available, beef, lamb, or bison are excellent alternatives.

Can I make this without wine?

Absolutely! Simply replace the red wine with extra broth or a splash of balsamic vinegar for depth.

Is venison stew healthy?

Yes! Venison is high in protein, iron, and essential nutrients, making it a great choice for a balanced diet.


Conclusion: The Perfect Comfort Food for Any Occasion

Slow cooker venison stew is a timeless dish that brings warmth, flavor, and nourishment to your table. With its tender meat, aromatic seasonings, and rich broth, this recipe is both simple and rewarding. Whether you’re preparing a hearty family dinner or meal prepping for the week, this stew is sure to become a favorite.

Give this recipe a try and let us know how it turned out! What’s your favorite way to enjoy venison stew? Share your tips and variations in the comments below!

No Title

February 20, 2025

Sara

The Best Sourdough Bread Breakfast Recipes You Must Try

Introduction

Imagine waking up to the comforting aroma of warm, toasted sourdough bread, its crisp crust crackling as you take that first delicious bite. Whether you enjoy your morning meal sweet or savory, sourdough bread offers the perfect foundation for a wholesome and flavorful breakfast. Packed with natural probiotics, easy to digest, and rich in nutrients, sourdough is more than just a tasty choice—it’s a health-conscious one too.

In this article, you’ll discover some of the best breakfast recipes using sourdough bread. Whether you’re craving something indulgent like French toast or a protein-packed option like avocado toast with eggs, these recipes will satisfy your morning hunger while keeping things nutritious.

Let’s dive into these mouthwatering dishes and turn your breakfast routine into a daily delight!


Why Sourdough Bread is Perfect for Breakfast

Health Benefits:

  • Easier Digestion – Sourdough’s fermentation process breaks down gluten, making it gentler on the stomach.
  • Rich in Probiotics – The natural fermentation supports gut health.
  • Low Glycemic Index – Helps keep blood sugar levels steady, preventing energy crashes.
  • Nutrient-Rich – Contains essential vitamins like B vitamins, iron, and magnesium.

Taste & Texture:

  • Crispy Crust & Soft Interior – A delightful contrast perfect for toasting.
  • Mild Tangy Flavor – Pairs well with both sweet and savory toppings.
  • Holds Up Well to Cooking – Ideal for soaking up flavors in recipes like French toast and casseroles.

Essential Ingredients & Tools for Sourdough Breakfast Recipes

Key Ingredients:

  • Sourdough Bread – Fresh or slightly stale for best results.
  • Eggs, Cheese, and Milk – Staples for many breakfast dishes.
  • Sweet Toppings – Honey, jam, fruit, and maple syrup.
  • Savory Toppings – Avocado, smoked salmon, and bacon.

Kitchen Tools:

  • Cast-Iron Skillet – Great for even cooking.
  • Mixing Bowls & Whisk – Essential for batter-based recipes.
  • Sharp Bread Knife – Ensures clean, even slices.

The Best Sourdough Bread Breakfast Recipes You Must Try

1. Classic Sourdough French Toast

Prep Time: 10 min | Cook Time: 15 min | Total Time: 25 min

Ingredients:

IngredientQuantity
Sourdough bread4 slices
Eggs2
Milk½ cup
Vanilla extract1 tsp
Cinnamon½ tsp
Butter1 tbsp

Instructions:

  1. In a bowl, whisk together eggs, milk, vanilla extract, and cinnamon.
  2. Dip each slice of sourdough into the mixture, ensuring even coating.
  3. Heat butter in a skillet over medium heat.
  4. Cook each slice until golden brown on both sides.
  5. Serve with fresh fruit, syrup, or powdered sugar.

2. Savory Sourdough Avocado Toast with Poached Egg

  • Packed with healthy fats and protein for an energy-boosting breakfast.
  • Toppings: Mashed avocado, poached eggs, cherry tomatoes, red pepper flakes.
  • Tip: Use slightly toasted sourdough for extra crunch.

Instructions:

  1. Toast the sourdough slices until golden brown.
  2. Mash ripe avocado with a pinch of salt and lemon juice.
  3. Spread avocado on toast and top with a poached egg.
  4. Sprinkle red pepper flakes and serve immediately.

3. Sourdough Breakfast Casserole

  • Perfect for meal prep – Make ahead and enjoy throughout the week.
  • Loaded with eggs, cheese, sausage, and veggies for a filling breakfast.
  • Tip: Use slightly stale sourdough to absorb flavors better.

Instructions:

  1. Cube sourdough bread and place in a greased baking dish.
  2. Whisk eggs, milk, salt, and pepper.
  3. Add cooked sausage, cheese, and vegetables to the mix.
  4. Pour mixture over bread and let soak for 15 minutes.
  5. Bake at 375°F for 30-35 minutes or until golden.

4. Fluffy Sourdough German Pancakes

  • Oven-baked and puffy – No flipping required.
  • Served with powdered sugar, butter, and lemon juice.

Instructions:

  1. Blend eggs, milk, flour, and a pinch of salt until smooth.
  2. Melt butter in a hot cast-iron skillet.
  3. Pour batter into the skillet and bake at 425°F for 15-20 minutes.
  4. Serve immediately with toppings of choice.

5. Sourdough Breakfast Grilled Cheese

  • A crispy, cheesy delight with eggs and ham.
  • Tip: Use cheddar or Swiss cheese for maximum flavor.

Instructions:

  1. Butter two slices of sourdough bread.
  2. Layer with cheese, ham, and a fried egg.
  3. Grill in a skillet until golden brown and melted inside.
  4. Serve hot with a side of fruit or salad.

Tips for Storing and Reheating Sourdough Breakfasts

  • Storage: Keep in an airtight container in the fridge for up to 4 days.
  • Reheating: Toast in an oven or skillet for crispiness.
  • Freezing: French toast and casseroles freeze well for up to 2 months.

FAQs About Breakfast Recipes with Sourdough Bread

Can I use stale sourdough bread for breakfast recipes?

Yes! Stale sourdough works great for French toast, casseroles, and bread pudding as it absorbs flavors better.

What’s the best way to toast sourdough bread?

Use a skillet with butter for a crispy texture or a toaster oven for convenience.

Can I make these recipes gluten-free?

Some bakeries offer gluten-free sourdough, or you can make a homemade version.

How can I add more protein to my sourdough breakfast?

Top with eggs, Greek yogurt, peanut butter, or smoked salmon for a high-protein boost.


Conclusion

Sourdough bread isn’t just for sandwiches—it’s a game-changer for breakfast. Whether you’re craving something sweet like French toast or a protein-packed option like avocado toast, these recipes are sure to start your day off right.

Try one today, experiment with toppings, and make breakfast an occasion worth savoring. Don’t forget to share your favorite sourdough breakfast recipe in the comments!

No Title

February 20, 2025

Sara

5 Apple Breakfast Recipes You Must Try for a Healthy Morning Boost

There’s something about the crisp, sweet scent of apples in the morning that makes breakfast feel extra special. Whether you’re in need of a quick and energizing start or you’re looking for something a bit more indulgent, apple breakfast recipes are the perfect choice. Not only do apples provide a natural sweetness, but they’re also packed with fiber, vitamins, and antioxidants that help keep you fueled throughout the day.

In this article, you’ll discover five irresistible apple breakfast recipes that will have you excited to start your day. From hearty pancakes to simple smoothies, these recipes will not only satisfy your cravings but also provide the nutritional boost you need to feel your best. So, let’s dive into these delicious apple-packed morning meals!


Why Apple Breakfast Recipes Are Perfect for Your Morning

Apples are often seen as the quintessential breakfast fruit for good reason. They’re versatile, nutritious, and easy to incorporate into a variety of dishes. But what makes apple breakfast recipes particularly great?

  1. Healthy and Energizing
    Apples are naturally high in fiber, which is essential for digestion and helps keep you full longer. The antioxidants found in apples also help support your immune system, keeping you strong throughout the day. Incorporating apples into your breakfast gives you an energy boost without the sugar crash that comes with many processed breakfast options.
  2. Quick and Easy to Prepare
    Mornings can be busy, and sometimes you don’t have the time for a lengthy meal. Fortunately, apple breakfast recipes are typically simple and quick to prepare. Whether you’re making a batch of apple pancakes or whipping up a smoothie, these dishes can be ready in minutes, making them ideal for hectic mornings.
  3. Versatility in Every Meal
    Apples can be enjoyed in so many different ways, making them the perfect ingredient for nearly any breakfast. You can slice them into oatmeal, blend them into smoothies, or bake them into muffins or pancakes. No matter what your taste buds are craving, apples can be the star of your meal.

Apple Pancakes – A Delicious Classic

If you’re a fan of fluffy, sweet pancakes, you’re in for a treat with apple pancakes. This comforting breakfast dish combines the light texture of pancakes with the natural sweetness of apples, making it a crowd-pleaser for the whole family. Plus, apples bring an extra dose of fiber and vitamins, giving you a nourishing breakfast.

Ingredients for Apple Pancakes:

IngredientQuantity
Apples (chopped)2 medium
Pancake mix1 ½ cups
Milk1 cup
Eggs2 large
Cinnamon1 tsp

How to Make Apple Pancakes:

  1. In a bowl, combine the pancake mix, milk, eggs, and cinnamon. Mix until smooth.
  2. Gently fold in the chopped apples, making sure they’re evenly distributed throughout the batter.
  3. Heat a griddle or skillet over medium heat and lightly grease it with cooking spray or butter.
  4. Pour about ¼ cup of batter onto the griddle for each pancake. Cook until bubbles form on the surface, then flip and cook until golden brown on both sides.
  5. Serve the pancakes hot with a drizzle of maple syrup and a dusting of powdered sugar.

Why You’ll Love This Recipe:

  • Fiber-Rich: The apples add extra fiber, keeping you full longer and making these pancakes a satisfying breakfast.
  • Customizable: Feel free to add extras like chopped walnuts, raisins, or a splash of vanilla for extra flavor.

Apple Cinnamon Oatmeal – Warm and Comforting

On those chilly mornings, nothing hits the spot quite like a warm bowl of oatmeal. This apple cinnamon oatmeal recipe combines hearty oats with the delicious flavors of apple and cinnamon, making it the perfect comforting breakfast. It’s easy to make and can be customized to your liking.

Ingredients for Apple Cinnamon Oatmeal:

IngredientQuantity
Rolled oats1 cup
Apples (chopped)1 large
Cinnamon1 tsp
Brown sugar2 tbsp
Milk or almond milk1 ½ cups

How to Make Apple Cinnamon Oatmeal:

  1. In a saucepan, bring the milk (or almond milk) to a boil. Add the rolled oats and reduce the heat. Let the oats simmer for about 5 minutes, stirring occasionally.
  2. While the oats are cooking, sauté the chopped apples with cinnamon and brown sugar in a small pan over medium heat. Cook until the apples are tender and caramelized.
  3. Once the oats are cooked, stir in the apple mixture.
  4. Serve the oatmeal hot, topped with additional cinnamon or a drizzle of honey.

Why This Recipe Works:

  • Warm and Cozy: This dish is perfect for mornings when you want something hearty and comforting.
  • Fiber-Packed: Both the oats and apples provide a great source of fiber to keep you satisfied until your next meal.

Apple Breakfast Bake – A Family Favorite

If you’re looking for something that’s both delicious and easy to prepare in advance, an apple breakfast bake is the way to go. This recipe combines the natural sweetness of apples with oats and eggs, making it a wholesome option that can be baked in the morning or prepared the night before.

Ingredients for Apple Breakfast Bake:

IngredientQuantity
Apples (sliced)3 medium
Rolled oats1 cup
Brown sugar½ cup
Butter2 tbsp
Eggs2 large

How to Make Apple Breakfast Bake:

  1. Preheat the oven to 350°F (175°C).
  2. Layer the sliced apples in a baking dish. Top with rolled oats, brown sugar, and melted butter.
  3. In a separate bowl, whisk the eggs and pour them over the apple-oat mixture.
  4. Bake for 30-40 minutes, or until the top is golden brown and the apples are soft.
  5. Serve warm, topped with a dollop of Greek yogurt or a sprinkle of cinnamon.

Why You’ll Love This Recipe:

  • Make-Ahead Option: This bake can be prepared the night before and popped in the oven in the morning for a quick, fuss-free breakfast.
  • Customizable: You can easily add nuts, raisins, or seeds to the recipe for extra texture and flavor.

Apple Smoothie – A Quick, Energizing Breakfast

If you’re short on time but still want a healthy breakfast, an apple smoothie is the perfect solution. It’s refreshing, easy to make, and packed with nutrients that will keep you going throughout the day. You can even customize it with additional ingredients like greens or protein powder for an extra boost.

Ingredients for Apple Smoothie:

IngredientQuantity
Apples (peeled)2 small
Greek yogurt1 cup
Almond milk1 cup
Honey1 tbsp

How to Make Apple Smoothie:

  1. Add the peeled apples, Greek yogurt, almond milk, and honey into a blender.
  2. Blend until smooth and creamy.
  3. Pour the smoothie into a glass and serve chilled. Optionally, sprinkle some chia seeds or cinnamon on top for added flavor.

Why It’s Great:

  • Quick and Convenient: This smoothie takes less than 5 minutes to prepare, making it the perfect on-the-go breakfast.
  • Packed with Protein: Greek yogurt provides a solid protein boost to keep you feeling full longer.

Apple Toast with Nut Butter – A Simple, Nutritious Option

For those mornings when you want something simple but still nutritious, apple toast with nut butter is a great choice. It’s quick, easy to make, and offers a balanced combination of healthy fats, fiber, and protein.

Ingredients for Apple Toast with Nut Butter:

IngredientQuantity
Whole grain bread2 slices
Apple (sliced)1 small
Almond butter2 tbsp
Honey1 tsp

How to Make Apple Toast:

  1. Toast the slices of whole grain bread to your desired crispness.
  2. Spread almond butter on each slice of toast.
  3. Top with thinly sliced apples and drizzle with honey.

Why It’s Great:

  • Healthy Fats: Nut butter provides a healthy source of fat that helps keep you satisfied throughout the morning.
  • Quick and Tasty: This no-cook recipe is perfect for busy mornings when you want something nutritious but don’t have much time.

Conclusion

Apple breakfast recipes offer a variety of delicious and healthy options to kickstart your day. Whether you’re in the mood for pancakes, oatmeal, or a quick smoothie, these recipes are perfect for both busy mornings and relaxed weekend breakfasts. Apples not only provide natural sweetness but also deliver essential nutrients to fuel your body and support your overall health. Give these 5 apple breakfast recipes a try and enjoy a wholesome, tasty start to your day!

No Title

February 20, 2025

Sara

Top 5 Turkey Neck Recipes to Try Today: Delicious and Easy Ideas

Turkey necks are often seen as an underrated and overlooked part of the bird, but they offer rich flavors, tender meat, and endless possibilities for creating delicious meals. Whether you’re cooking for a special occasion or just looking to experiment with something new, turkey neck recipes can elevate your meal to a whole new level. If you’re ready to discover how to make the most of these flavorful cuts, you’ve come to the right place. In this article, we’ll explore the top 5 turkey neck recipes that you can try today—each one sure to impress your taste buds and feed your cravings.

A Comforting Tradition in Every Bite

Turkey necks hold a nostalgic place in many kitchens, often prepared for comfort, warmth, and to create unforgettable family memories. If you’re new to turkey necks or simply haven’t thought about them for a while, you might be surprised by how versatile they are. With their savory flavors and tender texture when cooked right, turkey necks offer a depth of taste that many other cuts of meat can’t match. From slow-cooked smothered turkey necks to hearty soups and stews, turkey necks are an ingredient you’ll want to keep on your radar.

Ready to try them out for yourself? Let’s dive into the top 5 turkey neck recipes to help you discover how this humble ingredient can transform your meals.


1. Smothered Turkey Necks with Gravy

A Classic Comfort Food

One of the most beloved turkey neck recipes, smothered turkey necks with gravy is a true comfort food classic. The turkey necks are slow-cooked until tender, then smothered in a rich, savory gravy that makes every bite irresistible. Perfect for family gatherings or when you need a hearty meal, this dish never disappoints.

Ingredients for Smothered Turkey Necks with Gravy:

IngredientQuantity
Turkey necks4 pieces
Onion1, chopped
Garlic3 cloves, minced
Flour2 tbsp
Chicken broth2 cups
SeasoningsTo taste

Prep Time: 10 minutes

Cook Time: 2 hours

Total Time: 2 hours 10 minutes

Instructions:

  1. Sear the turkey necks: Heat a little oil in a large skillet and sear the turkey necks on each side until golden brown. This helps lock in the flavors.
  2. Prepare the gravy: In the same skillet, sauté onions and garlic until softened. Add flour and cook for about a minute to form a roux. Gradually add chicken broth, whisking to combine until the gravy thickens.
  3. Slow cook: Return the turkey necks to the skillet, cover, and let them cook on low heat for about 2 hours. The slow cooking process ensures that the meat becomes tender and absorbs all the flavors of the gravy.
  4. Serve: Once the turkey necks are tender, serve them with mashed potatoes, rice, or collard greens for a complete meal.

2. Smoked Turkey Necks

Perfect for BBQ Lovers

If you’re a fan of smoky flavors, smoked turkey necks should be at the top of your list. This recipe brings out the deep, earthy taste of the turkey necks and combines it with a savory smoky profile that’s hard to resist. Whether you’re grilling or using a smoker, this method will add layers of flavor to your meal that are sure to impress.

Ingredients for Smoked Turkey Necks:

IngredientQuantity
Turkey necks4 pieces
Paprika2 tbsp
Garlic powder1 tbsp
Brown sugar1 tbsp
Apple cider vinegar1 tbsp

Prep Time: 15 minutes

Cook Time: 4-5 hours

Total Time: 4 hours 15 minutes

Instructions:

  1. Season the turkey necks: In a small bowl, mix paprika, garlic powder, brown sugar, and apple cider vinegar. Rub this seasoning mixture all over the turkey necks.
  2. Prepare the smoker: Set up your smoker with wood chips for flavor. You can use hickory or applewood for a distinct smoky taste.
  3. Smoke the turkey necks: Place the turkey necks in the smoker and cook for 4-5 hours, or until the meat is tender and slightly crispy on the outside.
  4. Serve: Smoked turkey necks are perfect as a main dish or served alongside other BBQ favorites like cornbread, beans, or mac and cheese.

3. Turkey Neck Soup

Hearty, Soul-Warming Comfort

If you’re looking for a dish that’s both comforting and nutritious, turkey neck soup is an excellent choice. Packed with vegetables, herbs, and a rich broth, this soup provides warmth and nourishment in every spoonful. It’s the perfect dish for chilly evenings or when you need something hearty to feed a crowd.

Ingredients for Turkey Neck Soup:

IngredientQuantity
Turkey necks4 pieces
Carrots2, chopped
Celery2 stalks, chopped
Onion1, chopped
Chicken stock4 cups

Prep Time: 10 minutes

Cook Time: 1.5 hours

Total Time: 1 hour 40 minutes

Instructions:

  1. Boil the turkey necks: In a large pot, add turkey necks and enough water to cover them. Bring to a boil and let it simmer for 1 hour to create a flavorful broth.
  2. Add the vegetables: Add carrots, celery, and onions to the pot. Continue to simmer for another 30 minutes until the vegetables are tender and the flavors have melded together.
  3. Season: Taste and add salt, pepper, or other seasonings as needed.
  4. Serve: Serve the turkey neck soup hot, alongside crusty bread or crackers.

4. Braised Turkey Necks with Vegetables

A Simple, One-Pot Meal

For a low-effort, flavorful meal, braised turkey necks with vegetables is a fantastic option. This dish requires minimal prep and cooking time, yet the end result is a hearty, filling meal that will satisfy your cravings. The turkey necks are braised in a rich broth until they are perfectly tender and infused with the flavors of the vegetables.

Ingredients for Braised Turkey Necks with Vegetables:

IngredientQuantity
Turkey necks4 pieces
Potatoes2, cubed
Carrots2, sliced
Onion1, chopped
Beef broth2 cups

Prep Time: 10 minutes

Cook Time: 2 hours

Total Time: 2 hours 10 minutes

Instructions:

  1. Brown the turkey necks: In a large skillet, brown the turkey necks on all sides.
  2. Add vegetables and broth: Transfer the turkey necks to a slow cooker, add potatoes, carrots, onions, and beef broth.
  3. Braised cook: Cover and cook on low for about 2 hours, or until the meat is fork-tender.
  4. Serve: Serve the braised turkey necks with the vegetables and the delicious broth.

5. Turkey Neck Stew with Okra

Southern Comfort in a Bowl

Turkey neck stew with okra is a perfect example of Southern comfort food at its finest. The addition of okra gives the stew a delightful texture and a mild earthy flavor, while the turkey necks provide rich, savory meat. This stew is a filling meal that’s best served with rice or cornbread.

Ingredients for Turkey Neck Stew with Okra:

IngredientQuantity
Turkey necks4 pieces
Okra1 cup, sliced
Tomatoes2, chopped
Garlic3 cloves, minced
Chicken broth4 cups

Prep Time: 15 minutes

Cook Time: 1.5 hours

Total Time: 1 hour 45 minutes

Instructions:

  1. Sear the turkey necks: In a large pot, sear the turkey necks until golden brown.
  2. Add vegetables and broth: Add garlic, chopped tomatoes, okra, and chicken broth to the pot. Stir to combine.
  3. Simmer: Bring the stew to a boil, then reduce to a simmer and cook for 1.5 hours, or until the turkey necks are tender and the stew has thickened.
  4. Serve: Serve the stew hot, over rice or alongside cornbread for a complete meal.

Conclusion: Why You Should Try Turkey Neck Recipes Today

Turkey necks are often underappreciated in the world of cooking, but as these five recipes show, they have the potential to be transformed into mouth-watering meals. From the rich, hearty flavors of smothered turkey necks to the smoky goodness of turkey necks cooked on the grill, there’s no limit to what you can create with this versatile cut of meat. Whether you’re cooking for yourself or for a crowd, these turkey neck recipes are sure to become a staple in your kitchen.

So why wait? Try one of these recipes today and enjoy a satisfying, flavorful meal that will make turkey necks your new favorite ingredient!

No Title

February 20, 2025

Sara

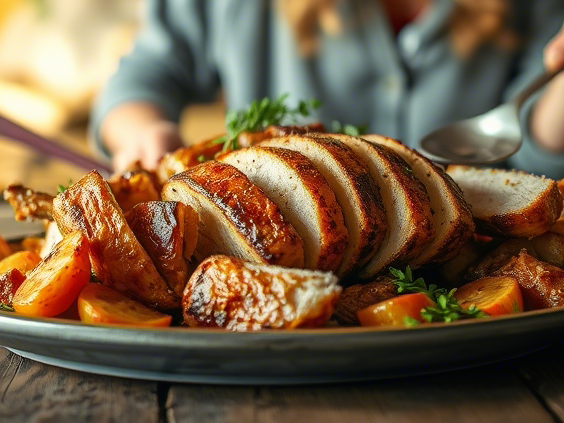
Easy Cajun Turkey Recipe with Bold Spice Rub – A Flavorful Feast

Introduction: The Secret to a Perfect Cajun Turkey

There’s nothing quite like the rich, smoky aroma of a Cajun turkey roasting in the oven. Whether you’re preparing for Thanksgiving, a family gathering, or just craving a flavorful meal, this recipe delivers a bold taste with minimal effort. You won’t need an injection to achieve juicy perfection—our spice rub does all the work. Get ready to impress your guests with a turkey that’s packed with Louisiana-inspired flavors and a perfectly crispy skin.

Why You’ll Love This Easy Cajun Turkey Recipe

  • Bursting with Flavor – A blend of bold spices gives the turkey a deep, smoky taste.
  • No Injection Required – Save time while still getting a juicy, tender bird.
  • Perfect for Any Occasion – Ideal for holidays, Sunday dinners, or meal prep.
  • Beginner-Friendly – Simple steps make it easy for anyone to follow.

Cajun Turkey Recipe Overview

Prep TimeCook TimeTotal TimeServings
15 minutes3 hours3 hours 15 minutes8-10 people

Ingredients for the Best Cajun Turkey Spice Rub

Dry Spice Rub Ingredients

  • 2 tbsp smoked paprika
  • 1 tbsp garlic powder
  • 1 tbsp onion powder
  • 1 tbsp cayenne pepper (adjust for spice level)
  • 1 tbsp dried thyme
  • 1 tbsp dried oregano
  • 1 tbsp black pepper
  • 1 tbsp salt
  • 1 tbsp brown sugar

Turkey & Other Ingredients

  • 1 whole turkey (12-14 lbs)
  • ¼ cup olive oil or melted butter
  • 1 lemon (sliced)
  • 4 garlic cloves (crushed)
  • 1 onion (quartered)

Step-by-Step Instructions to Make Cajun Turkey

Step 1: Preparing the Turkey

  • Thaw the turkey completely in the refrigerator (allow 24 hours per 5 pounds).
  • Remove giblets and pat the turkey dry with paper towels.
  • Let the turkey sit at room temperature for about 30 minutes before seasoning.

Step 2: Applying the Cajun Spice Rub

  • In a bowl, mix all the spice rub ingredients.
  • Rub the turkey with olive oil or melted butter to help the seasoning adhere.
  • Coat the turkey inside and out with the Cajun spice rub, ensuring even coverage.

Step 3: Stuffing & Trussing the Turkey

  • Place lemon slices, onion, and garlic inside the turkey cavity.
  • Tie the legs together using kitchen twine and tuck the wings under.

Step 4: Roasting the Cajun Turkey

  • Preheat oven to 325°F (165°C).
  • Place the turkey breast-side up on a roasting rack in a pan.
  • Roast uncovered for 13-15 minutes per pound.
  • Baste with pan juices every 45 minutes.
  • Cover loosely with foil if it browns too quickly.

Step 5: Checking for Doneness

  • Insert a meat thermometer into the thickest part of the thigh (without touching bone).
  • The turkey is done when the internal temperature reaches 165°F (75°C).
  • Remove from the oven and let rest for 20-30 minutes before carving.

Tips for the Best Cajun Turkey

  • Use a fresh turkey for the juiciest results.
  • Prepare the spice rub in advance to enhance flavor.
  • For crispier skin, roast uncovered during the last 30 minutes.
  • Baste with butter or broth for extra moisture.

Serving Suggestions & Side Dishes

  • Classic Pairings: Mashed potatoes, cornbread, green beans.
  • Cajun-Inspired: Dirty rice, jambalaya, spicy mac & cheese.
  • Sauce Options: Cajun gravy, spicy aioli, or a garlic butter drizzle.

Frequently Asked Questions (FAQ)

How do you keep Cajun turkey from drying out?

  • Basting every 45 minutes and letting it rest before carving helps retain moisture.

Can I use a Cajun injection for turkey instead of a dry rub?

  • Yes! A blend of melted butter, garlic, and Cajun spices makes a great injection.

What’s the best wood for smoking Cajun turkey?

  • Hickory, mesquite, or pecan wood adds a rich, smoky flavor.

Conclusion: Your Perfect Cajun Turkey Awaits!

Now that you have everything you need, it’s time to bring bold Louisiana flavors to your kitchen. Whether you’re hosting a big holiday meal or simply craving something different, this easy Cajun turkey recipe delivers unbeatable taste with minimal effort. Try it out and let us know how it turned out! Bookmark this recipe and impress your guests with a mouthwatering Cajun turkey!

No Title

February 20, 2025

Sara

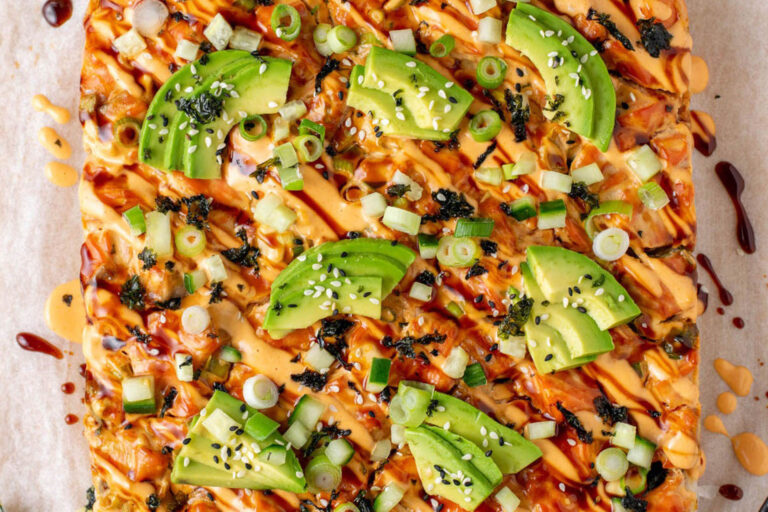
Easy Sushi Salmon Bake: Quick & Delicious Recipe for Busy Weeknights

Imagine walking into your kitchen after a long day, craving something comforting, yet packed with flavor. What if you could enjoy a sushi-inspired meal without the hassle of rolling delicate sushi pieces or spending hours in the kitchen? Enter the easy sushi salmon bake—a quick and delicious recipe that brings the flavors of sushi into a simple, baked dish. This recipe is perfect for those busy weeknights when you crave something flavorful, filling, and easy to make.

In this article, you’ll learn everything you need to know about creating a sushi salmon bake that’s sure to become a family favorite. From the ingredients to the step-by-step process, we’ve got you covered. Whether you’re a seasoned home cook or a beginner in the kitchen, this recipe will guide you to sushi bliss with minimal effort.

What is Sushi Salmon Bake?

The sushi salmon bake is a modern twist on traditional sushi. Instead of rolling the sushi into tight, delicate rolls, you combine the best parts of sushi—fluffy rice, rich salmon, creamy mayonnaise, and a dash of spice—into a casserole-like dish that’s baked until golden and bubbly. This dish allows you to enjoy the delicious, umami-packed flavors of sushi without all the work of sushi rolling.

What makes it even better? The ease! You don’t need a sushi mat, intricate techniques, or any special equipment. Just bake, top, and enjoy! Whether you’re new to sushi or a longtime fan, this simple recipe is sure to please.

Why You’ll Love This Easy Sushi Salmon Bake Recipe

Here are just a few reasons why this easy sushi salmon bake will quickly become your go-to recipe:

  • Quick & Simple: You don’t need to be a sushi expert to make this dish. The recipe is straightforward and easy to follow.
  • Family-Friendly: Even if you have picky eaters, this recipe is flexible and allows you to adjust the heat level or ingredients to suit everyone’s tastes.
  • Comforting: The combination of warm, seasoned rice and tender salmon baked to perfection creates a comforting, filling meal that everyone will love.
  • Versatile: Whether you prefer a bit of spice or something milder, this recipe is easily customizable. Add more sriracha for heat, or omit the avocado for a lighter version.
  • Perfect for Leftovers: This sushi bake tastes just as good the next day, making it an ideal dish for meal prep or lunch leftovers.

Ingredients You’ll Need for the Sushi Salmon Bake

Before you get started, let’s take a look at the key ingredients for the sushi salmon bake. The good news? Most of these items are easy to find at your local grocery store.

Table: Ingredients List

IngredientQuantityNotes
Sushi rice2 cupsCooked and cooled
Fresh salmon fillets1 lbSkinless, boneless
Mayonnaise½ cupFor creaminess
Sriracha1-2 tbspAdjust to taste
Soy sauce1 tbspOptional for flavor
Avocado (optional)1Sliced, for garnish
Nori sheets (seaweed)4 sheetsCut into strips
Furikake seasoning2 tbspOptional, for topping

These ingredients are simple yet essential to achieving the right balance of flavors in your sushi salmon bake. If you’re missing any, substitutions are always possible (more on that later). Just ensure the rice is cooked and cooled properly before assembling the dish.

How to Make the Easy Sushi Salmon Bake

Now that you have everything you need, let’s dive into the process of making the easy sushi salmon bake. Don’t worry—it’s much simpler than it sounds. Follow these steps, and you’ll be savoring this delightful dish in no time.

Step 1: Prepare the Rice

The foundation of any sushi dish is the rice. For this recipe, you’ll need 2 cups of sushi rice. Sushi rice is a short-grain rice that has the right amount of stickiness to hold everything together. Follow these steps:

  1. Rinse the rice under cold water to remove excess starch.
  2. Cook the rice according to package instructions.
  3. Once cooked, let the rice cool to room temperature. This will prevent it from getting too mushy when baking.

Pro Tip: Add a tablespoon of rice vinegar and a pinch of sugar to your cooled rice for the authentic sushi flavor. This gives it the slightly tangy, sweet undertones that sushi rice is known for.

Step 2: Make the Salmon Mixture

While the rice cools, it’s time to prepare the salmon. Here’s how to do it:

  1. Cook the salmon: You can either bake, grill, or pan-sear the salmon. If you’re baking it, simply season the salmon with a pinch of salt and bake it at 375°F for about 15-20 minutes until fully cooked. Once it’s cooked, flake it into small pieces with a fork.
  2. Mix the salmon: In a bowl, combine the flaked salmon with ½ cup mayonnaise, 1-2 tablespoons sriracha (adjust the heat level to your liking), and 1 tablespoon soy sauce. This creamy and spicy mixture is what gives the dish its rich flavor.

Step 3: Assemble the Sushi Bake

Now comes the fun part! The assembly is easy, and this is where the magic happens. Here’s what you need to do:

  1. Preheat the oven to 375°F (190°C).
  2. Spread the rice: In a baking dish, evenly spread the cooled sushi rice. Make sure it covers the bottom of the dish.
  3. Add the salmon mixture: Spoon the salmon mixture over the rice, spreading it out evenly.
  4. Bake: Place the dish in the oven and bake for 20-25 minutes or until the top is golden brown and bubbly.

Step 4: Final Touches

Once your sushi salmon bake is out of the oven, it’s time to add the finishing touches:

  1. Garnish: Top the bake with sliced avocado for a creamy, fresh addition.
  2. Nori strips: Cut nori sheets into strips and sprinkle them on top for that familiar sushi crunch and flavor.
  3. Furikake seasoning: If you have furikake seasoning, sprinkle it over the top for an added layer of umami.

Serve hot, and enjoy the fruits of your labor!

Tips for the Perfect Sushi Salmon Bake

To ensure your sushi salmon bake turns out perfectly, here are a few helpful tips:

  • Use fresh salmon: Fresh, high-quality salmon will give your dish the best flavor and texture. If you can, buy wild-caught salmon for superior taste.
  • Don’t overcook the salmon: Overcooked salmon can become dry and tough. Keep an eye on it while baking.
  • Customize the spice level: If you love heat, add more sriracha to the salmon mixture. If you prefer something milder, adjust or omit the sriracha.
  • Let it rest: After baking, let the dish sit for a few minutes before serving. This helps the flavors to meld together.

Common Questions About Sushi Salmon Bake

Let’s address some of the most frequently asked questions about making the easy sushi salmon bake.

Can I make this sushi bake ahead of time?

Yes! You can prepare the sushi salmon bake up to a day ahead of time. Simply assemble it and refrigerate it until you’re ready to bake. You may need to bake it a little longer if it’s coming straight from the fridge.

Can I use other types of fish?

Absolutely! While the recipe calls for salmon, you can substitute it with tuna, shrimp, or even crab. Each variation will bring its own unique flavor to the dish.

What can I serve with sushi salmon bake?

The options are endless! You can serve your sushi salmon bake with a simple miso soup, a crisp salad, or some pickled vegetables to balance out the richness of the dish.

Table: Cooking Time Overview

Prep TimeCook TimeTotal Time
15 minutes20 minutes35 minutes

Conclusion

The easy sushi salmon bake is the ultimate dish for anyone craving the delicious flavors of sushi without the time or effort required for traditional sushi rolling. It’s quick, customizable, and perfect for any night of the week. With a few simple ingredients, you can create a comforting, flavorful meal that will have your family or guests coming back for more.

So what are you waiting for? Gather your ingredients, preheat your oven, and get ready to enjoy a sushi-inspired dish that’s as quick as it is delicious. You won’t regret it!

No Title

February 20, 2025

Sara

How to Smoke Salmon: Perfect Smoked Salmon Brine & Temp Guide

Imagine sitting down at your kitchen table, surrounded by the rich, savory aroma of freshly smoked salmon. Whether you’re a seasoned chef or a complete beginner, learning how to smoke salmon at home can elevate your cooking skills and delight your taste buds. It’s a technique that may seem complex at first, but with the right brine and a little patience, you can enjoy perfectly smoked salmon every time.

In this comprehensive guide, we will walk you through the entire process—from preparing the perfect smoked salmon brine to mastering the ideal smoking temperature. By the end, you’ll have all the tools and knowledge to create mouthwatering smoked salmon in your own kitchen.

What Is Smoked Salmon and Why It’s Worth Learning?

Smoked salmon is a delicacy that’s often associated with gourmet meals and sophisticated dinner parties. It’s a simple, yet flavorful dish that can be enjoyed in various ways—whether served on bagels, in salads, or as a main course. Smoking salmon involves infusing it with smoky flavors while preserving its delicate texture.

Learning how to smoke salmon at home offers numerous benefits. Not only does it allow you to control the flavors, but it also gives you the satisfaction of creating a gourmet dish from scratch. It’s a skill that’s both practical and impressive, making it well worth the time and effort.

Benefits of Smoking Salmon at Home

  1. Control Over Flavor: When you smoke your own salmon, you have complete control over the flavor profile. Whether you like it sweet and mild or bold and savory, you can adjust your brine and wood chips to create your perfect smoked salmon.
  2. Cost-Effective: Buying smoked salmon from the store can be pricey, especially when you want high-quality options. Smoking your own salmon is a more affordable alternative, allowing you to enjoy the same delicious flavors at a fraction of the cost.
  3. Satisfaction of Homemade Creations: There’s a sense of accomplishment in preparing a gourmet meal at home. Smoking salmon is a process that can be as rewarding as it is delicious.

The Importance of the Perfect Smoked Salmon Brine

At the heart of every great smoked salmon lies a perfect brine. A brine is a solution of water, salt, and other ingredients that helps to infuse flavor into the fish while keeping it moist during the smoking process. Without the right brine, your salmon may turn out dry or lack the depth of flavor you’re aiming for.

What Is Smoked Salmon Brine?

Smoked salmon brine serves as a marinade for the fish. The salt in the brine draws out moisture from the salmon, and as it’s reabsorbed, it helps to season the fish throughout. The sugar in the brine helps to balance the saltiness and creates a nice, caramelized exterior when smoked.

Key Ingredients in a Smoked Salmon Brine

The foundation of any good smoked salmon brine consists of a few basic ingredients:

  • Salt: Essential for both flavor and preservation, salt is the key ingredient in any brine. It draws moisture from the salmon, which then reabsorbs the brine and infuses it with flavor.
  • Sugar: Adds sweetness and balances the saltiness, while also helping to create that golden crust on the fish.
  • Water: Acts as the base for the brine, allowing all the ingredients to dissolve.
  • Herbs and Spices: Optional ingredients such as dill, pepper, garlic, or citrus zest can be added for extra flavor. These ingredients infuse the salmon with aromatic qualities that elevate its taste.

Step-by-Step Guide to Making Smoked Salmon Brine

Making your own brine is simple. Here’s how you can create a flavorful brine that will make your salmon shine.

Smoked Salmon Brine Recipe
Prep Time: 10 minutes
Total Time: 2 hours (to brine)
Cook Time: N/A

IngredientQuantity
Water4 cups
Salt½ cup
Sugar¼ cup
Fresh Herbs2 tbsp

Instructions:

  1. Combine the water, salt, and sugar in a large bowl or container. Stir until the salt and sugar dissolve completely.
  2. Add your herbs (dill, thyme, or any of your favorites). Let the brine steep for about 10 minutes to infuse the flavors.
  3. Submerge your salmon fillets in the brine, making sure they are fully covered. Let them sit in the brine for 2 hours in the refrigerator.

How to Smoke Salmon: The Perfect Brine & Temp Guide

Now that you’ve prepared your smoked salmon brine, it’s time to focus on smoking the fish. Smoking salmon is a delicate process that requires the right temperature and timing to get that perfect smoky flavor and texture.

How Long to Smoke Salmon

The length of time you smoke your salmon depends on the thickness of the fillets and the temperature at which you’re smoking it. As a general guideline, you’ll want to smoke salmon for 2 to 4 hours.

  • Thin fillets: 2-3 hours
  • Thicker fillets: 3-4 hours

It’s important to monitor the internal temperature of the salmon during the smoking process to ensure it’s cooked to perfection.

What Temperature Is Ideal for Smoked Salmon?

The ideal smoking temperature for salmon is between 180°F and 225°F. Low and slow is the key to achieving perfectly smoked salmon. Smoking at a lower temperature allows the fish to cook gently, maintaining its moisture and tenderness while allowing the smoky flavor to infuse the fish.

Low and Slow vs. Quick and Hot – Which Works Best?

While quick, high-temperature smoking can work for certain cuts of meat, smoking salmon low and slow is the best method. Here’s why:

  • Low and Slow: This method results in tender, flaky salmon with a rich smoky flavor.
  • Quick and Hot: While this method can be faster, it can dry out the fish and produce less flavor depth.

For the best results, aim for that sweet spot of 180°F to 225°F.


Additional Tips for Smoking Salmon Like a Pro

To take your smoked salmon to the next level, here are some additional tips and tricks:

Using Wood Chips for Flavor

Wood chips play a crucial role in adding flavor to your smoked salmon. Choose wood chips that complement the natural taste of the fish:

  • Alder wood: A popular choice for salmon, it provides a mild and slightly sweet flavor.
  • Applewood: Offers a fruity and slightly sweet flavor.
  • Cherrywood: Adds a rich, sweet flavor with a touch of fruitiness.

Soak your wood chips in water for at least 30 minutes before using them in your smoker. This prevents them from burning too quickly and allows them to release their smoky aroma over time.

How to Check for Doneness

The key to perfectly smoked salmon is ensuring that it reaches the correct internal temperature. Use a meat thermometer to check the fish’s internal temperature—it should read 145°F when fully cooked. If you don’t have a thermometer, you can also check for doneness by gently flaking the salmon with a fork. If the flesh easily separates, your salmon is ready.


Smoked Salmon Recipe: Try It for Yourself!

Now that you have all the knowledge to make the perfect smoked salmon, it’s time to try your hand at a full recipe. Here’s a simple yet flavorful recipe you can follow:

Smoked Salmon Recipe with Ingredients Table

IngredientQuantity
Fresh Salmon2 lbs
Smoked Salmon Brine2 cups
Wood Chips (Applewood)1 cup

Instructions

StepAction
1Prepare the brine and allow the salmon to marinate for 2 hours.
2Preheat your smoker to 225°F.
3Place the salmon in the smoker and smoke for 2-4 hours, depending on thickness.
4Check for doneness using a thermometer or fork. Once the salmon flakes easily, remove it from the smoker.

FAQ – Your Smoked Salmon Brine & Temp Questions Answered

Can I Use a Store-Bought Smoked Salmon Brine?

Yes, you can use a store-bought brine, but making your own gives you full control over the flavors. Homemade brines are customizable, allowing you to adjust the sweetness, saltiness, and herbs to your liking.

What Is the Best Wood for Smoking Salmon?

Alderwood is the most popular wood choice for smoking salmon, providing a mild and slightly sweet flavor. Other great options include applewood and cherrywood.

How Do I Know If My Smoked Salmon Is Done?

The most reliable way to check if your smoked salmon is done is by using a meat thermometer. The internal temperature should reach 145°F. Alternatively, you can use a fork to check for flakiness—if the fish flakes easily, it’s ready to serve.


Conclusion: Mastering Smoked Salmon at Home

Smoking salmon at home is a rewarding experience that allows you to craft a gourmet dish tailored to your taste. With the right brine, smoking temperature, and wood chips, you’ll be able to enjoy delicious, flavorful smoked salmon that will impress your friends and family. Whether you’re making it for a special occasion or just for your own enjoyment, smoking salmon is a skill worth mastering.

Now it’s time to roll up your sleeves, fire up the smoker, and get started. Happy smoking!

No Title

February 20, 2025

Sara

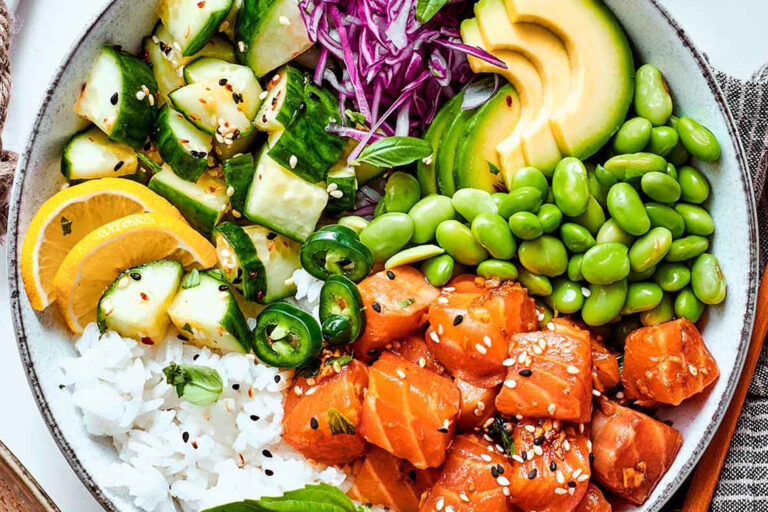
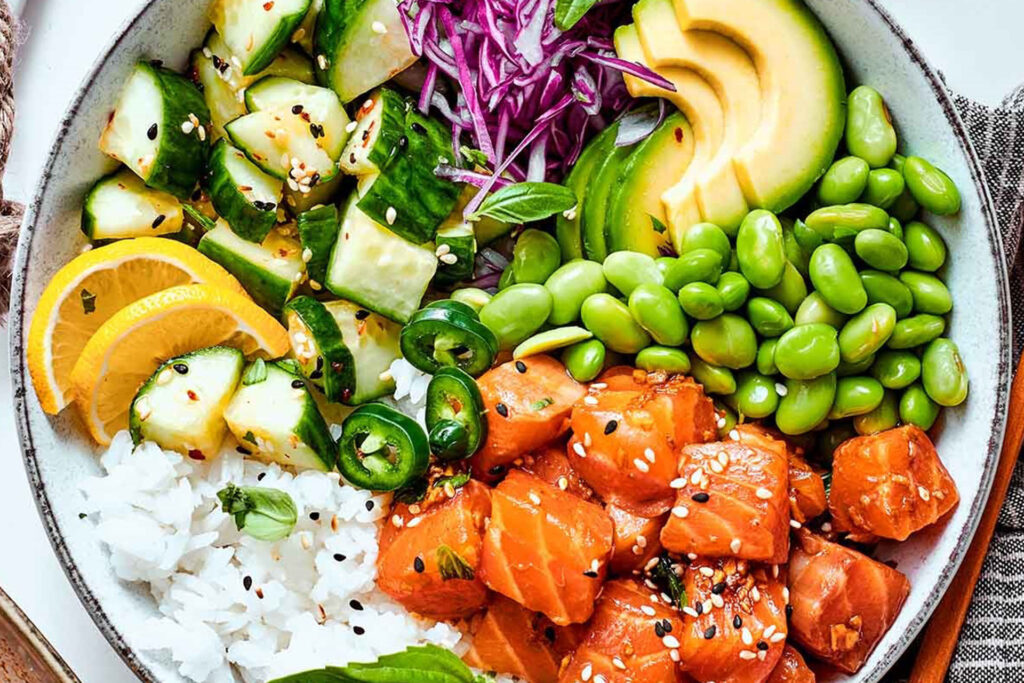
How to Make a Salmon Poke Bowl in 10 Minutes: A Quick, Tasty, and Nutritious Meal


Imagine this: after a long day, you want something fresh, satisfying, and healthy, but you don’t have hours to spend in the kitchen. Enter the salmon poke bowl—a vibrant, delicious, and incredibly nutritious dish that you can make in just 10 minutes. Packed with protein, healthy fats, and fiber, this bowl has everything you need for a satisfying meal. Whether you’re new to poke or a seasoned fan, you’ll love how easy and customizable this dish can be. Let’s dive into the details of how you can prepare your own salmon poke bowl in no time.


What is a Salmon Poke Bowl?

A salmon poke bowl is a modern twist on a traditional Hawaiian dish, where fresh, raw fish is paired with rice, vegetables, and various seasonings. Poke (pronounced “poh-kay”) means “to slice” or “to cut crosswise into pieces” in Hawaiian, which is exactly what you’ll do with your fresh salmon. It’s typically served with a base of rice (like sushi rice or brown rice), topped with fish and various fresh toppings like avocado, cucumber, seaweed, and even pickled ginger.

The beauty of a salmon poke bowl is that it’s versatile—there’s no wrong way to build it. You can make it as light and simple as you like, or as indulgent and filling as you desire. Plus, it’s a healthy meal option that doesn’t compromise on taste or freshness.


Ingredients You’ll Need for a Quick Salmon Poke Bowl

To create your salmon poke bowl, you’ll need a few simple ingredients. These are easy to find at your local grocery store, and you might even have some of them in your kitchen already! Here’s a list of the basics:

IngredientQuantity
Fresh salmon (sashimi-grade)1/2 lb
Sushi rice (or brown rice)1 cup
Soy sauce (or tamari)2 tbsp
Sesame oil1 tbsp
Avocado, sliced1/2
Cucumber, thinly sliced1/2
Scallions, chopped2 tbsp
Seaweed salad (optional)1/4 cup
Sesame seeds1 tsp
Pickled ginger (optional)1 tbsp
Sriracha mayo (optional)1 tbsp

Quick Substitutions:

  • Rice options: If you’re not a fan of sushi rice, you can use brown rice for a healthier twist or even cauliflower rice for a low-carb option.
  • Vegan version: For a plant-based version, swap the salmon with tofu, tempeh, or chickpeas.
  • Additional toppings: Feel free to get creative with your toppings—try adding edamame, shredded carrots, radishes, or even a sprinkle of chili flakes for some heat.

How to Prepare the Ingredients in 10 Minutes

With the right ingredients on hand, it’s time to start assembling your salmon poke bowl. Follow these easy steps, and you’ll have a restaurant-quality meal ready in less than 10 minutes.

1. Cook the Rice (or Use Pre-Cooked Rice)

Start by preparing the rice. If you’re using sushi rice, you can cook it on the stovetop or in a rice cooker. If you’re in a hurry, you can opt for pre-cooked rice—just warm it up in the microwave, and you’re good to go.

2. Prepare the Salmon

Next, you’ll need to slice your fresh, sashimi-grade salmon into bite-sized cubes. Make sure to choose the freshest fish available, as it’s the star of the dish. If you’re unsure, look for “sashimi-grade” or “sushi-grade” on the label—this indicates that the fish is safe to eat raw.

3. Prepare the Vegetables

Now, slice your vegetables. Cut the avocado into thin slices, peel and slice the cucumber, and chop the scallions. These veggies not only add flavor and crunch, but they also bring color and texture to your poke bowl.

4. Assemble the Bowl

It’s time to put everything together! Start by placing a generous serving of rice at the bottom of your bowl. Then, layer your salmon on top, followed by the avocado, cucumber, and scallions. Feel free to pile on the seaweed salad or any other optional toppings.

5. Add the Sauce and Garnishes

Drizzle the soy sauce and sesame oil over your poke bowl. For extra flavor, you can add a bit of pickled ginger, sesame seeds, or sriracha mayo. The beauty of a salmon poke bowl is how you can adjust it to your personal taste.


Quick Tips for the Perfect Salmon Poke Bowl

While making a salmon poke bowl is simple, there are a few tips that can take your bowl to the next level.

1. Use Fresh, High-Quality Salmon

Since poke bowls are made with raw fish, it’s crucial to use the freshest salmon possible. Always look for sashimi-grade fish, which has been handled with care to ensure it’s safe to eat raw.

2. Experiment with Toppings

The fun part of making a poke bowl is experimenting with different toppings. Try adding things like edamame, radishes, or even a handful of crispy fried onions for a fun crunch. The possibilities are endless!

3. Balance Your Flavors

To create a truly satisfying poke bowl, balance the different flavors—salty, sweet, savory, and spicy. The soy sauce adds a salty umami flavor, while the avocado brings creaminess. Pickled ginger and sriracha mayo add a nice kick, while sesame oil rounds it all out with nuttiness.

4. Customize It for Your Diet

The salmon poke bowl can be easily customized to fit different dietary preferences. For a low-carb option, try substituting the rice with cauliflower rice. For a vegetarian poke bowl, use tofu or tempeh instead of salmon. The beauty of poke is that it can be tailored to fit your lifestyle.


Salmon Poke Bowl Recipe – Step-by-Step Guide

Now that you know how to prepare all the ingredients, it’s time for the recipe. Here’s a quick, step-by-step guide:

  1. Cook the rice (or warm pre-cooked rice).
  2. Cube the salmon into bite-sized pieces.
  3. Slice the avocado, cucumber, and scallions.
  4. Assemble the bowl: Start with a bed of rice, then layer on the salmon, avocado, cucumber, and scallions.
  5. Drizzle with soy sauce and sesame oil, and add any optional toppings.
  6. Garnish with sesame seeds, pickled ginger, or sriracha mayo.

And that’s it! You’ve got yourself a salmon poke bowl in 10 minutes.


Nutritional Benefits of a Salmon Poke Bowl

A salmon poke bowl isn’t just delicious; it’s also packed with health benefits. Here’s a quick look at some of the nutritional perks of the ingredients you’re using:

  • Salmon: Rich in omega-3 fatty acids, which are great for heart health and reducing inflammation. It’s also a fantastic source of protein, helping you stay full longer.
  • Avocado: Full of healthy fats and fiber, avocados support digestion and provide a creamy texture to your poke bowl.
  • Cucumber: Low in calories but high in water content, cucumbers help with hydration and add a refreshing crunch.
  • Soy Sauce and Sesame Oil: These ingredients provide depth of flavor and are packed with antioxidants and healthy fats.

Together, these ingredients make for a balanced meal that is not only delicious but also nourishing for your body.


Conclusion: Enjoy Your Homemade Salmon Poke Bowl in Just 10 Minutes!

Now that you know exactly how to make a salmon poke bowl in 10 minutes, there’s no reason not to try it yourself! Whether you’re looking for a quick meal after a busy day or want to impress your friends with your culinary skills, this dish is sure to satisfy. It’s healthy, customizable, and packed with flavor. Plus, you can easily make it your own with different toppings and variations.

Ready to make your own salmon poke bowl? Gather your ingredients, follow the steps, and enjoy a tasty, nutritious meal in just minutes. Your body (and taste buds) will thank you.


FAQ Section

Q1: Can I use frozen salmon for a poke bowl?
A1: While it’s recommended to use fresh, sashimi-grade salmon for the best flavor and safety, you can use frozen salmon if it’s been properly thawed. Just make sure it’s safe for raw consumption.

Q2: How can I make a salmon poke bowl vegan?
A2: Swap the salmon for tofu, tempeh, or chickpeas, and load up your poke bowl with more veggies like carrots, radishes, and avocado.

Q3: Can I prepare a salmon poke bowl ahead of time?
A3: While the salmon is best fresh, you can prepare the rice and veggies ahead of time. Just assemble the bowl and add the salmon and sauce when you’re ready to eat.

No Title

February 20, 2025

Sara

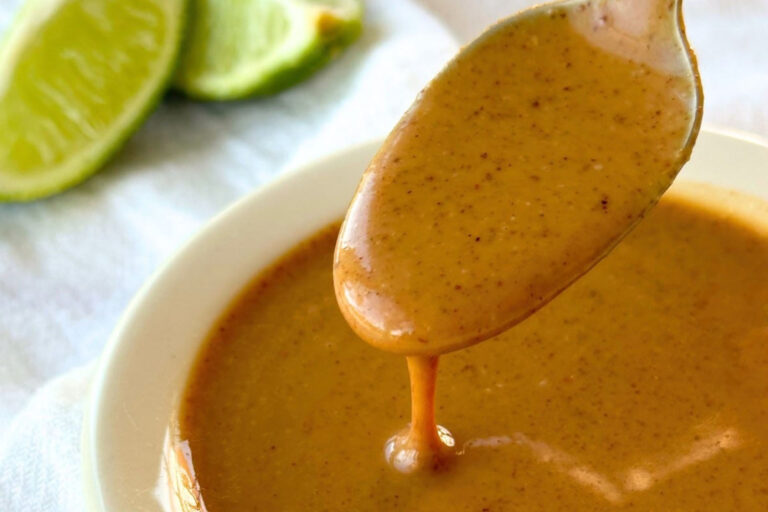
Spicy & Smooth Thai Almond Dressing Recipe – A Flavorful Almond Sauce Recipe

Introduction: A Bold, Irresistible Dressing for Every Dish

Have you ever wanted to take your meals from ordinary to extraordinary with just one simple sauce? If so, this Spicy & Smooth Thai Almond Dressing is exactly what you need. Bursting with bold flavors, this creamy almond sauce blends nuttiness, spice, and a hint of sweetness to create an irresistible dressing. Whether you drizzle it over salads, use it as a dip, or toss it with noodles, this sauce will add a deliciously unique twist to any dish. Best of all, it’s quick and easy to make, requiring only a handful of pantry staples.

Ready to elevate your culinary game? Let’s dive into this mouthwatering almond sauce recipe that will become a staple in your kitchen!

Recipe Overview

Prep TimeCook TimeTotal TimeServings
5 minutes0 minutes5 minutes4 servings

Why You’ll Love This Almond Sauce Recipe

  • Healthy & Nutritious – Packed with protein, healthy fats, and essential vitamins.
  • Quick & Easy – Ready in just 5 minutes with simple ingredients.
  • Versatile – Perfect as a dressing, dip, or marinade.
  • Bold Thai Flavors – A perfect balance of nuttiness, spice, and sweetness.

Ingredients for Spicy & Smooth Thai Almond Dressing

Essential Ingredients

IngredientQuantity
Almond butter¼ cup
Soy sauce (or tamari)2 tbsp
Lime juice1 tbsp
Maple syrup (or honey)1 tbsp
Garlic (minced)1 clove
Sriracha (or chili paste)1 tsp
Sesame oil1 tsp
Water (adjust consistency)2-3 tbsp

Optional Add-ins for Extra Flavor

  • Ginger – Adds warmth and depth.
  • Coconut milk – For a creamier texture.
  • Fish sauce – For an authentic Thai umami kick.

How to Make Thai Almond Sauce (Step-by-Step)

Step 1 – Mix the Ingredients

In a medium-sized bowl, combine almond butter, soy sauce, lime juice, and maple syrup. Whisk together until smooth.

Step 2 – Add Spice & Balance the Flavors

Stir in minced garlic, sriracha, and sesame oil for a bold kick. Adjust the spice level based on your preference.

Step 3 – Adjust Consistency

Slowly add water while whisking until you achieve the desired thickness. A thicker consistency works great for dips, while a thinner version is perfect for dressings.

Step 4 – Taste & Adjust

Taste your sauce and tweak as needed. If it’s too salty, add more lime juice; too spicy, add more almond butter; not sweet enough, a little more maple syrup should do the trick.


Best Ways to Use Thai Almond Dressing

  • 🥗 Salad Dressing – Drizzle over greens or Thai-inspired salads.
  • 🍜 Noodle Sauce – Toss with rice noodles for a creamy, flavorful dish.
  • 🌯 Dip for Spring Rolls – Pair with fresh rolls or raw veggies.
  • 🥢 Marinade for Proteins – Perfect for tofu, shrimp, or grilled meats.

Expert Tips for the Best Almond Sauce Recipe

Choosing the Right Almond Butter

  • Opt for natural almond butter without added sugar or oils to maintain a pure, nutty taste.

Adjusting Spice Levels

  • Mild: Reduce sriracha and add more lime juice.
  • Extra Spicy: Add chili flakes or Thai bird’s eye chili.

How to Store & Preserve

  • Fridge: Store in an airtight container for up to 1 week.
  • Freezer: Freeze in small portions for up to 3 months.

FAQ – Your Almond Sauce Recipe Questions Answered

Can I use peanut butter instead of almond butter?

Yes! Peanut butter works well, but it will have a stronger, distinct flavor.

How do I make this sauce gluten-free?

Use tamari or coconut aminos instead of soy sauce.

What if my sauce is too thick?

Simply add more water, lime juice, or coconut milk and whisk until smooth.

Can I make this sauce ahead of time?

Absolutely! It actually tastes better after a few hours as the flavors meld.


Conclusion – Try This Spicy & Smooth Thai Almond Sauce Today!

This Spicy & Smooth Thai Almond Dressing is a game-changer for anyone who loves bold flavors and healthy, easy-to-make condiments. With its nutty richness, spicy kick, and hint of sweetness, this versatile sauce enhances everything from salads to noodles and beyond. Whether you’re meal-prepping for the week or looking for a last-minute flavor boost, this dressing will not disappoint.

Try it today and let us know how you use it! If you love this recipe, share it with friends and explore new ways to incorporate it into your meals. 🍽️🥜🔥

No Title

February 20, 2025

Sara