Author

Sara

Browsing

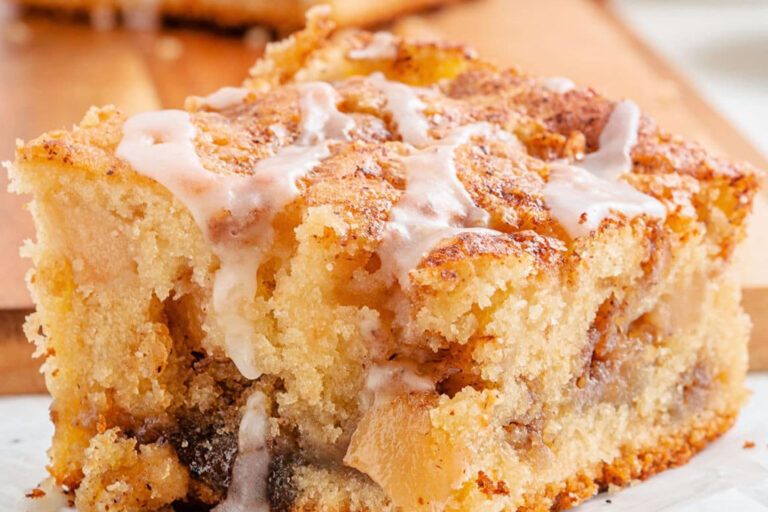
Apple Coffee Cake: A Cozy Fall Favorite You Can’t Miss

The crisp autumn air, the golden hue of leaves falling from trees, and the warm embrace of cinnamon and apple. There’s no better way to celebrate the fall season than with a freshly baked apple cinnamon coffee cake. Imagine yourself in your kitchen, the comforting scent of sweet apples and spices filling the air as your cake bakes to perfection. This apple coffee cake is more than just a recipe; it’s a way to bring comfort, joy, and a touch of homemade goodness into your life.

Whether you’re hosting a cozy brunch, preparing for a family gathering, or simply indulging in a personal treat, this easy-to-make apple cinnamon coffee cake is sure to become your new fall favorite. Let’s walk through everything you need to know about making the perfect apple coffee cake.


Why Apple Cinnamon Coffee Cake Is the Ultimate Fall Treat

There’s something about apple cinnamon coffee cake that just feels like autumn. The marriage of warm, spiced apples and the light, fluffy texture of coffee cake is truly unbeatable. As the seasons change and the days become cooler, we start to crave comforting, warm treats—and apple cinnamon coffee cake fits that craving perfectly.

This cake’s flavor combination makes it ideal for the fall season. Whether you enjoy it with your morning coffee or serve it at your next get-together, apple cinnamon coffee cake brings a sense of warmth and nostalgia. It’s not only delicious, but also incredibly versatile. From its moist texture to the delightful crunch of cinnamon streusel, it’s the perfect balance of sweetness and spice.


Key Ingredients for a Delicious Apple Cinnamon Coffee Cake

Before you get started, let’s gather the ingredients for your apple coffee cake. The beauty of this recipe lies in its simplicity—most of these ingredients are staples you likely already have in your pantry. Here’s what you’ll need:

Table: Ingredients

IngredientQuantity
Apples (Granny Smith, Fuji, or Gala)3 medium-sized, peeled, cored, and diced
All-purpose flour2 ½ cups
Granulated sugar1 cup
Brown sugar½ cup
Baking powder1 ½ teaspoons
Ground cinnamon2 teaspoons
Salt½ teaspoon
Butter½ cup (1 stick)
Eggs2 large
Sour cream1 cup
Vanilla extract1 teaspoon
Optional: Walnuts or Pecans½ cup (chopped)

These simple yet flavorful ingredients come together to create a cake that will fill your home with irresistible aromas. By using fresh apples, your cake will have the perfect texture and flavor.


Step-by-Step Recipe: How to Make Apple Cinnamon Coffee Cake

Now that you’ve gathered everything you need, it’s time to get started! Follow these simple steps to bake your apple cinnamon coffee cake.

1. Preheat Your Oven and Prepare Your Pan

Start by preheating your oven to 350°F (175°C). Then, grease and flour a 9-inch round or square cake pan. You can also line the bottom of the pan with parchment paper to ensure easy removal once the cake is baked.

2. Prepare the Apple Cinnamon Filling

In a small bowl, mix together ½ cup of granulated sugar and 1 teaspoon of ground cinnamon. Set aside. This will be the cinnamon-sugar filling that you’ll layer into the cake.

3. Make the Batter

In a medium-sized bowl, whisk together the all-purpose flour, baking powder, salt, and remaining ½ cup of granulated sugar. Set this dry mixture aside.

In a separate large bowl, beat the butter until smooth and creamy. Add the eggs, one at a time, beating well after each addition. Stir in the sour cream and vanilla extract, ensuring that everything is well combined.

Slowly add the dry flour mixture into the wet ingredients, mixing until just combined. Be careful not to overmix the batter to avoid a dense cake.

4. Layer the Cake

Now comes the fun part—layering the cake! Pour half of the batter into your prepared pan. Spread it out evenly. Next, sprinkle half of the cinnamon-sugar mixture and half of the chopped apples over the batter. Add the remaining batter on top, then sprinkle the rest of the cinnamon-sugar mixture and apples.

5. Bake the Cake

Bake your cake in the preheated oven for about 45 minutes, or until a toothpick inserted into the center comes out clean. The top should be golden and slightly firm to the touch.

6. Let It Cool

Allow the cake to cool in the pan for about 10 minutes. Then, remove it from the pan and let it cool completely on a wire rack.


Recipe Table – Prep, Cook, and Total Time

Prep TimeCook TimeTotal TimeYield
15 minutes45 minutes1 hour8-10 servings

This simple recipe allows you to spend less time in the kitchen and more time enjoying the fruits of your labor. With only 1 hour total, you can easily whip this up for any occasion.


Tips for the Perfect Apple Coffee Cake Every Time

While this recipe is straightforward, a few helpful tips can ensure your apple cinnamon coffee cake turns out perfectly every time.

Use Fresh Apples

The key to a great apple coffee cake is using fresh apples. Granny Smith apples work well because they are tart and hold their shape during baking. However, you can also use Fuji or Gala apples for a sweeter flavor.

Don’t Overmix the Batter

To ensure a light, fluffy texture, avoid overmixing the batter. Mix just until the dry and wet ingredients are incorporated to prevent a dense cake.

Add a Streusel Topping for Extra Crunch

For an extra crunch, you can top the cake with a streusel topping made from butter, brown sugar, flour, and cinnamon. This adds a delightful contrast to the soft, moist cake.


Customizing Your Apple Cinnamon Coffee Cake

While the classic apple cinnamon flavor is always a winner, you can experiment with different variations to make the recipe your own.

Add a Glaze or Frosting

For a sweeter touch, consider drizzling a glaze or frosting over your cake. A simple powdered sugar glaze or cream cheese frosting can elevate the cake and add another layer of flavor.

Experiment with Different Apple Varieties

Different apples bring different flavors to the cake. While tart apples like Granny Smith give a nice contrast to the sweetness of the cake, you can experiment with sweet apples like Gala or Golden Delicious for a different twist.

Try Adding Nuts

For an added crunch, try incorporating walnuts or pecans into the batter. This will give your cake a nice texture and complement the sweetness of the apples.


Why You’ll Love This Apple Cinnamon Coffee Cake Recipe

This apple cinnamon coffee cake recipe is not just a seasonal treat—it’s something you’ll want to make year-round. Here’s why:

Easy to Make

With a straightforward recipe and common ingredients, this cake comes together in no time. You don’t need to be a professional baker to create something impressive.

Perfect for Sharing

Whether you’re bringing it to a brunch gathering, a potluck, or enjoying it with your family at home, this apple coffee cake is perfect for sharing. Its comforting flavors are sure to please everyone.

Ideal for Fall (But Delicious All Year)

While it’s especially delightful during the fall season, this cake is delicious at any time of year. The warm cinnamon and apples are a timeless combination that will bring joy whenever you make it.


Apple Cinnamon Coffee Cake FAQ

Can I Use a Different Type of Apple for This Recipe?

Yes! Granny Smith apples are tart and hold up well in baking, but feel free to experiment with Fuji or Gala apples for a sweeter taste.

How Can I Make This Recipe Gluten-Free?

You can substitute the all-purpose flour with a gluten-free flour blend that’s designed for baking. Make sure the other ingredients are gluten-free as well.

Can I Make This Coffee Cake Ahead of Time?

Absolutely! This coffee cake can be baked a day in advance and stored in an airtight container at room temperature. It actually becomes even more flavorful the next day.

Can I Freeze This Cake?

Yes! You can freeze the cake for up to 2 months. Just be sure to wrap it tightly in plastic wrap and aluminum foil before freezing. When you’re ready to enjoy it, thaw at room temperature.


Conclusion

Apple cinnamon coffee cake isn’t just a fall treat—it’s a cozy, comforting experience that brings people together. Whether you’re baking it for a special occasion or just because you want something warm and delicious to enjoy with your morning coffee, this recipe will surely become a staple in your kitchen. So, why wait? Gather your ingredients and bake up this perfect fall favorite today. Trust us, your taste buds will thank you!

Now, it’s your turn. Will you make this delicious apple cinnamon coffee cake? Let us know how it turns out! Share your experience in the comments below or tag us on social media to show off your creation. Happy baking!

No Title

February 20, 2025

Sara

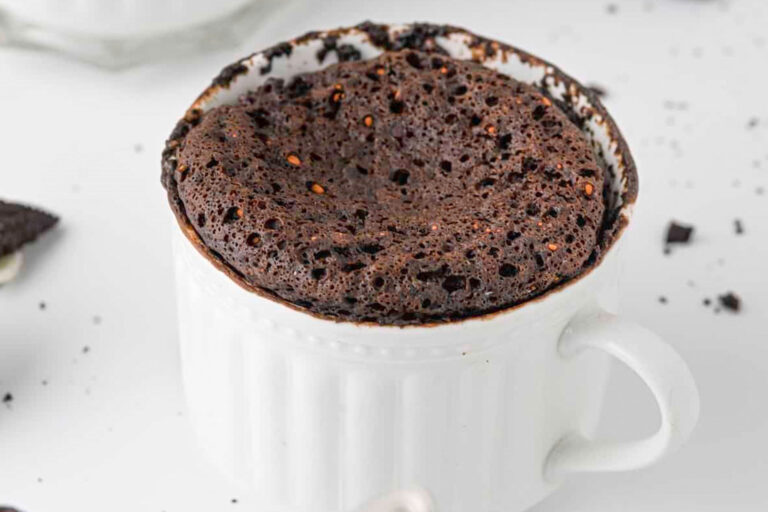
The Ultimate Guide to Making Oreo Mug Cake in 5 Minutes

There’s nothing quite like the warm, gooey satisfaction of a freshly baked dessert—especially when it’s made in just five minutes! If you’re craving something sweet but don’t have the time or energy to bake a full cake, an Oreo mug cake is the answer to your prayers. You get the indulgence of a rich chocolate treat without all the hassle. In this article, we’ll show you how to make an Oreo mug cake in just 5 minutes, along with tips, tricks, and everything you need to know to make the best mug cake possible.


What is an Oreo Mug Cake?

An Oreo mug cake is exactly what it sounds like: a quick and easy dessert made in a mug using Oreos as the main ingredient. It’s the perfect solution when you need something sweet in a hurry. The magic behind a mug cake is its microwave cooking method, which allows you to whip up a warm dessert in just minutes. You only need a handful of ingredients, and the result is a deliciously moist cake with the rich flavor of Oreos.

Oreo mug cakes have become incredibly popular for several reasons:

  1. Speed: They take just 5 minutes to make, which is ideal for busy people or those who want a quick sweet treat.
  2. Minimal Ingredients: You don’t need an elaborate list of ingredients—just a few pantry staples and some Oreos.
  3. Customization: You can add different flavors, toppings, or fillings to suit your tastes.
  4. Portion Control: Because you make it in a mug, you can enjoy a single serving without worrying about leftovers.

How to Make Oreo Mug Cake in 5 Minutes: A Step-by-Step Guide

Ready to create your own Oreo mug cake? Follow these simple steps to enjoy a decadent treat in just 5 minutes.

Ingredients You’ll Need

Here’s the list of ingredients you’ll need for the classic Oreo mug cake recipe:

  • 4-6 Oreos – Choose your favorite variety, but regular Oreos work best.
  • 3-4 tablespoons milk – You can use any kind of milk you prefer (whole, almond, or oat milk all work well).
  • 1/4 teaspoon baking powder – This helps the cake rise and become fluffy.
  • Optional toppings – Ice cream, whipped cream, or chocolate syrup for added indulgence.

Easy 5-Minute Instructions

  1. Crush the Oreos: Place the Oreos into a ziplock bag or use a spoon to break them up into smaller pieces. This step ensures that the cookies melt into the batter evenly and create a smooth texture.
  2. Mix Ingredients in a Mug: Place the crushed Oreos into a microwave-safe mug. Add 3 tablespoons of milk and the baking powder. Stir until the mixture is fully combined and has a batter-like consistency.
  3. Microwave: Microwave your mug cake on high for 1 to 2 minutes. Start by microwaving for 1 minute, and then check the cake. If it’s still wet in the middle, microwave for an additional 20-30 seconds. Every microwave is different, so keep an eye on it!
  4. Serve and Enjoy: Let the mug cake cool for a minute or two, and then top it off with your favorite toppings. You can add whipped cream, a scoop of ice cream, or some chocolate syrup for an extra indulgent treat.

Recipe Ingredients & Quantities

IngredientQuantity
Oreos4-6 cookies
Milk3-4 tbsp
Baking Powder1/4 tsp
Optional ToppingsWhipped cream, Ice cream, Chocolate syrup

Prep Time & Cooking Time

TaskTime
Prep Time1 minute
Cook Time1-2 minutes
Total Time5 minutes

Tips for the Best Oreo Mug Cake

To ensure your Oreo mug cake turns out perfectly every time, here are some helpful tips:

  • Choose the Right Mug: Use a microwave-safe mug that holds at least 8 ounces. This gives the batter enough room to rise without overflowing.
  • Don’t Overfill Your Mug: Leave some space at the top of the mug to allow for the cake to rise without spilling over.
  • Use Fresh Oreos: If your Oreos are stale, the cake might not have the same rich, chocolatey taste. Fresh Oreos yield a better flavor and texture.
  • Adjust Microwave Time: Depending on the wattage of your microwave, the cooking time may vary. Start by microwaving for 1 minute, and then check the cake. If it’s not set, heat for 20-30 seconds more.

Common Mistakes to Avoid When Making Oreo Mug Cake

While Oreo mug cakes are easy to make, there are a few common mistakes that can affect the result. Here’s how to avoid them:

  • Using Too Much Milk: This can make your cake soggy rather than light and fluffy. Stick to the recommended 3-4 tablespoons of milk.
  • Overcooking: Overcooking your mug cake can make it dry. Always check it after the first minute, and microwave in small increments to ensure you don’t overdo it.
  • Not Crushing Oreos Enough: You want the Oreos to break down well so they combine evenly with the other ingredients. If they’re not crushed enough, the texture may be lumpy.

Frequently Asked Questions (FAQ)

Can I make an Oreo Mug Cake without a microwave?

Yes, you can! If you don’t have a microwave, you can bake your mug cake in the oven at 350°F (175°C) for about 10 minutes. The texture may be slightly different, but it will still taste amazing.

How can I make my Oreo Mug Cake fluffier?

For a fluffier cake, add a pinch of baking powder or baking soda. This will help your cake rise and give it a light texture. You can also try using buttermilk for a slightly different flavor and fluffier consistency.

What’s the best way to store leftover Oreo Mug Cake?

While it’s best enjoyed fresh, you can store any leftovers in an airtight container for up to 1-2 days. Reheat in the microwave for about 20-30 seconds before eating.

Absolutely! You can experiment with other cookies like chocolate chip, peanut butter, or even a mix of your favorites. The process is the same, just substitute the cookies.


Conclusion: Indulge in Your 5-Minute Oreo Mug Cake Today!

Making an Oreo mug cake is one of the quickest and easiest ways to satisfy your sweet tooth. In just 5 minutes, you can enjoy a warm, gooey, and indulgent treat that tastes just like a homemade dessert. Whether you’re craving a quick snack or need a last-minute dessert for guests, this Oreo mug cake is the perfect solution.

Don’t wait—grab your Oreos and make your own mug cake today! Try experimenting with different toppings or mix-ins to create your signature dessert. With only a few ingredients and a microwave, you can have a decadent treat whenever the mood strikes. So go ahead, enjoy your delicious Oreo mug cake!

No Title

February 20, 2025

Sara

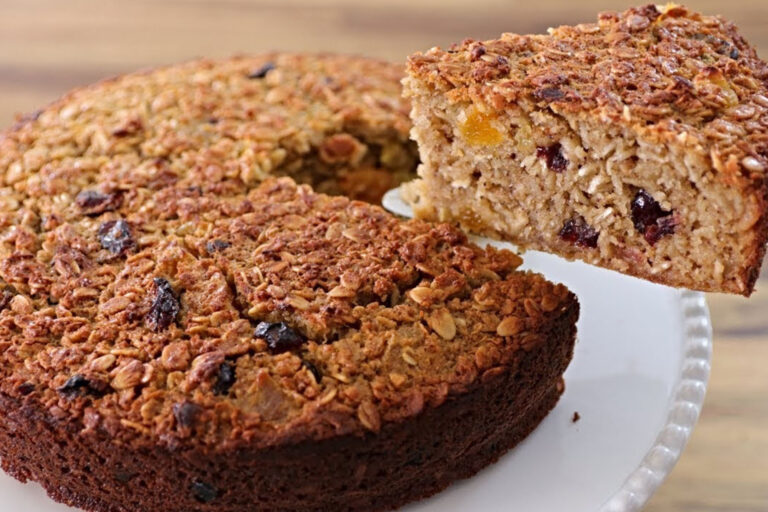
Oatmeal Cake Recipe Easy: A Sweet & Nutty Delight with Coconut Pecan Frosting

There’s something undeniably comforting about the warm, inviting aroma of freshly baked oatmeal cake. It’s a dessert that not only satisfies your sweet tooth but also offers a delightful texture and flavor, making it the perfect choice for any occasion. This oatmeal cake recipe is not only incredibly easy to make, but it also combines the sweetness of coconut and pecans in the frosting, creating a sweet and nutty delight that will leave everyone asking for seconds. If you’re ready to impress with a moist, flavorful cake, keep reading to learn how you can easily recreate this classic treat in your own kitchen.

A Nostalgic Treat for Every Occasion

If you’ve ever had a slice of oatmeal cake, you know exactly why it’s so beloved by many. Whether you’re baking for a special event or simply want to treat yourself to something indulgent, this oatmeal cake with coconut pecan frosting provides the perfect balance of moistness and texture, with just the right amount of sweetness. The combination of the hearty oats and the rich, creamy frosting creates an unforgettable experience that’s sure to remind you of those cozy moments spent around the table with family and friends.

Imagine taking that first bite—the light crunch of the toasted pecans, the smooth, velvety coconut frosting, and the moist, slightly spiced oatmeal cake beneath. It’s a comfort food that never goes out of style and will quickly become a staple in your dessert repertoire.

What Makes Oatmeal Cake So Special?

Overview of Oatmeal Cake

Oatmeal cake is a unique dessert that stands apart from traditional cakes due to its incorporation of oats into the batter. The oats give the cake a chewy, hearty texture that you can’t find in other cakes. The simple, yet flavorful ingredients combine perfectly to create a dessert that’s rich but not overwhelmingly sweet, making it an ideal choice for those who prefer a more subtle sweetness.

Unlike most cakes that rely on butter or oil for moisture, oatmeal cake gets its moisture from ingredients like milk, eggs, and the oats themselves, resulting in a texture that’s tender yet slightly dense. It’s the kind of cake that’s both satisfying and light, making it perfect for any season or occasion.

Benefits of Oatmeal in Baking

Not only does oatmeal add a unique texture to the cake, but it also brings several health benefits. Oats are high in soluble fiber, which is great for your digestion and can help lower cholesterol. Adding oats to your cake means you’re making a dessert that’s a little bit healthier than your typical treat.

The fiber in oats also helps the cake maintain its moisture, ensuring each slice is soft and tender. Plus, the natural oat flavor complements the rich, nutty frosting beautifully.

Why Coconut Pecan Frosting?

What truly takes this oatmeal cake to the next level is the coconut pecan frosting. The frosting adds a creamy, nutty finish that contrasts perfectly with the moist texture of the cake. Coconut, with its tropical sweetness, blends beautifully with the pecans, which bring a satisfying crunch and earthy flavor.

The combination of the two not only creates a decadent topping but also offers an additional layer of texture and flavor that elevates the cake to something truly special. Whether you’re serving this cake at a family gathering or enjoying it as a solo treat, the coconut pecan frosting is sure to impress.

How to Make Oatmeal Cake with Coconut Pecan Frosting

Now that you know why oatmeal cake is so irresistible, let’s get into the details of how you can make this delicious dessert in your own kitchen. This oatmeal cake recipe is simple to follow and doesn’t require any specialized baking skills. Just a few basic ingredients and a little time is all you need to create this sweet and nutty delight.

Ingredients

Let’s start by gathering the ingredients. You’ll need the following:

IngredientsAmount
Rolled Oats1 cup
All-Purpose Flour1 cup
Baking Powder1 tsp
Brown Sugar1 cup
Eggs2
Milk1/2 cup
Shredded Coconut1 cup
Chopped Pecans1/2 cup
Butter (melted)1/2 cup

Instructions

Follow these simple steps to create your oatmeal cake with coconut pecan frosting:

  1. Preheat the Oven
    Preheat your oven to 350°F (175°C) and grease a 9×9-inch baking pan or line it with parchment paper.
  2. Prepare the Cake Batter
    In a medium bowl, combine the rolled oats, all-purpose flour, baking powder, and brown sugar. In a separate bowl, whisk together the eggs and milk. Gradually add the wet ingredients to the dry ingredients and stir until the batter is well combined.
  3. Bake the Cake
    Pour the batter into the prepared pan and spread it evenly. Bake in the preheated oven for about 30 minutes, or until a toothpick inserted into the center comes out clean. Let the cake cool completely before frosting.
  4. Prepare the Frosting
    While the cake is cooling, melt the butter in a saucepan over medium heat. Add the shredded coconut and chopped pecans. Stir constantly until the mixture is heated through and slightly golden. Remove from heat and let it cool for a few minutes before spreading it over the cooled cake.
  5. Frost the Cake
    Once the cake is completely cool, spread the coconut pecan frosting evenly over the top, making sure to cover the entire surface. Slice and serve!

Tips for Perfect Oatmeal Cake Every Time

Choosing the Right Oats

For the best texture in your oatmeal cake, it’s essential to use rolled oats, also known as old-fashioned oats. These oats hold their shape during baking and contribute to the cake’s hearty, chewy texture. Instant oats or quick oats may not work as well because they tend to break down more during baking, which can affect the cake’s consistency.

How to Get a Moist Cake

Achieving a moist cake comes down to a few key techniques:

  • Don’t Overmix: Once you combine the wet and dry ingredients, stir just until everything is incorporated. Overmixing can lead to a dense and dry cake.
  • Watch the Baking Time: Keep a close eye on the cake as it bakes. Test for doneness by inserting a toothpick into the center. If it comes out clean, your cake is ready.
  • Let the Cake Cool: Allow your cake to cool completely before frosting. This will ensure that the frosting doesn’t melt into the cake, giving you a beautiful finish.

Storing and Freezing Your Cake

If you have leftovers or want to prepare the cake ahead of time, you can store it:

  • At Room Temperature: Store the cake in an airtight container for up to 3 days.
  • In the Freezer: For longer storage, wrap the cake tightly in plastic wrap and foil and freeze for up to 2 months.

Customizing Your Oatmeal Cake

One of the best things about this oatmeal cake recipe is how versatile it is. Feel free to customize it to your taste by experimenting with different add-ins or frostings.

Alternative Frosting Ideas

If you’re not a fan of coconut pecan frosting, there are plenty of other frosting options you can try. A rich chocolate frosting, tangy cream cheese frosting, or even a simple vanilla glaze would all pair wonderfully with the oatmeal cake.

Mix-ins for Extra Flavor

Add more flavor and texture to your cake by mixing in ingredients like:

  • Dried Fruit: Raisins, cranberries, or chopped dates add a fruity sweetness.
  • Nuts: If you prefer a different nut, try walnuts or almonds instead of pecans.
  • Chocolate Chips: For an extra indulgent treat, fold in some chocolate chips for a decadent twist.

A Sweet & Nutty Delight You’ll Want to Make Again and Again

This oatmeal cake with coconut pecan frosting is a dessert that’s not only easy to make but also packed with flavor and texture. Whether you’re looking for a comforting treat or something to impress your guests, this cake delivers on both fronts. The combination of hearty oats, rich frosting, and the perfect balance of sweetness makes it a dessert you’ll want to bake time and time again.

Don’t wait—gather your ingredients, preheat that oven, and enjoy a slice of this sweet and nutty delight today!


Frequently Asked Questions

1. Can I make oatmeal cake without the coconut pecan frosting?

Yes! You can certainly enjoy the oatmeal cake without the frosting, or swap it for a different frosting of your choice, like chocolate or vanilla.

2. How do I store leftover oatmeal cake?

Store leftover oatmeal cake in an airtight container at room temperature for up to 3 days. For longer storage, wrap it tightly and freeze for up to 2 months.

3. Can I use instant oats for this recipe?

While you can use instant oats in a pinch, rolled oats provide the best texture and are recommended for this recipe.

4. Can I make this recipe gluten-free?

Yes, you can easily make this oatmeal cake gluten-free by swapping the all-purpose flour for a gluten-free flour blend.


Ready to try this easy oatmeal cake recipe? Get baking and enjoy the sweet, nutty goodness today!

No Title

February 20, 2025

Sara

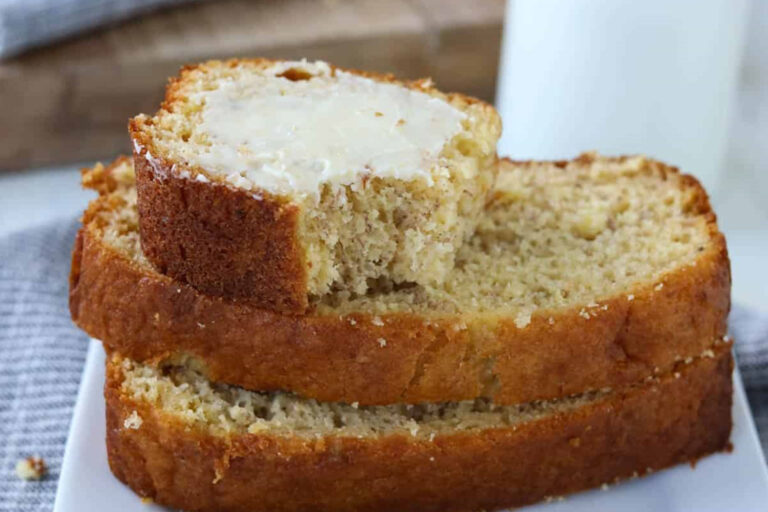
Easy Cake Mix Banana Bread Recipe – Just 3 Ingredients!

There’s something undeniably comforting about the smell of freshly baked banana bread wafting through your kitchen. But what if you’re craving that delicious loaf without all the complicated steps? The great news is you can create an incredibly moist and fluffy banana bread using just three simple ingredients with a cake mix! Yes, you read that right. No complex baking techniques, just an easy, quick, and fuss-free recipe that delivers fantastic results every time.

So, whether you’re an experienced baker or someone just starting in the kitchen, this easy cake mix banana bread recipe is perfect for you. Let’s dive into this time-saving, flavor-packed recipe!


Why You’ll Love This Easy Cake Mix Banana Bread Recipe

When it comes to baking, the process should feel rewarding, not overwhelming. This recipe cuts out all the fuss and gets you straight to what matters: enjoying a moist, sweet banana bread. Here’s why you’ll love it:

  • Quick & Simple: You don’t need to be a pro baker to make this recipe. With just three ingredients, you can have banana bread ready in no time.
  • Perfect for Beginners: If you’ve never baked before, this is the perfect recipe to try. No complicated steps, just mix and bake!
  • Moist & Delicious: Cake mix naturally creates a soft and flavorful texture, making this banana bread a real treat.

By using cake mix banana bread, you’ll experience all the deliciousness of homemade banana bread with a fraction of the effort!


Ingredients for Cake Mix Banana Bread

You won’t need to run out and buy a ton of specialty ingredients for this recipe. Everything you need is probably already in your pantry. Here’s a quick look at the essentials:

IngredientQuantity
Yellow cake mix1 box (15.25 oz)
Ripe bananas3 medium bananas
Eggs2 large eggs

Cake Mix

Choose a standard yellow cake mix for the best results. It’s the perfect base for banana bread, providing structure and a moist crumb. If you like to experiment, you can also try other cake mixes, but the classic yellow will always be your best bet for flavor and texture.

Bananas

The key to banana bread is ripe bananas. The riper they are, the sweeter and more flavorful your bread will turn out. Look for bananas with plenty of brown spots; they’ll bring out that rich, natural banana flavor you’re craving.

Eggs

Eggs help bind the ingredients together and add moisture to the bread. They’re essential for the structure of the loaf and for that soft, delicious texture.


Step-by-Step Instructions for Cake Mix Banana Bread

Here’s where the magic happens! Follow these simple steps, and you’ll have a fresh loaf of banana bread cooling on your counter in just under an hour.

Prep Time and Cooking Time

Prep Time10 minutes
Cook Time50-55 minutes
Total Time1 hour

How to Make Cake Mix Banana Bread

  1. Preheat the Oven:
    Start by preheating your oven to 350°F (175°C). While your oven warms up, you’ll have plenty of time to prepare the batter.
  2. Mash the Bananas:
    In a medium-sized bowl, peel and mash your ripe bananas. Use a fork or potato masher to break them down until smooth, with just a few small lumps. This is where the flavor really starts to come together.
  3. Mix the Ingredients:
    Add the two eggs to the mashed bananas and stir to combine. Then, pour in the yellow cake mix and stir until everything is fully incorporated. You’ll have a thick, smooth batter that smells amazing.
  4. Prepare the Pan:
    Grease a loaf pan with butter or cooking spray to prevent the banana bread from sticking. If you prefer, you can line the pan with parchment paper for easy removal.
  5. Pour the Batter:
    Pour the batter into the prepared loaf pan, spreading it evenly across the bottom.
  6. Bake:
    Place the loaf pan in the oven and bake for 50-55 minutes. To check if it’s done, insert a toothpick into the center of the bread. If it comes out clean or with just a few crumbs, your bread is ready!
  7. Cool:
    Let the banana bread cool in the pan for about 10 minutes. Then, transfer it to a wire rack to cool completely. Slice and enjoy!

Tips for Perfect Cake Mix Banana Bread

While this recipe is super simple, a few extra tips will ensure your banana bread turns out perfect every time.

  • Banana Ripeness: The riper your bananas, the better the bread. Overripe bananas are full of natural sweetness, which is the key to flavorful banana bread.
  • Greasing the Pan: Don’t skip this step! Greasing the loaf pan ensures your banana bread won’t stick, making it easier to remove once it’s done baking.
  • Add-Ins: Want to make your banana bread even more exciting? Add chocolate chips, walnuts, or cinnamon for extra flavor. These are optional but can elevate the taste and texture.
  • Storage: If you don’t finish the loaf in one sitting (though we doubt that’ll happen!), you can store your banana bread in an airtight container at room temperature for up to 3 days. It also freezes well—just wrap it tightly and store it for up to 3 months.

Frequently Asked Questions (FAQs)

Can I use other cake mixes for banana bread?

Absolutely! While yellow cake mix is the traditional choice, you can experiment with white cake mix or even spice cake mix for a different flavor profile. Spice cake mix adds a warm, comforting touch to the banana bread.

How can I make this banana bread gluten-free?

If you need a gluten-free version, simply substitute the yellow cake mix with a gluten-free cake mix. Be sure to check that all your other ingredients are also gluten-free, and you’ll have a delicious gluten-free loaf!

Can I freeze this banana bread?

Yes, this banana bread freezes wonderfully! After it’s completely cool, wrap it tightly in plastic wrap or foil and store it in the freezer for up to 3 months. When you’re ready to eat it, just let it thaw at room temperature or reheat it in the oven.

How do I know when the banana bread is done?

The toothpick test is your best friend! Insert a toothpick into the center of the loaf—if it comes out clean or with just a few crumbs, your bread is done. If it’s still wet, give it a few more minutes in the oven.


Conclusion

There’s no need to stress over complicated banana bread recipes anymore. This easy cake mix banana bread recipe is a game-changer. With just three ingredients, you can whip up a moist, flavorful loaf that’s sure to impress. Whether you’re a seasoned baker or a newbie, this simple recipe offers big rewards without the hassle.

So, the next time you have some ripe bananas on hand, don’t hesitate—grab a box of cake mix and start baking. You’ll be enjoying a warm, homemade treat in no time!

No Title

February 20, 2025

Sara

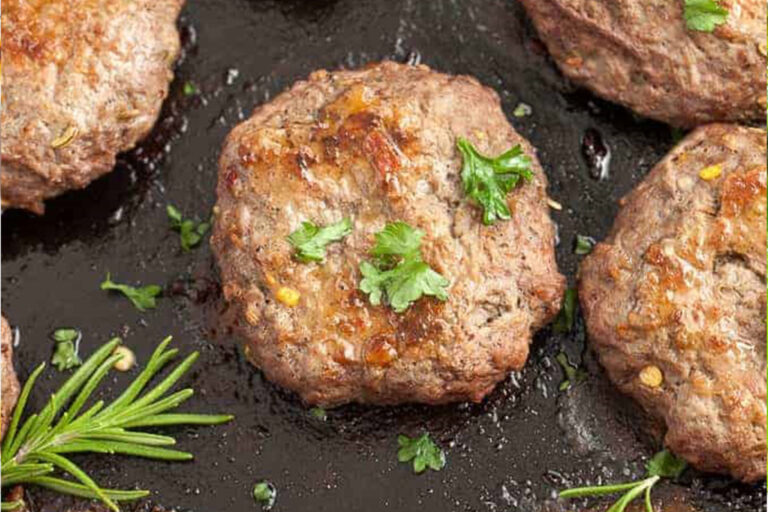
Best Ground Beef Sausage Recipe | Quick & Tasty

Introduction

Imagine waking up to the mouthwatering aroma of sizzling beef sausage—perfectly seasoned, juicy, and cooked to golden perfection. Whether you’re looking for a hearty breakfast, a protein-packed meal, or a quick recipe that beats store-bought options, this homemade ground beef sausage is your go-to solution. Unlike commercial sausages filled with additives and preservatives, this recipe is made from simple, wholesome ingredients, allowing you to control the flavors and quality. Ready to create the best ground beef sausage in your own kitchen? Let’s dive in!

Quick Recipe Overview

Prep TimeCook TimeTotal TimeServings
10 mins15 mins25 mins4-6

Why Make Homemade Ground Beef Sausage?

Homemade ground beef sausage is not just about great taste—it’s also a healthier and more customizable alternative to store-bought options. Here’s why you should try making it at home:

  • No Additives or Preservatives: Avoid artificial fillers and chemicals.
  • Customizable Flavors: Adjust seasoning to match your taste preferences.
  • Budget-Friendly: Save money by making a high-quality sausage at home.
  • Versatile Uses: Perfect for breakfast, lunch, dinner, or meal prep.

Ingredients for the Best Ground Beef Sausage

Essential Ingredients

To make the perfect ground beef sausage, you’ll need:

  • 1 lb ground beef (80/20 fat ratio for juicy texture)
  • 1 tsp salt
  • ½ tsp black pepper
  • 1 tsp garlic powder
  • 1 tsp onion powder
  • ½ tsp smoked paprika
  • ½ tsp red pepper flakes (optional, for heat)
  • 1 tbsp Worcestershire sauce (for deeper flavor)

Optional Additions for Extra Flavor

  • Fresh herbs: Parsley, thyme, or sage for a fresh twist.
  • Spices: Add cumin or coriander for an earthy depth.
  • Sweetener: A teaspoon of maple syrup balances the flavors beautifully.

Step-by-Step Guide: How to Make Ground Beef Sausage

Step 1: Prepare the Meat

  • Choose fresh ground beef with an 80/20 fat ratio for optimal flavor and texture.
  • Place the ground beef in a large mixing bowl.

Step 2: Mix the Seasonings

  • In a small bowl, combine salt, black pepper, garlic powder, onion powder, smoked paprika, and red pepper flakes.
  • Evenly sprinkle the seasoning mix over the ground beef.

Step 3: Blend & Shape the Sausage

  • Use your hands to gently mix the seasonings into the meat. Avoid overworking, as it can make the sausage tough.
  • Shape into patties or crumbles, depending on how you plan to cook it.

Step 4: Cook the Sausage

For Patties:

  • Heat a skillet over medium heat.
  • Add sausage patties and cook for 4-5 minutes per side or until golden brown.

For Crumbles:

  • Brown the sausage in a skillet, breaking it apart with a spatula.
  • Cook until no pink remains, stirring occasionally.

Table: Ingredients & Measurements

IngredientAmount
Ground beef1 lb
Salt1 tsp
Black pepper½ tsp
Garlic powder1 tsp
Onion powder1 tsp
Smoked paprika½ tsp
Red pepper flakes (optional)¼ tsp
Worcestershire sauce1 tbsp

Pro Tips for Perfect Ground Beef Sausage

  • Use chilled meat for easier mixing and shaping.
  • Let the mixture rest for 30 minutes before cooking to enhance flavors.
  • Test the seasoning by frying a small portion first and adjusting if needed.

How to Store & Reheat Homemade Sausage

Refrigeration

  • Store cooked sausage in an airtight container in the refrigerator for up to 3 days.

Freezing

  • Wrap raw or cooked sausage in plastic wrap and store in the freezer for up to 3 months.

Reheating

  • Skillet: Reheat over medium-low heat for the best texture.
  • Microwave: Heat in short bursts to prevent drying out.

Serving Suggestions: What to Eat with Ground Beef Sausage?

  • Breakfast: Pair with eggs, toast, or hash browns.
  • Lunch/Dinner: Add to pasta, rice bowls, or casseroles.
  • Low-Carb Option: Serve with roasted vegetables or in lettuce wraps.

FAQs: Ground Beef Sausage Recipes

1. Can I use lean ground beef for this recipe?

Yes, but leaner beef can result in a drier texture. Adding a bit of olive oil or butter helps retain moisture.

2. How do I make spicy ground beef sausage?

Increase the red pepper flakes or add cayenne pepper for an extra kick.

3. Can I bake instead of pan-fry the sausage?

Absolutely! Bake at 375°F (190°C) for 15-18 minutes, flipping halfway through for even cooking.

4. What’s the best way to meal prep ground beef sausage?

Cook in advance, store in portioned containers, and freeze for easy meal prep.


Conclusion

This quick & tasty ground beef sausage recipe is easy to make, packed with flavor, and far healthier than store-bought alternatives. Whether you serve it for breakfast, lunch, or dinner, this homemade version guarantees delicious results every time.

Give this recipe a try and let us know how it turned out! Drop a comment below or share your favorite seasoning blend. Happy cooking!

No Title

February 20, 2025

Sara

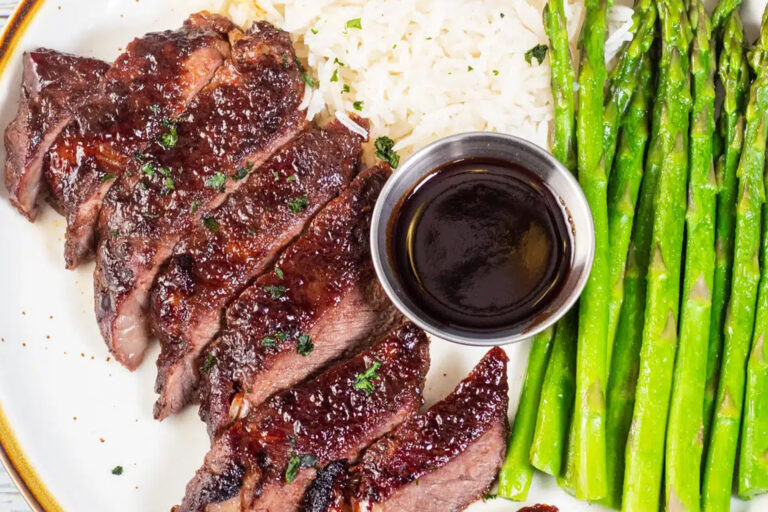
Juicy Boneless Beef Short Ribs Recipe – Oven, Grill & Crock Pot

The Secret to Perfect Boneless Beef Short Ribs

There’s something undeniably satisfying about a plate of tender, juicy boneless beef ribs. Whether slow-cooked for hours, grilled to perfection, or baked in the oven, these ribs offer a melt-in-your-mouth experience that leaves you craving more. If you’ve been searching for the best way to cook boneless beef short ribs, you’re in the right place. This guide will walk you through three foolproof methods, ensuring that your ribs turn out perfect every single time.


🕒 Quick Recipe Overview

Prep TimeCook TimeTotal TimeServings
15 mins2-3 hrs (varies by method)2 hrs 15 mins+4-6

What Are Boneless Beef Short Ribs?

Unlike traditional beef ribs, boneless short ribs come from the chuck or plate section of the cow. They’re known for their rich marbling, which makes them incredibly tender when cooked correctly. If you’re wondering where to buy high-quality boneless beef ribs, look for them at your local butcher shop or a trusted online meat supplier.


Essential Ingredients for Juicy Boneless Beef Ribs

🔍 Main Ingredients

IngredientQuantity
Boneless beef short ribs2 lbs
Olive oil2 tbsp
Garlic powder1 tsp
Onion powder1 tsp
Smoked paprika1 tsp
Brown sugar2 tbsp
Salt & pepperTo taste
BBQ sauce1 cup

Optional Additions for Extra Flavor

  • Worcestershire sauce for a deeper umami taste
  • Cayenne pepper for a spicy kick
  • Fresh rosemary or thyme for an herby aroma

How to Cook Boneless Beef Short Ribs: 3 Easy Methods

Method 1: Oven-Baked Boneless Beef Ribs

🔥 Perfect for juicy, caramelized ribs with crispy edges.

  1. Preheat oven to 325°F (163°C).
  2. Season ribs with dry rub and let sit for 15 minutes.
  3. Sear ribs in a hot pan until golden brown.
  4. Transfer to a baking dish, cover with foil, and bake for 2-2.5 hours.
  5. Remove foil, brush with BBQ sauce, and broil for 5 minutes.
  6. Let rest before serving.

Pro Tips for Oven Baking

  • Use a wire rack for even cooking.
  • Wrapping ribs in foil keeps them moist.

Method 2: Grilled Boneless Beef Ribs

🔥 Great for smoky, charred ribs with deep BBQ flavor.

  1. Preheat grill to medium heat.
  2. Brush ribs with olive oil and season generously.
  3. Grill for 4-5 minutes per side.
  4. Baste with BBQ sauce and grill for an additional 2 minutes per side.
  5. Rest for 5 minutes before serving.

Pro Tips for Grilling

  • Use indirect heat to prevent burning.
  • Marinate overnight for extra tenderness.

Method 3: Slow Cooker Boneless Beef Ribs (Crock Pot)

🔥 Set it and forget it – the easiest way to achieve fall-apart tenderness.

  1. Season ribs and sear in a hot pan.
  2. Place ribs in a slow cooker and pour BBQ sauce over them.
  3. Cook on low for 6-8 hours or high for 4 hours.
  4. Optional: Broil for a crispy caramelized finish.

Pro Tips for Slow Cooking

  • Add beef broth for extra juiciness.
  • Use a liner for easy cleanup.

Serving Suggestions & Side Dishes

  • Classic Sides: Mashed potatoes, cornbread, coleslaw.
  • Healthy Options: Roasted veggies, quinoa, or a fresh salad.
  • Best Drinks to Pair: Red wine, iced tea, or a smoky bourbon cocktail.

Storing & Reheating Boneless Beef Ribs

Storage Tips

  • Refrigeration: Store in an airtight container for up to 4 days.
  • Freezing: Freeze in a vacuum-sealed bag for up to 3 months.

How to Reheat Without Drying Out

  1. Oven: Reheat at 275°F for 15 minutes, covered with foil.
  2. Microwave: Heat in 30-second intervals with a splash of broth.
  3. Grill: Reheat over indirect heat for 5 minutes.

Frequently Asked Questions (FAQs)

What is the best cooking method for boneless beef ribs?

Each method has its pros: the oven gives crispy edges, grilling adds smoky flavor, and the crock pot makes them fall-apart tender.

How do I make boneless beef ribs more tender?

Slow cooking, marinating, and using acidic ingredients like vinegar or lemon juice help break down the meat fibers.

Can I cook boneless beef ribs without BBQ sauce?

Absolutely! You can use a dry rub or braise them in beef broth and herbs for a different flavor profile.

What temperature should boneless beef ribs be cooked to?

For tenderness, aim for an internal temperature of 195-205°F.


Conclusion: The Best Boneless Beef Short Ribs Recipe Awaits!

Now that you have three foolproof methods, which one will you try first? Whether you bake, grill, or slow cook, these ribs are guaranteed to impress. Let us know in the comments how your ribs turned out, and don’t forget to share this recipe with fellow BBQ lovers! 🍽️

No Title

February 20, 2025

Sara

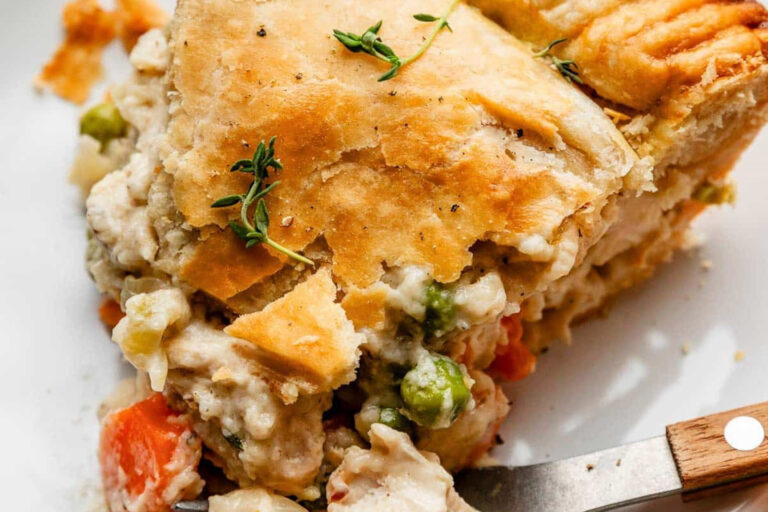
Best Pie Crust for Pot Pie (Crispy & Buttery!) – Perfect for Cream of Chicken Pot Pie

Introduction

There’s nothing quite like the comforting warmth of a homemade pot pie, especially when it comes wrapped in a crust that’s both crispy and buttery. If you’ve ever wondered what makes the perfect pie crust or struggled with soggy, lackluster results, you’re not alone. The secret to a mouthwatering pot pie lies in its flaky, golden crust — the kind that shatters gently under your fork and melts in your mouth. Whether you’re making a classic cream of chicken pot pie or experimenting with new flavors, a perfect crust sets the stage for comfort food bliss. Let’s dive into what makes the best pie crust and how you can nail it every time.


🥧 What Makes the Best Pie Crust for Pot Pie?

Flaky & Buttery Texture

The texture of a pie crust can make or break a pot pie. The ideal crust is tender but sturdy enough to hold a creamy filling. Achieving this balance comes down to two essential factors: flakiness and flavor. Flakiness is all about layers, created by cold butter that melts during baking, leaving pockets of air. The buttery flavor brings richness, enhancing the savory filling of a cream of chicken pot pie.

Store-Bought vs. Homemade

  • Store-Bought: Great for saving time but can sometimes lack the depth of flavor and texture that a homemade crust offers.
  • Homemade: Offers total control over ingredients and texture. You can tweak the recipe to your taste and dietary needs, ensuring it complements the filling perfectly.

Key Ingredients for Success

  • Butter vs. Shortening: Butter delivers unbeatable flavor and flakiness, while shortening adds structure. A mix of both can also yield excellent results.
  • Ice-Cold Water: Keeps the fat solid until baking, crucial for those tender, flaky layers.
  • Proper Flour: All-purpose flour works best, balancing protein content for structure and tenderness.

🥄 Ingredients & Prep Time

📌 Recipe Overview

Prep TimeCook TimeTotal Time
15 mins35 mins50 mins

📝 Ingredients for the Best Pie Crust

  • 2 ½ cups all-purpose flour
  • 1 cup unsalted butter (cold, cubed)
  • ½ tsp salt
  • ½ cup ice water

👩‍🍳 Step-by-Step Guide: How to Make a Flaky Pot Pie Crust

1️⃣ Step 1: Prepare the Dough

  • Combine the flour and salt in a large mixing bowl.
  • Add cold, cubed butter and use a pastry cutter or your fingers to mix until the texture resembles coarse crumbs.
  • Gradually add ice-cold water, stirring just until the dough comes together. Do not overmix.

2️⃣ Step 2: Chill the Dough

  • Shape the dough into a disc, wrap it in plastic, and refrigerate for at least 30 minutes. Chilling allows the gluten to relax and the butter to firm up, ensuring a flaky texture.

3️⃣ Step 3: Roll and Fit the Dough

  • Lightly flour your work surface and roll the dough to about ¼-inch thickness.
  • Carefully transfer it to your pie dish, trimming any excess overhang.

4️⃣ Step 4: Blind Bake for Extra Crispiness

  • Prick the crust with a fork, cover with parchment paper, and fill with pie weights or dry beans.
  • Bake at 375°F for 10 minutes. This step helps prevent a soggy bottom by cooking the dough slightly before adding a moist filling.

5️⃣ Step 5: Assemble & Bake the Pot Pie

  • Pour your cream of chicken filling into the pre-baked crust.
  • Roll out a second disc of dough for the top, crimp the edges, and cut a few slits for steam to escape.
  • Brush with egg wash for a golden finish and bake at 400°F for 35-40 minutes.

🥄 Tips for a Crispy & Buttery Pot Pie Crust

  • Keep Ingredients Cold: Cold butter and water mean more steam and flakiness in the oven.
  • Don’t Overwork the Dough: Excess handling develops gluten, leading to a tough crust.
  • Use an Egg Wash: A beaten egg brushed over the crust gives it a beautiful sheen and seals in moisture.
  • Bake on a Lower Rack: Ensures the bottom crust gets crispy and fully cooked.

🍽️ Best Fillings to Pair with Your Pot Pie Crust

  • Cream of Chicken Pot Pie: A classic, comforting filling that pairs perfectly with a rich, buttery crust.
  • Vegetarian Pot Pie: Use a hearty mix of root vegetables, mushrooms, and a creamy sauce.
  • Seafood Pot Pie: A luxurious twist, filled with shrimp, crab, or white fish in a creamy dill sauce.

❓ Frequently Asked Questions (FAQ)

What is the secret to a flaky pie crust?

Cold ingredients and minimal handling are key. The less you work the dough, the more the butter stays in solid chunks, which creates flakiness when it melts during baking.

Can I use store-bought crust for pot pie?

Yes! While homemade crust gives you complete control over taste and texture, store-bought options can be a great time-saver. Just opt for high-quality brands to ensure a tasty result.

How do I keep my pot pie crust from getting soggy?

Pre-bake the bottom crust (blind bake) and ensure your filling isn’t too watery. A thicker filling helps maintain a crisp bottom crust.

Should I brush my pie crust with egg wash?

Definitely! An egg wash not only gives a golden, glossy finish but also acts as a sealant to keep moisture out of the crust.

Can I freeze the pie crust dough?

Absolutely! Wrap it tightly in plastic wrap and store in a freezer bag. It can last for up to 3 months. Thaw in the fridge before rolling out.


📝 Conclusion

The perfect pot pie starts with the perfect crust. By focusing on cold ingredients, careful handling, and a few expert techniques, you can achieve a flaky, buttery crust that’s as good as any you’ll find in a bakery. Whether you’re making a classic cream of chicken pot pie or putting your spin on this comfort-food favorite, mastering the crust is half the battle—and all the reward. Now that you’re armed with the secrets of pie crust success, it’s time to roll up your sleeves and get baking!

Ready to taste the flakiest pot pie ever? Try this recipe today and share your delicious results!

No Title

February 20, 2025

Sara

Loaded Grilled Chicken on the Griddle: A Quick Guide to Cooking Chicken on Blackstone

There’s something magical about the smell of sizzling chicken on the griddle — that perfect combination of charred edges and tender, juicy meat. Whether you’re a seasoned cook or a beginner, cooking chicken on your Blackstone griddle can completely transform your grilling game. This guide will take you through the step-by-step process of creating loaded grilled chicken that’s bursting with flavor, while also giving you expert tips to make the most out of your Blackstone griddle.

By the time you finish reading, you’ll be ready to cook mouthwatering, loaded grilled chicken dishes on your griddle, impressing your family and friends with every bite. So, let’s dive in and discover how you can master this tasty and satisfying recipe!


Why Cooking Chicken on a Blackstone Griddle is a Game Changer

If you’ve been cooking chicken on a regular grill or stovetop, you might be wondering why you should consider switching to a Blackstone griddle. Well, there are plenty of reasons why this versatile cooking surface is a game-changer for preparing chicken.

Benefits of Cooking Chicken on the Blackstone Griddle:

  • Even Heat Distribution: One of the major advantages of using a Blackstone griddle is its ability to evenly distribute heat across the entire cooking surface. This means no more hot spots or uneven cooking—just perfectly grilled chicken every time.
  • Large Cooking Surface: If you love cooking in batches or for a crowd, the spacious surface of the Blackstone griddle allows you to cook large amounts of chicken all at once. No need to worry about overcrowding your pan or grill anymore!
  • Locking in Moisture: The high, consistent heat of the griddle helps lock in moisture, giving your chicken that tender, juicy texture while also adding a perfect crisp on the outside.
  • Quick Cooking Times: Griddles heat up quickly and cook chicken faster than traditional methods, making it a fantastic option for busy weeknight dinners or weekend BBQs.

Whether you’re grilling, searing, or stir-frying, the Blackstone griddle can handle it all. And the best part? The result is a deliciously tender, perfectly cooked chicken every time.


Essential Equipment for Cooking Chicken on the Blackstone

Before we dive into the recipe itself, let’s make sure you’re equipped with everything you need to make your loaded grilled chicken on the Blackstone a success.

Tools and Accessories You’ll Need:

  • Blackstone Griddle: Of course, the most important tool here is your griddle. Make sure it’s clean and well-maintained before you start cooking.
  • Spatulas: Having a good spatula is essential for flipping and moving the chicken around on the griddle. Opt for a sturdy, wide spatula that can handle large chicken breasts or thighs.
  • Griddle Scraper: To keep your griddle in pristine condition, you’ll need a scraper for cleaning up any leftover bits of food or seasoning.
  • Oil: A light coating of oil helps prevent the chicken from sticking to the griddle. Use high-smoke-point oils like vegetable oil or canola oil for best results.
  • Tongs: For turning the chicken pieces, tongs are a handy tool that lets you maintain control without tearing or piercing the meat.
  • Thermometer: For perfectly cooked chicken, use a meat thermometer to ensure that your chicken reaches an internal temperature of 165°F (74°C).
  • Seasonings and Marinades: The right seasoning or marinade can elevate your grilled chicken. Prepare your favorite mix of herbs, spices, and sauces to enhance the flavor.

Setting Up Your Blackstone Griddle

  • Preheat the Griddle: Set your Blackstone griddle to medium-high heat, and allow it to preheat for a few minutes. Once the griddle reaches the desired temperature, it’s ready to cook!
  • Oil the Griddle: Before placing your chicken on the griddle, apply a thin layer of oil to prevent sticking and ensure even cooking.

Now that you’re all set with the right equipment, let’s move on to the fun part — cooking that delicious loaded grilled chicken!


Step-by-Step Guide: How to Make Loaded Grilled Chicken on the Griddle

Cooking chicken on your Blackstone griddle is easy once you know the basic steps. Here’s how you can make perfectly loaded grilled chicken that’s juicy, tender, and packed with flavor.

Preparing the Chicken

The first step in preparing your chicken for grilling is to season it well. You can choose from a variety of marinades or spice rubs, depending on your preference.

  • Marinating the Chicken: To infuse maximum flavor into your chicken, marinate it for at least 30 minutes (or overnight for a deeper flavor). If you’re in a rush, you can also use a simple dry rub that will add plenty of flavor.
  • Tenderizing the Chicken: If you’re using boneless chicken breasts, consider tenderizing them with a meat mallet to ensure they cook evenly and remain juicy.
  • Table: Recipe IngredientsIngredientQuantityChicken Breasts4 (boneless, skinless)Olive Oil2 tbspSalt1 tspBlack Pepper1 tspGarlic Powder1 tspPaprika1 tspToppings (cheese, bacon, etc.)As desired

Cooking the Chicken on Your Blackstone Griddle

  • Place the Chicken on the Griddle: Once your griddle is preheated, place the seasoned chicken breasts onto the cooking surface. Sear the chicken for about 5-6 minutes on one side before flipping it.
  • Cook the Other Side: After flipping, cook the chicken for another 5-6 minutes, or until the internal temperature reaches 165°F (74°C).
  • Tip: If you’re worried about drying out your chicken, you can cover it with a lid to retain moisture while it cooks.

Adding the “Loaded” Toppings

Now comes the fun part—adding the “loaded” toppings to make this grilled chicken extra delicious.

  • Cheese: A generous layer of melted cheese adds richness and flavor. Try sharp cheddar, Monterey Jack, or mozzarella for different tastes.
  • Bacon: Crisp up some bacon on the griddle and crumble it on top of the chicken for a smoky, salty crunch.
  • Grilled Veggies: Add sautéed onions, bell peppers, or mushrooms to bring in extra flavor and texture.
  • Sauces: Drizzle your favorite sauce—barbecue, ranch, or buffalo—on top of the chicken for a burst of flavor.
  • Tip: Let the chicken sit on the griddle for a couple of extra minutes to melt the cheese and heat up your toppings.

Quick Recipe: Loaded Grilled Chicken on the Blackstone

Now that you know the basic steps, here’s a simple recipe to follow for a flavorful and satisfying meal.

Recipe Ingredients

IngredientQuantity
Chicken Breasts4 (boneless, skinless)
Olive Oil2 tbsp
Salt1 tsp
Black Pepper1 tsp
Garlic Powder1 tsp
Paprika1 tsp
Cheese (cheddar)1 cup (shredded)
Bacon4 slices (cooked and crumbled)
Grilled Veggies1 cup (optional)
Sauce (BBQ or ranch)As desired

Recipe Instructions:

  1. Preheat your Blackstone griddle to medium-high heat.
  2. Season the chicken breasts with olive oil, salt, black pepper, garlic powder, and paprika.
  3. Place the chicken on the griddle and cook for 5-6 minutes on one side.
  4. Flip the chicken and cook for another 5-6 minutes, or until the internal temperature reaches 165°F.
  5. Add cheese, bacon, and any other toppings to the chicken.
  6. Let the chicken cook for another 2-3 minutes until the cheese melts and the toppings are heated.
  7. Serve and enjoy!

Tips and Tricks for Perfect Grilled Chicken Every Time

Even though cooking on a Blackstone griddle is relatively straightforward, a few extra tips can ensure your grilled chicken turns out perfectly every time.

  • Use a Meat Thermometer: The best way to ensure your chicken is cooked perfectly is by using a meat thermometer. Aim for an internal temperature of 165°F (74°C).
  • Don’t Overcrowd the Griddle: When cooking multiple pieces of chicken, make sure not to overcrowd the griddle. This can lead to uneven cooking and dry chicken.
  • Experiment with Different Seasonings: Don’t be afraid to experiment with different spices and marinades to find your favorite flavor combinations.

Conclusion

Cooking loaded grilled chicken on your Blackstone griddle is an easy and delicious way to bring flavor to your table. Whether you’re cooking for a crowd or preparing a quick weeknight dinner, the griddle ensures your chicken will come out tender, juicy, and packed with flavor.

By following these simple steps and tips, you can transform your chicken dishes into mouthwatering meals that everyone will love. So, fire up your Blackstone, grab your ingredients, and start cooking! Don’t forget to experiment with toppings and seasonings to make each dish uniquely yours.

Ready to get cooking? Try our Loaded Grilled Chicken recipe today and experience the griddle magic!

No Title

February 20, 2025

Sara

Easy King Ranch Chicken Casserole Recipe (5 Ingredients) – The Perfect Comfort Meal!

If you’re looking for a meal that’s both simple and comforting, then you’ve found it. The Easy King Ranch Chicken Casserole recipe is here to simplify your dinner routine, making meal prep a breeze while still delivering that warm, savory comfort food experience we all crave. Best of all, this version only requires five ingredients, making it perfect for busy nights when you want to get dinner on the table quickly without compromising on taste.

This dish is a twist on a classic Tex-Mex favorite, offering layers of tender chicken, spicy Rotel, creamy soup, and melted cheese, all tucked between corn tortillas. It’s the kind of meal you’ll look forward to sharing with your family, and one that will have everyone asking for seconds. Ready to learn how to make this easy and delicious casserole? Let’s dive right in!

Why You’ll Love This Easy King Ranch Chicken Casserole

If you’ve ever made a casserole before, you know how comforting it is to pull a bubbling, cheesy dish out of the oven. What makes this Easy King Ranch Chicken Casserole even better is its simplicity. With only five ingredients, you’re just minutes away from a flavorful, hearty meal that will satisfy everyone at the dinner table. Here’s why you’ll love it:

  • Quick and Simple: No complicated prep steps or hard-to-find ingredients. The beauty of this dish is its minimalism, making it accessible for anyone, whether you’re an experienced cook or a beginner.
  • Perfect for Busy Nights: Life gets busy, and sometimes, you just want a meal that doesn’t take hours to prepare. This casserole takes just 35 minutes from start to finish, giving you more time to enjoy your evening.
  • Comforting & Flavorful: Every bite is a warm, cheesy, and comforting explosion of flavor. The combination of creamy soup, tangy Rotel, and tender chicken hits all the right notes.

By the end of this article, you’ll have a new go-to recipe for those hectic weeknights when you want something quick, satisfying, and full of flavor.


What You Need for This 5-Ingredient King Ranch Chicken Casserole

Here’s a handy list of the five ingredients you’ll need to make this casserole. These ingredients are likely already in your kitchen, making this recipe both accessible and budget-friendly.

Ingredients Table

IngredientQuantity
Shredded Chicken2 cups
Rotel (Diced Tomatoes with Green Chilies)1 can (10 oz)
Cream of Chicken Soup1 can (10 oz)
Corn Tortillas6-8 tortillas
Shredded Cheese1 ½ cups
  • Shredded Chicken: This is the heart of the dish. You can use leftover chicken, rotisserie chicken, or cook your own. Either way, it’s the perfect filling for the casserole.
  • Rotel: The diced tomatoes with green chilies add a wonderful balance of spice and acidity to the dish. It’s what gives the casserole that signature kick.
  • Cream of Chicken Soup: This ingredient brings richness and creaminess, creating a velvety sauce that binds everything together.
  • Corn Tortillas: These serve as the base of the casserole and provide texture. You can tear them into pieces or layer them whole.
  • Shredded Cheese: A blend of your favorite cheeses (cheddar, Monterey Jack, or a Mexican blend) adds a gooey, melty topping that will have everyone reaching for seconds.

Each ingredient serves a purpose, working in harmony to create a dish that’s both simple and flavorful.


How to Make Easy King Ranch Chicken Casserole

Now that you have all your ingredients ready, it’s time to assemble the casserole! Follow these simple steps for a dish that’s ready in no time.

Step-by-Step Instructions

  1. Preheat the Oven: Set your oven to 350°F (175°C). This allows the casserole to cook evenly and thoroughly.
  2. Prepare the Chicken: If you don’t already have shredded chicken, cook and shred it now. You’ll need about 2 cups of shredded chicken for this recipe.
  3. Layer the Casserole:
    • Start with a layer of torn corn tortillas at the bottom of your casserole dish.
    • Next, spread half of the shredded chicken over the tortillas.
    • Pour half of the Rotel (with the juice) over the chicken.
    • Add half of the cream of chicken soup, spreading it evenly to cover the other ingredients.
    • Repeat the layers with the remaining tortillas, chicken, Rotel, and soup.
    • Finally, sprinkle shredded cheese over the top.
  4. Bake the Casserole: Place the casserole in the oven and bake for 20-25 minutes, or until the cheese is melted, bubbly, and slightly golden on top.
  5. Optional – Broil for Extra Crisp: If you prefer a crispy topping, switch your oven to broil for the last 2-3 minutes of baking.

Once it’s out of the oven, let the casserole sit for a few minutes to set, then slice and serve. Enjoy the delicious, comforting flavors in every bite!


Nutritional Information (Approximate)

If you’re wondering about the nutritional value of this Easy King Ranch Chicken Casserole, here’s a general breakdown per serving. Keep in mind that these values can vary depending on the specific brands and types of ingredients you use.

  • Calories per Serving: 350-400
  • Protein: 25g
  • Fat: 20g
  • Carbohydrates: 30g
  • Fiber: 2g

This casserole is hearty, with a good balance of protein, carbs, and fats. It’s a filling meal that’s sure to keep you satisfied. You can even make some healthy substitutions if you prefer a lighter version (like using low-fat soup or cheese, or adding veggies).


Variations on the Easy King Ranch Chicken Casserole Recipe

While this casserole is fantastic as-is, you can easily tweak the recipe to suit your tastes or dietary preferences. Here are a few ideas to make it even more versatile:

  • Spicy Version: If you love heat, add extra chili peppers, jalapeños, or use a spicy cheese. You can also opt for the spicy Rotel variety.
  • Vegetarian: Swap the chicken for black beans or grilled vegetables like bell peppers and zucchini to make this casserole vegetarian-friendly.
  • Gluten-Free: Make the casserole gluten-free by using gluten-free corn tortillas. The rest of the ingredients are naturally gluten-free, so this is a simple adjustment.
  • Extra Veggies: Add some sautéed onions, bell peppers, or corn to the layers for added texture and flavor.

Feel free to get creative! This casserole is incredibly adaptable.


Tips for Success

Want to make sure your casserole turns out perfectly every time? Here are a few tips to help:

  • Use Leftover Chicken: If you have leftover chicken from a previous meal or a rotisserie chicken, it can save you time in the kitchen.
  • Cheese Variations: Experiment with different types of cheese, such as Monterey Jack, pepper jack, or even a blend of Mexican cheeses for added flavor.
  • Make-Ahead Tip: You can assemble the casserole up to 24 hours ahead of time. Just cover it tightly and refrigerate. When you’re ready, bake it as usual.

Common Questions About Easy King Ranch Chicken Casserole

Here are some frequently asked questions that might help you with this recipe:

Can I make this casserole ahead of time?

Yes! You can prepare the casserole and store it in the fridge for up to 24 hours before baking. This is great for meal prepping or when you have a busy week ahead.

Can I use a different kind of soup?

Absolutely! While cream of chicken soup is traditional, you can substitute with cream of mushroom or cream of celery if you prefer. These variations will give the casserole a slightly different flavor.

Can I freeze King Ranch Chicken Casserole?

Yes, you can freeze the casserole before baking. Just cover it tightly with plastic wrap and aluminum foil, and it will keep in the freezer for up to 3 months. When you’re ready to bake, let it thaw overnight in the fridge, and then cook as usual.

How can I make it spicier?

To add more heat, try using a spicier Rotel variety, or toss in some chopped jalapeños, chili peppers, or a dash of hot sauce. You can even add spicy pepper jack cheese to up the ante!


Conclusion – Your New Go-To Family Meal

This Easy King Ranch Chicken Casserole is a quick, simple, and comforting dish that’s perfect for busy nights when you want to make a meal the whole family will enjoy. With just five ingredients, you can put together a hearty and flavorful casserole that’s bound to become a staple in your household. Whether you’re making it for a weeknight dinner or a special occasion, this recipe is sure to impress.

Don’t hesitate to experiment with the variations and add your own twist to the dish. It’s so versatile that you can customize it to suit your tastes or dietary preferences. Try it tonight, and see why this easy casserole recipe will quickly become one of your favorite go-to meals!

No Title

February 20, 2025

Sara

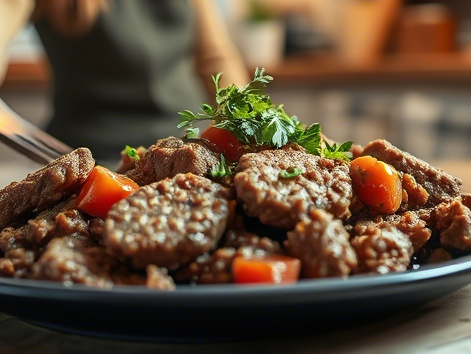
https://recipenova.com/quick-tasty-hamburger-rice-recipes/Easy Carne Picada Recipe – The Best Beef Taco Filling You’ll Ever Make!

Imagine your taco night elevated to a new level with juicy, tender beef that’s bursting with flavor. That’s what Carne Picada brings to your table. It’s not just another taco filling – it’s a savory, melt-in-your-mouth experience that will have your family and friends asking for seconds. If you’re tired of the same old ground beef or chicken tacos, it’s time to try something new. This easy Carne Picada recipe is the key to making the best beef taco filling you’ve ever tasted. Let’s dive in!


What is Carne Picada?

Carne Picada, directly translated from Spanish as “chopped meat,” is a traditional Mexican dish that uses thinly sliced or finely chopped beef, often prepared with a variety of spices. It’s usually made from a tender cut of beef like flank steak or sirloin, marinated to enhance its natural flavor and tenderness. Carne Picada is often used as a filling for tacos, burritos, quesadillas, and more.

This dish is a step above typical ground beef. Its texture is much more satisfying, and its depth of flavor makes it a go-to for taco lovers. Unlike standard beef that might end up dry or bland, carne picada is juicy, flavorful, and incredibly versatile. Whether you’re looking for a quick dinner or something to impress at a gathering, carne picada is the perfect option.


Why This Carne Picada Recipe is the Best

There’s no shortage of carne picada recipes out there, but what makes this one stand out? It’s simple, fast, and packed with authentic flavors that will transport you straight to your favorite taco stand. Here’s why this recipe is unbeatable:

  • Simplicity at Its Best: You don’t need to be a culinary expert to whip up a flavorful carne picada. With just a few key ingredients and a little patience, you’ll have the perfect taco filling in no time.
  • Authentic Flavors: This recipe uses a combination of spices that create the depth of flavor that defines carne picada. From the smoky paprika to the zesty lime, each bite will burst with fresh, savory goodness.
  • Quick and Easy: Whether you’re cooking for a crowd or just making dinner for yourself, this recipe comes together in 30 minutes. It’s ideal for busy weeknights or last-minute gatherings.

Ingredients You’ll Need for the Best Carne Picada

Before you get started, gather the following ingredients. These are the essentials that will ensure your carne picada turns out perfectly every time.

IngredientAmount
Beef (flank steak or sirloin)1 lb
Olive oil1 tbsp
Onion (diced)1 medium
Garlic (minced)2 cloves
Lime juice2 tbsp
Chili powder1 tsp
Cumin1 tsp
Paprika1 tsp
Salt & pepperTo taste
Beef broth (optional)1/2 cup
  • Beef: Opt for a tender cut of beef such as flank steak or sirloin. These cuts hold up well when chopped or shredded and have the perfect texture for carne picada.
  • Spices: Chili powder, cumin, and paprika are key to achieving the classic flavor profile. These spices, along with the lime juice, are what give carne picada its irresistible zest.
  • Optional Ingredients: If you prefer a richer flavor, you can add beef broth to the mix. It will also help keep the meat tender as it cooks.

How to Make Easy Carne Picada (Step-by-Step Guide)

Now that you have your ingredients ready, let’s walk through the process of making carne picada. Don’t worry, this recipe is straightforward, and you’ll be savoring the best beef taco filling in just 30 minutes.

Step 1: Prepare the Beef

Start by cutting your beef into thin strips or small bite-sized pieces. The goal here is to make sure the beef cooks evenly and gets a perfect sear on all sides. If you’re using flank steak, you’ll want to slice it against the grain to ensure the meat stays tender.

Once your beef is chopped, season it with salt, pepper, chili powder, cumin, and paprika. Let it sit for a few minutes to absorb the spices while you prepare the other ingredients.

Step 2: Sauté the Onion, Garlic, and Spices

Heat olive oil in a large skillet over medium heat. Add the diced onion and cook it until it softens and turns translucent. This usually takes about 2-3 minutes. Then, add the minced garlic and cook for another minute, allowing the aroma to fill your kitchen.

Next, toss in your seasoned beef. Stir occasionally, ensuring all sides are browned. This step is key to developing the deep, savory flavors that make carne picada so delicious.

Step 3: Cook the Carne Picada

Once the beef is browned on all sides, add the lime juice and optional beef broth. Stir to combine and let the mixture simmer on low heat for about 10 minutes. This allows the beef to absorb all the flavors and become tender. If you prefer your carne picada a bit saucier, you can add more beef broth during this step.

Step 4: Final Touches – Garnish and Serve

Once the beef is tender and the sauce has thickened, it’s time to finish it off. Taste the carne picada and adjust seasoning if necessary. Garnish with fresh cilantro or chopped onions for an extra pop of flavor and color.


Tips for Perfect Carne Picada Every Time

To ensure your carne picada is always restaurant-quality, here are a few tips:

  • Marinate the Beef: If you have the time, marinate the beef for at least 30 minutes before cooking. This will help the meat absorb all the spices and make it even more flavorful.
  • Use a Cast-Iron Skillet: A cast-iron skillet helps maintain consistent heat and gives the beef a nice sear, enhancing the flavor.
  • Experiment with Heat: If you like things spicy, feel free to add a dash of cayenne pepper or a chopped jalapeño to the mix.
  • Make Ahead: Carne picada stores well in the fridge for up to 3 days. You can also freeze it for later use.

Serving Suggestions

Carne picada isn’t just for tacos – it’s incredibly versatile and can be used in a variety of dishes. Here are some of the best ways to serve it:

  • Tacos: The most classic option! Serve your carne picada in soft corn or flour tortillas with toppings like salsa, avocado, and cilantro.
  • Burritos: Wrap your carne picada in a large flour tortilla with rice, beans, and cheese for a hearty meal.
  • Quesadillas: Stuff your quesadilla with carne picada and your favorite cheese for a satisfying snack.
  • Rice Bowls: Serve your carne picada on a bed of rice with toppings like guacamole, sour cream, and shredded lettuce for a fresh, filling meal.

Nutritional Information

Here’s a breakdown of the nutritional value of carne picada per serving:

NutrientAmount per Serving
Calories250 kcal
Protein30g
Carbohydrates5g
Fat12g
Fiber1g
  • Protein: With 30 grams of protein per serving, carne picada is an excellent choice for anyone looking to increase their protein intake.
  • Low Carb: Carne picada is naturally low in carbs, making it a great option for low-carb or keto diets.
  • Healthy Fats: The olive oil and beef provide healthy fats that are essential for energy and overall health.

FAQ

What is carne picada made of?
Carne picada is made from tender cuts of beef, typically flank steak or sirloin, that are finely chopped or sliced. The beef is then cooked with spices like chili powder, cumin, and paprika to create a flavorful filling for tacos, burritos, or other Mexican dishes.

Can I use a different meat for this recipe?
Yes, you can use chicken or pork in place of beef for carne picada. Both options will work wonderfully with the same spices and cooking method.

Can I make carne picada ahead of time?
Absolutely! Carne picada can be made ahead of time and stored in the fridge for up to 3 days. It also freezes well, so you can prepare a batch and store it for later.


Conclusion

Now that you have the perfect carne picada recipe, it’s time to get cooking! With just a few simple ingredients and steps, you’ll create the best beef taco filling you’ve ever tasted. Whether you’re feeding a crowd or enjoying a quiet dinner, this easy carne picada recipe will become a staple in your kitchen. So, what are you waiting for? Grab your ingredients and get ready to enjoy a flavorful, satisfying meal that everyone will love.

Don’t forget to share your results with us! Have fun experimenting with different toppings and serving ideas, and enjoy your delicious carne picada!

No Title

February 20, 2025

Sara