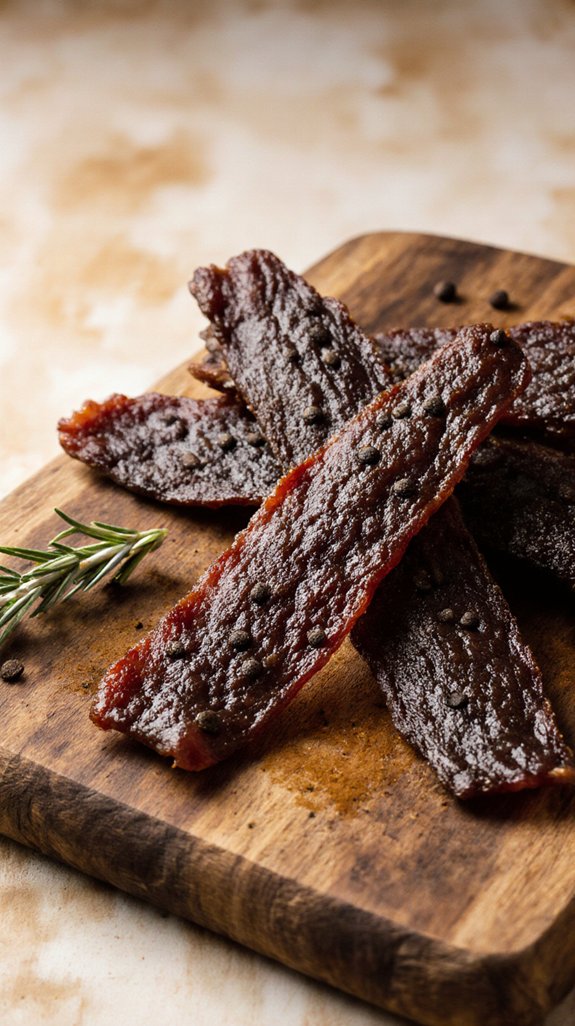
I’ve been making my own beef jerky for years, and I’m convinced it’s one of those recipes that transforms how you think about snacks. The flavor difference between homemade and store-bought is striking—you control every ingredient, from the quality of beef to the intensity of spices. Sure, it requires patience as the meat slowly dries, but that wait rewards you with bold, complex flavors that simply can’t be rushed or replicated.
Why You`ll Love this Homemade Beef Jerky
While store-bought jerky can set you back $30 or more per pound, making your own costs a fraction of that and gives you complete control over what goes into it.
I love knowing exactly what ingredients I’m using, and this recipe’s flavor profile is something you won’t find in any gas station package. The combination of soy sauce, ginger, and garlic creates an Asian-inspired taste that’s both savory and slightly sweet.
Plus, you can adjust the seasonings to match your preferences perfectly. As a snack alternative to processed options, homemade jerky delivers protein without artificial preservatives or mystery ingredients.
You’ll need patience for the eight-hour drying time, but the results are absolutely worth it.
What ingredients are in Homemade Beef Jerky?
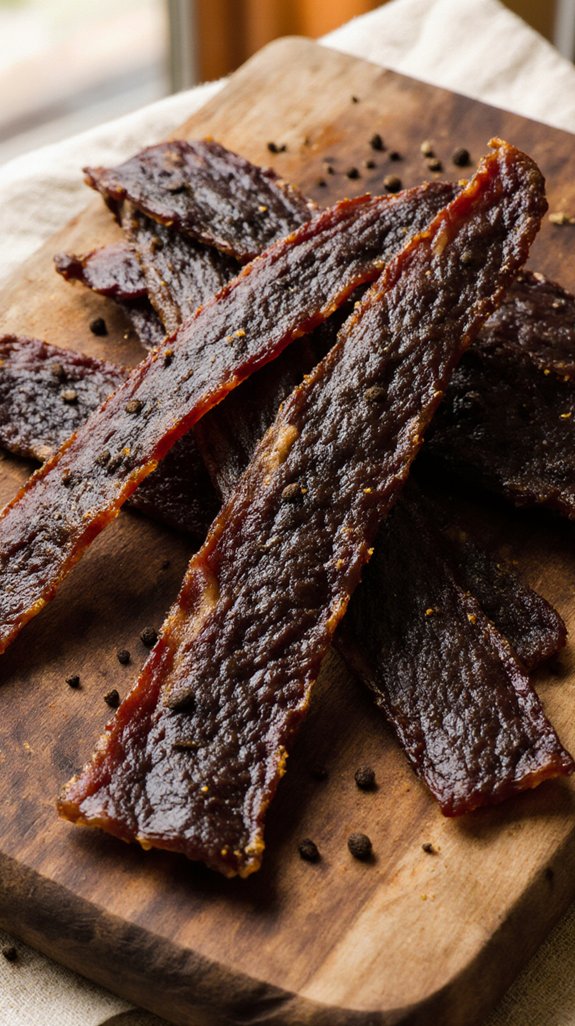
The foundation of excellent homemade beef jerky starts with selecting the right cut of meat and gathering a handful of flavorful marinade ingredients. This recipe uses lean beef cuts like round, rump, or sirloin tip, though London broil produces the best results.
The marinade combines both Asian-inspired elements and classic jerky seasonings to create a complex, savory flavor that far surpasses anything you’ll find at the store.
Ingredients:
- 2 lbs beef (round, rump, or sirloin tip; London broil recommended)
- 1/3 cup dry sherry
- 1/2 cup soy sauce
- 1/3 cup chicken stock or beef stock
- 3 tablespoons rice wine vinegar
- 1 tablespoon brown sugar
- 1 teaspoon fresh ginger root, finely diced
- 2 garlic cloves, chopped
- 1 teaspoon fresh ground black pepper
When selecting your beef, choose the leanest cuts possible since fat doesn’t dry well and can cause your jerky to spoil more quickly. All visible fat should be trimmed before slicing.
Fresh ginger and garlic will provide the most robust flavor, though you can substitute ground versions in a pinch (use about 1/4 teaspoon ground ginger and 1/2 teaspoon garlic powder).
The combination of dry sherry and rice wine vinegar adds depth and helps tenderize the meat during the overnight marinating process, while the brown sugar balances the salty soy sauce with just a hint of sweetness.
How to make this Homemade Beef Jerky
The process of making homemade beef jerky requires patience, but the steps themselves are straightforward. Start by removing all fat from your 2 lbs of beef, as fat doesn’t dry properly and can spoil your jerky.
Here’s an essential step that makes all the difference: wrap the trimmed meat in plastic wrap and freeze it for about 2 hours until it’s almost solid. This isn’t optional—freezing the meat firms it up so you can cut those neat, even 1/8-inch thick slices with the grain that are vital for good jerky. If you’re looking to streamline your preparation process, a professional meat grinder can help you achieve consistent cuts and make the trimming process much easier.
Once sliced, arrange the meat in a shallow dish. Now it’s time to make the marinade by combining the remaining ingredients in a saucepan: 1/3 cup dry sherry, 1/2 cup soy sauce, 1/3 cup chicken or beef stock, 3 tablespoons rice wine vinegar, 1 tablespoon brown sugar, 1 teaspoon finely diced fresh ginger, 2 chopped garlic cloves, and 1 teaspoon fresh ground black pepper.
Bring this mixture to a boil, then let it cool completely before pouring it over your sliced meat. Cover and refrigerate overnight, stirring once or twice to guarantee every piece gets thoroughly soaked in those flavors.
When you’re ready to dry the jerky, preparation is key. Line the bottom of your oven with foil to catch any drips, then preheat it to 250°.
Remove the meat from the marinade and pat each slice thoroughly dry with paper towels—this helps the drying process along. Arrange the strips in a single layer on a roasting rack, making sure they don’t overlap or touch.
Place the rack in the preheated oven, then immediately reduce the temperature to 150° and let the meat dry slowly for about 8 hours. Keep in mind that drying times can vary anywhere from 6 to 24 hours depending on your oven and how thick your slices are.
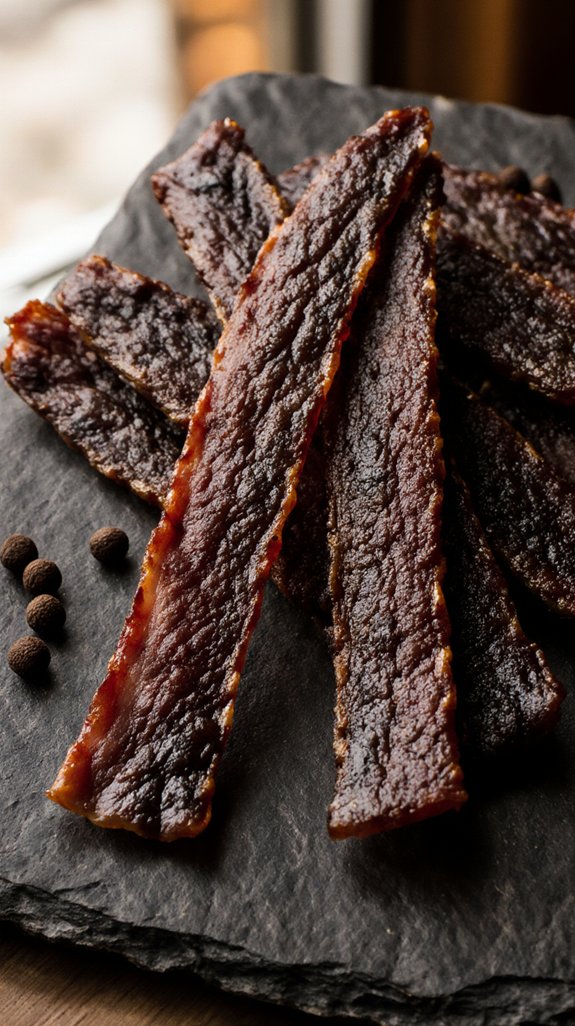
The finished jerky should be stiff but still bendable—if it snaps cleanly in half, it’s overdone. One important safety note: meats need to be dried at 145° or above to kill microorganisms, which this recipe accounts for in its initial higher temperature.
Once done, store your jerky in an airtight container in the refrigerator to keep it fresh.
Shop Related Products

QUICKLY SLICES MEAT INTO CONSISTENT STRIPS FOR JERKY: This Weston jerky slicer has 32 stainless steel blades that quickly cut meat in consistent .25 strips for jerky. It can cut up to 15 quarter-inch strips at once

ONCE GET 18 SLICES: The supmakin meat slicer set is the ultimate tool for precision cuts with 17 blades, easily cut a fresh meat into 18 thin slices in one stroke, compatible with a variety of fresh meats including pork, beef, chicken breast, and salmon....(not suit for frozen and deil meat)

1.【Fast and Convenient Beef Jerky Slicer】This home meat slicer set includes everything you need to make delicious beef jerky without years of experience. It comes with a premium Beef Jerky Slicer, a professional 14-inch chef’s knife with a guide rail, and two sheets of food-safe cutting plastic
Homemade Beef Jerky Substitutions and Variations
Once you’ve mastered the basic beef jerky recipe, you’ll discover that this template is incredibly flexible and welcomes all sorts of creative tweaks.
I love experimenting with spicy variations by adding crushed red pepper flakes, cayenne, or sriracha to the marinade. For those who prefer sweet alternatives, try replacing the brown sugar with honey or maple syrup, and add a splash of Worcestershire sauce for depth.
You can also swap the sherry for pineapple juice or apple cider. Don’t feel limited to beef either—turkey, venison, and even salmon work beautifully with this method.
Each protein absorbs the marinade differently, creating unique flavor profiles. The key is maintaining proper drying temperature and time regardless of your chosen variation.
Shop Related Products

Perfect Design: The breathable mesh maintains air circulation, make drying herbs become very fast and easy. Each layer of zipper closure design, easy to open and close, effectively prevent birds,leaves, mosquitoes, flies

Food Dehydrator Dryer For Model 904JY: Each layer features a generous 0.79” gap, this food dehydrator dryer features a powerful fan for even airflow, ensuring consistent drying for meat, jerky, fruit, vegetable, mushroom and Herb.

✔️【Large Capacity & Multiple Layers】 Each of 4(or 6)layers holds substantial dried herbs, flowers, vegetables, and foods without overcrowding - perfect for home gardeners and plant enthusiasts drying fresh basil, rosemary, mint, thyme, or wildflowers simultaneously. Dimensions: 24" diameter × 32(or 48)" height for maximum vertical space efficiency.
What to serve with Homemade Beef Jerky
After you’ve prepared your perfectly seasoned jerky, you’ll want to think about what foods pair well with this protein-packed snack.
I love enjoying my jerky with cheese cubes, crackers, or trail mix for a satisfying energy boost during hikes or road trips. Fresh fruit like apples or grapes provides a revitalizing contrast to the savory, salty flavors.
For drink options, I recommend cold beer, iced tea, or lemonade to complement the bold taste.
If you’re serving jerky at a gathering, include nuts, dried fruits, and vegetable sticks on your platter. These snack pairings create a balanced spread that appeals to different tastes.
The jerky’s intense flavor means you don’t need much else to feel satisfied and energized.
Final Thoughts
Making your own beef jerky at home isn’t just about saving money—it’s about taking control of what goes into your food and creating flavors that store-bought versions can’t match.
I’ve found that experimenting with different marinades is where the real fun happens. Try swapping the ginger for chili flakes, or add a splash of Worcestershire sauce for flavor enhancement.
The key to success lies in proper jerky storage—keep it refrigerated in an airtight container, and it’ll stay fresh for weeks.
Yes, the eight-hour drying time requires patience, but that first bite of your homemade jerky makes every minute worthwhile. You’ll taste the difference, and you’ll never want to go back to the commercial stuff again.
Frequently Asked Questions
How Long Does Homemade Beef Jerky Last in the Refrigerator?
I’ll share that homemade beef jerky lasts about 1-2 months in the refrigerator when stored in an airtight container. For ideal jerky shelf life, proper refrigerator storage’s essential to maintain freshness and prevent spoilage.
Can I Make Beef Jerky Without a Dehydrator or Oven?
Yes, I can make beef jerky without a dehydrator or oven using alternative beef jerky methods. Air-drying in front of a fan or using solar drying techniques works well, though these methods require careful temperature monitoring for food safety.
What’s the Best Way to Tell When Jerky Is Done?
I check for texture indicators like stiffness and bendability—it should flex without breaking. I also do taste testing throughout the drying process. When it’s leathery but not brittle, and the flavor’s concentrated, it’s ready.
Can I Freeze Beef Jerky for Longer Storage?
Yes, I’d recommend freezing beef jerky for extended storage beyond a few weeks. I use vacuum-sealed bags or airtight freezer containers to prevent freezer burn. These storage tips help maintain flavor and texture for several months.
Is It Safe to Make Jerky at Lower Temperatures?
I don’t recommend drying jerky below 145°F, as safe temperatures are essential for killing harmful microorganisms. While some drying methods use lower heat, you’ll risk foodborne illness. Always prioritize food safety over convenience when making jerky.