I’ve spent years perfecting my pierogi recipe, and I’m convinced there’s no better comfort food than these tender, pillowy dumplings. Whether you’re craving the savory richness of potato and cheese filling or the tangy bite of sauerkraut and mushroom, homemade pierogi beats store-bought every time. The process might seem intimidating at first, but once you master the dough and learn the simple folding technique, you’ll discover why Polish grandmothers have been making these for generations.
Why You`ll Love this Homemade Pierogi
There’s something incredibly satisfying about biting into a tender pierogi that you’ve made with your own hands. This Polish comfort food brings warmth to any table, and making it from scratch isn’t as complicated as you might think.
I love how this recipe transforms simple ingredients like flour, eggs, and sour cream into pillowy pockets of deliciousness. The savory filling of ground beef and sauerkraut creates the perfect balance of flavors that’ll have everyone asking for seconds.
Making pierogi can become a cherished family tradition, bringing generations together in the kitchen. You’ll appreciate the control you have over ingredients, ensuring each bite is exactly how you want it.
Plus, they freeze beautifully for quick weeknight meals.
What ingredients are in Homemade Pierogi?
The beauty of homemade pierogi lies in its straightforward ingredient list that comes together to create something extraordinary. You’ll need basic pantry staples for the dough and a hearty filling that combines savory beef with tangy sauerkraut. Each component plays a vital role in achieving that authentic Polish flavor and texture.
For the Dough:
- 3 cups all-purpose flour
- 2 eggs
- 1 cup sour cream
- 1/2 teaspoon salt
For the Filling:
- 16 ounces ground beef, browned
- 16 ounces sauerkraut, drained but not rinsed
- Sour cream (enough to hold mixture together)
- Salt and pepper, to taste
For Cooking and Serving:
- Butter
- Additional sour cream for serving
- Extra flour for working the dough
When selecting your ingredients, quality matters. Choose full-fat sour cream for the richest dough texture, and don’t skimp on draining the sauerkraut properly to avoid a watery filling.
The key is maintaining equal proportions of ground beef to sauerkraut, which creates the perfect flavor balance. Keep extra flour on hand since the dough tends to be sticky, and make sure your butter is ready to coat the pierogi immediately after boiling to prevent them from sticking together.
How to make this Homemade Pierogi
Making pierogi from scratch might seem intimidating at first, but once you get the hang of it, the process becomes quite enjoyable. Start by preparing the dough in a large bowl, combining 3 cups of all-purpose flour, 2 eggs, 1 cup of sour cream, and 1/2 teaspoon of salt. Mix everything together until combined, then knead the dough for a full 10 minutes.
Don’t worry if it feels sticky – that’s completely normal. Dust your work surface with extra flour as needed to keep things manageable. Once your dough is smooth and elastic, roll it out to about 1/16-inch thickness (roughly as thick as a dime). Use a coffee mug or round cutter to cut out circles, which will become your pierogi shells.
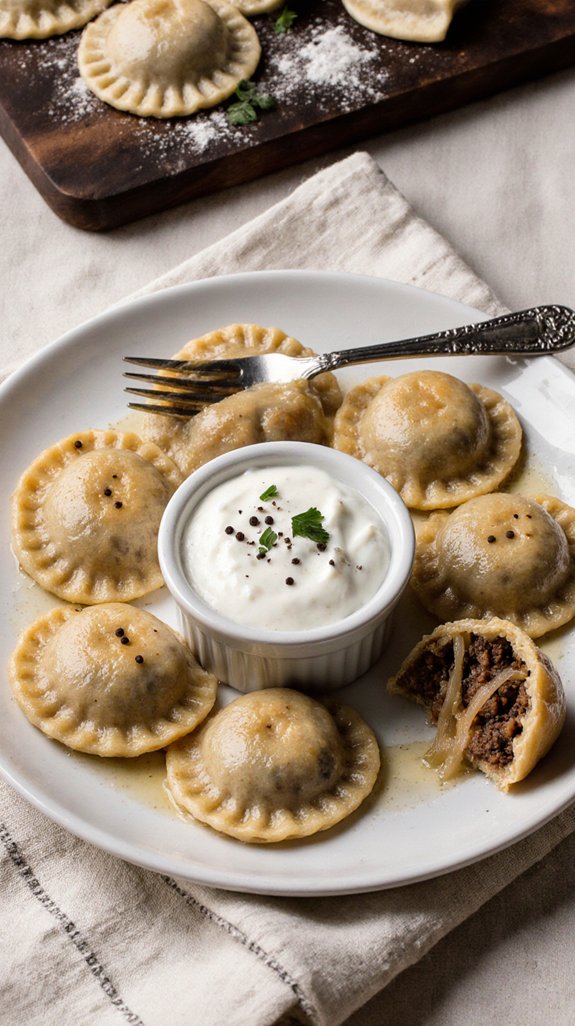
While you’re working with the dough, prepare the filling by mixing together 16 ounces of browned ground beef with 16 ounces of drained sauerkraut. Add enough sour cream to bind the mixture together, then season generously with salt and pepper to taste.
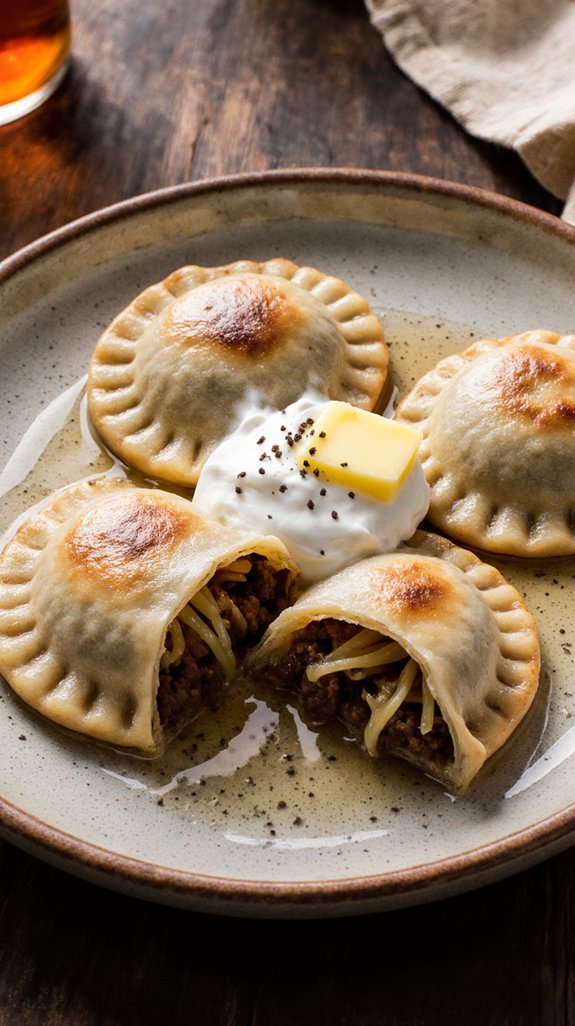
Now comes the fun part – assembling your pierogi. Place about 1 tablespoon of filling on one half of each dough circle, being careful not to overfill them. Fold the dough over to create a half-moon shape, then seal the edges tightly by pinching them together or pressing with the tines of a fork. The key here is ensuring a good seal without puncturing the dough, which would cause your filling to leak during cooking.
Once all your pierogi are assembled, bring a very large stockpot of salted water to a rapid boil. Working in batches, drop several pierogi into the boiling water and cook until they float to the surface. Depending on their size, this should take anywhere from 5 to 12 minutes. Investing in a high end cookware set ensures even heat distribution and makes the cooking process much more efficient.
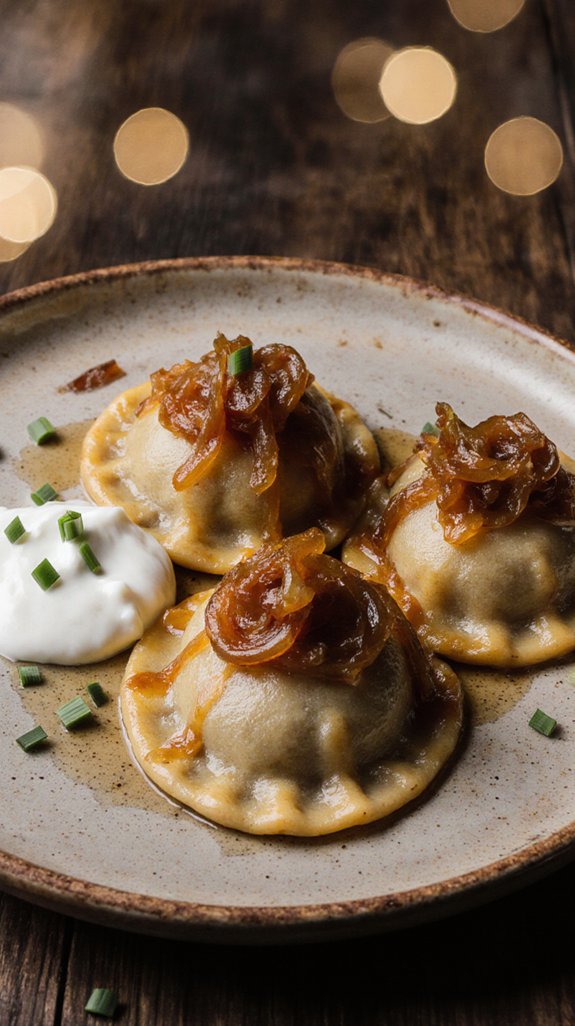
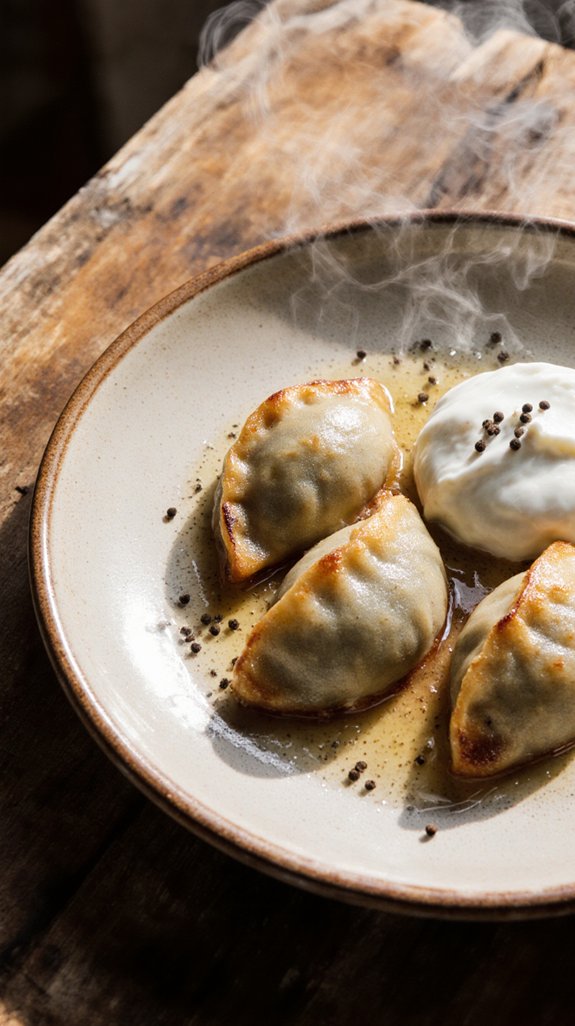
As each batch finishes cooking, drain them well and immediately toss with butter to prevent sticking. Add a final sprinkle of salt and pepper if desired, and serve these delicious dumplings hot with a generous dollop of sour cream on the side.
Shop Related Products

ONE-PRESS PERFECT DUMPLINGS: Create 8 uniform dumplings per minute! Simply fill, press, and seal – no messy fingers or broken wrappers. Grandmas and kids get identical results!
Size(L*W): 9*7 cm/3.54*2.75 inch. Package includes: 2 pieces pastry cutter rollings. Color: silver.

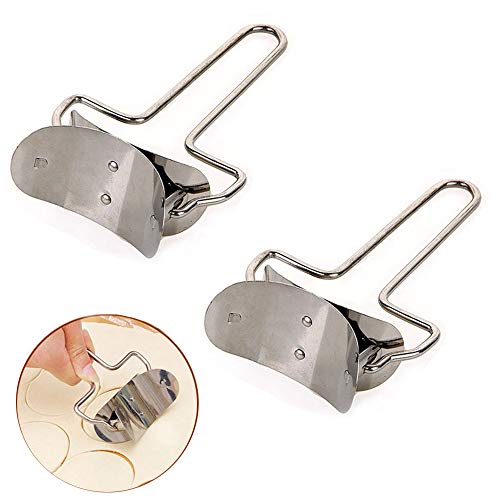
DUMPLING WRAPPER CUTTER: Dumpling wrapper cutter helps you create round dough pieces quickly for dumplings, ravioli, empanada, pierogi, calzone, pies, cookies, and biscuits. The rolling cutter style supports efficient prep when making batches at home or in food service settings, giving you a practical way to shape wrapper dough with a simple hand tool that is easy to use during cooking preparation
Homemade Pierogi Substitutions and Variations
While this traditional beef and sauerkraut filling is absolutely delicious, one of the best things about pierogi is how versatile they can be – you can customize them to suit your taste preferences or use whatever ingredients you have on hand.
For pierogi fillings, I love experimenting with mashed potatoes and cheese, caramelized onions and mushrooms, or even sweet options like blueberries or cherries for dessert.
You can also try spinach and feta, pulled pork, or leftover chicken mixed with vegetables.
As for dough alternatives, you can substitute half the all-purpose flour with whole wheat flour for a nuttier flavor and added nutrition.
Some cooks even use Greek yogurt instead of sour cream in the dough for a tangier taste.
The possibilities are truly endless!
Shop Related Products

Pierogi Maker Makes 6 Peirogis or dumplings at a time

Beginner-Friendly Dumpling Mold: Zero experience required! Just press dough into the mold, add your favorite fillings, flip to seal, and create flawless dumplings in seconds—designed for hassle-free, pro-level results, even for total beginners

SEAL GOOD: dumplings will not leak when they are boiled. Sometimes the edges are not tight enough, because the flour each one used is different in viscosity, you can try to make the edge of the empanadas a little wet. (use the water or egg) then pressed it again to help seal it better than before.
What to serve with Homemade Pierogi
Pierogi are hearty enough to serve as a main dish, but they really shine when you pair them with complementary sides that balance their rich, savory flavors.
I love serving mine with a simple green salad dressed in vinaigrette—the acidity cuts through the butter beautifully. Sautéed cabbage with onions makes another classic choice, adding sweetness and texture to your plate.
For sauce options, consider offering extra sour cream, applesauce, or even a drizzle of melted butter with caramelized onions. Kielbasa sausage works wonderfully as a protein-packed addition, while pickled vegetables provide a tangy contrast.
When planning side dishes, think about fresh, light options that won’t compete with the pierogi’s satisfying filling. A crusty bread for soaking up any remaining butter rounds out the meal perfectly.
Final Thoughts
Once you’ve mastered this homemade pierogi recipe, you’ll find yourself making them again and again for family dinners and special occasions.
The beauty of these Polish dumplings lies in their versatility and the satisfaction of creating them from scratch. Don’t be intimidated by the process—with practice, you’ll develop your own rhythm and cooking tips that work best in your kitchen.
I encourage you to experiment with flavor variations once you’re comfortable with the basic recipe. Try different fillings like potato and cheese, mushrooms, or even sweet options with fruit.
Each batch you make will taste better than the last as you refine your technique. Trust me, your family will be requesting these delicious pierogi all year long.
Frequently Asked Questions
Can I Freeze Uncooked Pierogi for Later Use?
Yes, I’ll share my best freezing tips for pierogi storage! Arrange uncooked pierogi on a parchment-lined baking sheet, freeze until solid, then transfer to freezer bags. They’ll keep for three months and cook straight from frozen.
How Do I Prevent the Dough From Tearing When Sealing?
I’ll guarantee proper dough consistency by kneading it thoroughly and not rolling too thin. When sealing, I’ll use gentle pressure with my fingers or fork tines, being careful not to overwork the edges or stretch them.
What’s the Best Way to Reheat Leftover Pierogi?
I prefer pan-frying leftover pierogi in butter until they’re crispy and golden. You can also use the microwave method for quick reheating or try oven reheating at 350°F for about 15 minutes.
Can I Pan-Fry Pierogi Instead of Boiling Them?
I recommend boiling pierogi first, then pan-frying them in butter until golden and crispy. This two-step cooking technique guarantees they’re cooked through while achieving that delicious crispy exterior. Pan fried pierogi are absolutely delicious!
How Long Do Cooked Pierogi Last in the Refrigerator?
I’ll share some storage tips for your pierogi’s shelf life. Cooked pierogi last 3-5 days in the refrigerator when stored in an airtight container. Make sure they’re completely cooled before refrigerating to maintain their best quality.