I’ve been making fresh pasta for years, and I can tell you it’s one of those skills that looks intimidating but becomes second nature once you try it. You’ll need just two ingredients—flour and eggs—and about thirty minutes from start to finish. The texture and flavor difference compared to dried pasta is remarkable, and once you master the basic technique, you’ll discover endless possibilities for customization that’ll transform your everyday meals into restaurant-quality dishes.
Why You`ll Love this Fresh Homemade Pasta

When you make pasta from scratch, you’re creating something that tastes completely different from anything you’ll find in a box. The freshness factor alone transforms your meal into something special.
I love how simple ingredients—just eggs and flour—become tender, silky noodles with a pasta texture that’s incredibly satisfying. You’ll notice the difference immediately when you take that first bite.
The dough feels alive under your hands as you knead it, and watching it transform through the pasta maker is genuinely rewarding. Plus, you control exactly what goes into your food, which means no preservatives or additives.
Whether you’re making fettuccine, bowties, or ravioli, fresh pasta elevates even the simplest sauce into a memorable dish.
What ingredients are in Fresh Homemade Pasta?
The beauty of homemade pasta lies in its remarkable simplicity. This recipe requires only two essential ingredients that you likely already have in your kitchen.
These basic components combine to create a versatile dough that can be shaped into countless pasta varieties, from delicate fettuccine to stuffed ravioli.
Ingredients:
- 4 large eggs
- 3 cups all-purpose flour
While the base recipe is wonderfully straightforward, you can customize your pasta with additional ingredients for color and visual appeal.
Adding pureed spinach creates a vibrant green pasta, tomato paste produces a rich red hue, saffron mixed into the eggs yields a golden yellow color, and pureed carrots offer an orange tint.
Keep in mind that these additions primarily affect the color rather than the flavor of the pasta. The simple egg-and-flour foundation remains the same regardless of which variation you choose to create.
How to make this Fresh Homemade Pasta

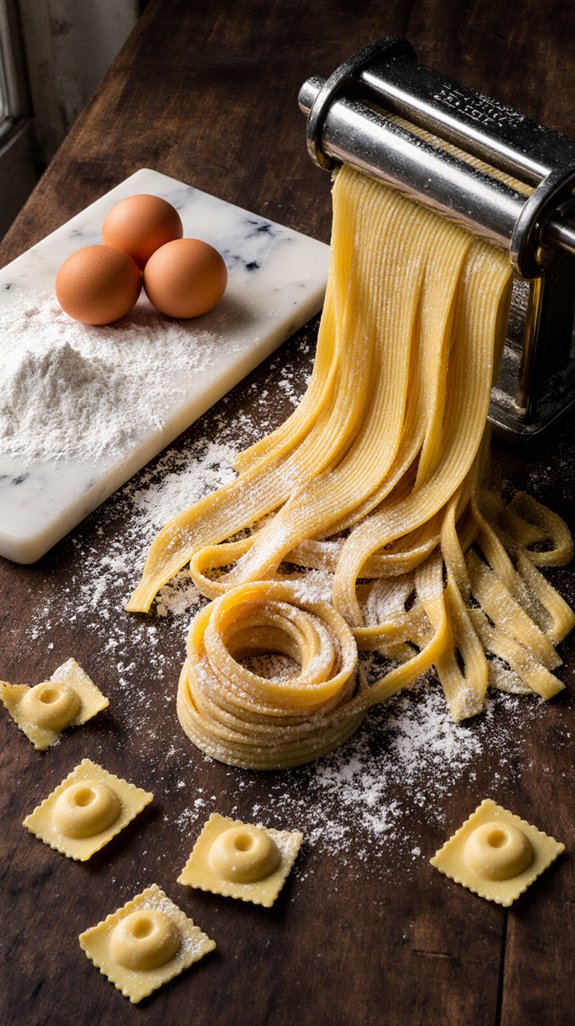
Making homemade pasta is easier than you might think, and the process is incredibly satisfying. Start by mixing your 4 large eggs together in a bowl. Then, place your 3 cups of all-purpose flour on a clean work surface or large cutting board, and create a well in the center of the flour mound, like a little volcano. Gradually incorporate the mixed eggs into the flour, starting from the inner walls of the well and working your way outward.
Once everything is combined, turn the dough onto your board and knead it for 7-8 minutes until it becomes smooth and elastic. You’ll know the dough is ready when you poke it with your finger and it springs back slightly but still feels a bit moist. If the dough feels sticky, just keep kneading for a bit longer. If you’re using a food processor, you can speed things up by mixing the eggs first, then pulsing in the flour until you get a soft, sticky dough, which you’ll then knead by hand for just 3-4 minutes.
After kneading, let your dough rest while you prepare your workspace. Cut the dough in half and cover one portion with plastic wrap to keep it from drying out. Flatten the other half, dust it lightly with flour, and begin feeding it through your pasta maker on the widest setting.
Keep folding the dough over and running it through the machine, gradually working your way to smaller settings until the dough is smooth and no longer sticky. Once you’ve rolled your sheets to the desired thickness, you can cut them into noodles using the pasta machine’s cutting blades, feeding one end through while holding the other end straight up and catching the strips as they emerge.
Arrange these strips on lightly floured baking sheets or drape them over the backs of chairs, and let them dry for 30 minutes before cooking. Investing in a premium pasta maker can elevate your pasta-making experience and help you achieve restaurant-quality results at home. You can also get creative with shapes—make bowties by scrunching rectangles in the center, create tortelloni by cutting squares and folding them diagonally with filling inside, or craft ravioli by spacing filling on half of a rectangular sheet and folding it over.
Shop Related Products

【FOODS GRADE MATERIAL & CLEANING METHOD】 Tired of those pasta machines that smell of metal or plastic? Sailnovo pasta machine is made of food-grade material, The blade attachment of this pasta maker machine shouldn’t be washed in water or put in the dishwasher. Residual moisture will affect the sharpness of the blade and shorten machine's lifespan. We suggest using a brush or wooden stick, or if you don't have one you can use a toothpick to remove any residual dough.

Introducing the GVODE electric pasta maker. Transform your pasta maker experience! Crafted from premium aluminum, this pasta maker machine ensures safety and durability in pasta making. Explore endless possibilities in the kitchen.
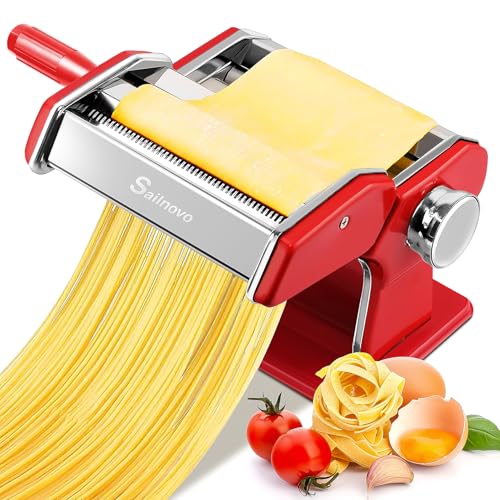
【Food-Grade Materials】Tired of pasta maker machine with metallic or plastic smell? The Sailnovo pasta machine hand crank is made of food-grade materials, designed for direct food contact with pure taste. Safe and simple enough for even little hands to get involved.
Fresh Homemade Pasta Substitutions and Variations
Once you’ve mastered the basic pasta recipe, you can transform your dough in countless ways by adding colorful and flavorful ingredients.
I love experimenting with pasta flavorings that change both appearance and taste. For green pasta, I blend spinach into my eggs before mixing. Tomato paste creates beautiful red noodles, while saffron produces vibrant yellow strands. Pureed carrots give you gorgeous orange pasta.
These additions mainly affect color, keeping the texture similar to plain pasta. You can also explore alternative flours like whole wheat or semolina for different textures and nutritional profiles.
Each variation opens new possibilities for your homemade creations. The basic technique stays the same, but your pasta becomes a canvas for creativity and experimentation in the kitchen.
Shop Related Products
100% made and assembled in Italy. Easily create a variety of extruded/pressed out pasta

User-Friendly Operation: Designed for ease of use, this pasta maker machine comes with recipes and simple ratios to follow. With four automatic modes, making fresh noodles at home is as easy as a single click. Even beginners can create delicious pasta effortlessly.Please do not add too much or too little water, otherwise the dough will not pass through and will stick to the machine. Please refer to the flour and water ratio table in the Quick Start Guide Manual.

Automatically kneads and extrudes 2-3 servings of fresh pasta in just 18 minutes thanks to uniquely designed stirring bar. Cord length : 40 Inches
What to serve with Fresh Homemade Pasta

Fresh homemade pasta deserves sauces and accompaniments that complement rather than overwhelm its delicate flavor and tender texture.
I’ve found that simple sauce pairings work best—think butter and sage, fresh tomato basil, or a light cream sauce. These options let the pasta’s subtle taste shine through.
For side dishes, I recommend keeping things equally straightforward. A crisp green salad with lemon vinaigrette, garlic bread, or roasted vegetables make excellent companions.
If you’re serving filled pasta like tortelloni or ravioli, you might need even less on the plate since the filling adds richness.
I suggest tasting your pasta plain first to appreciate what you’ve created, then adding sauces gradually. This approach helps you find the perfect balance that highlights your homemade creation.
Final Thoughts
After you’ve mastered the basics and enjoyed your first few batches, you’ll quickly realize that making pasta from scratch isn’t just about following a recipe—it’s about developing an intuition for the dough. You’ll learn to feel when it needs more flour or another minute of kneading.
I’ve found that proper pasta storage makes a huge difference—dried noodles keep for weeks in airtight containers. When you’re ready to cook, remember these essential cooking tips: use plenty of salted water, don’t overcook fresh pasta (it only needs 2-3 minutes), and always save some pasta water for your sauce.
The journey from flour and eggs to perfectly tender noodles is incredibly rewarding, and I hope you’ll make it a regular part of your cooking routine.
Frequently Asked Questions
How Long Can I Store Fresh Homemade Pasta Before Cooking It?
I can store fresh pasta in the refrigerator for up to 2 days or freeze it for up to 3 months. For best storage tips, I’ll dust it with flour and keep it loosely covered to prevent sticking.
Can I Freeze Fresh Pasta Dough for Later Use?
Yes, I can freeze fresh pasta dough! I’ll wrap it tightly in plastic wrap, then place it in a freezer bag. Proper freezing techniques preserve the dough’s quality for up to three months without affecting texture.
What’s the Best Way to Dry Fresh Pasta for Storage?
I’ll let my fresh pasta dry for 30 minutes by hanging pasta strips over straight-backed chairs or arranging them on lightly floured pans. You can also use drying racks for better air circulation and storage.
How Do I Prevent My Pasta Dough From Sticking Together?
I prevent sticking by dusting my work surface and dough with flour throughout rolling. Proper kneading develops gluten for better texture. Using semolina flour for dusting works exceptionally well since it’s coarser and prevents pasta pieces from clinging together.
What Thickness Setting Should I Use for Different Pasta Shapes?
I use thinner pasta thickness settings for delicate shapes like ravioli and bowties, while keeping it slightly thicker for heartier noodles. The second-to-last notch works well for most pasta shapes I’m making.